Signage SoC displays and certain players can be connected to the system to utilize Digital Signage features.
¶ Supported Signage Players
Uniguest supports a variety of signage players, ranging from entry-level HD options to high-performance 4K devices designed for demanding digital signage environments.
For a detailed overview of our supported signage players, click here.
¶ Supported Signage SoC-Screens
¶ Philips
¶ LG WebOS
¶ Samsung Tizen / SSSP
¶ ProDVX
¶ Bluefin
¶ Installing Signage Players
¶ HD1 / HD4 / 4K2
See usage and installation instructions for the players here.
See hardware information for the players here.
¶ Installing Signage SoC-Screens
¶ Philips
Find detailed installation instructions here.
¶ LG WebOS
Find detailed LG installation instructions here.
¶ Samsung Tizen / SSSP
Find detailed Samsung installation instructions here.
¶ ProDVX
Find detailed ProDVX installation instructions here.
¶ Bluefin Linux
Debian version:
Find detailed Bluefin Linux installation instructions here.
¶ Bluefin BrightSign
Find detailed BrightSign installation instructions here.
¶ Authenticating a display
To connect a display to a site the display will initially need to be authenticated. For signage displays this is achieved using an installer code.
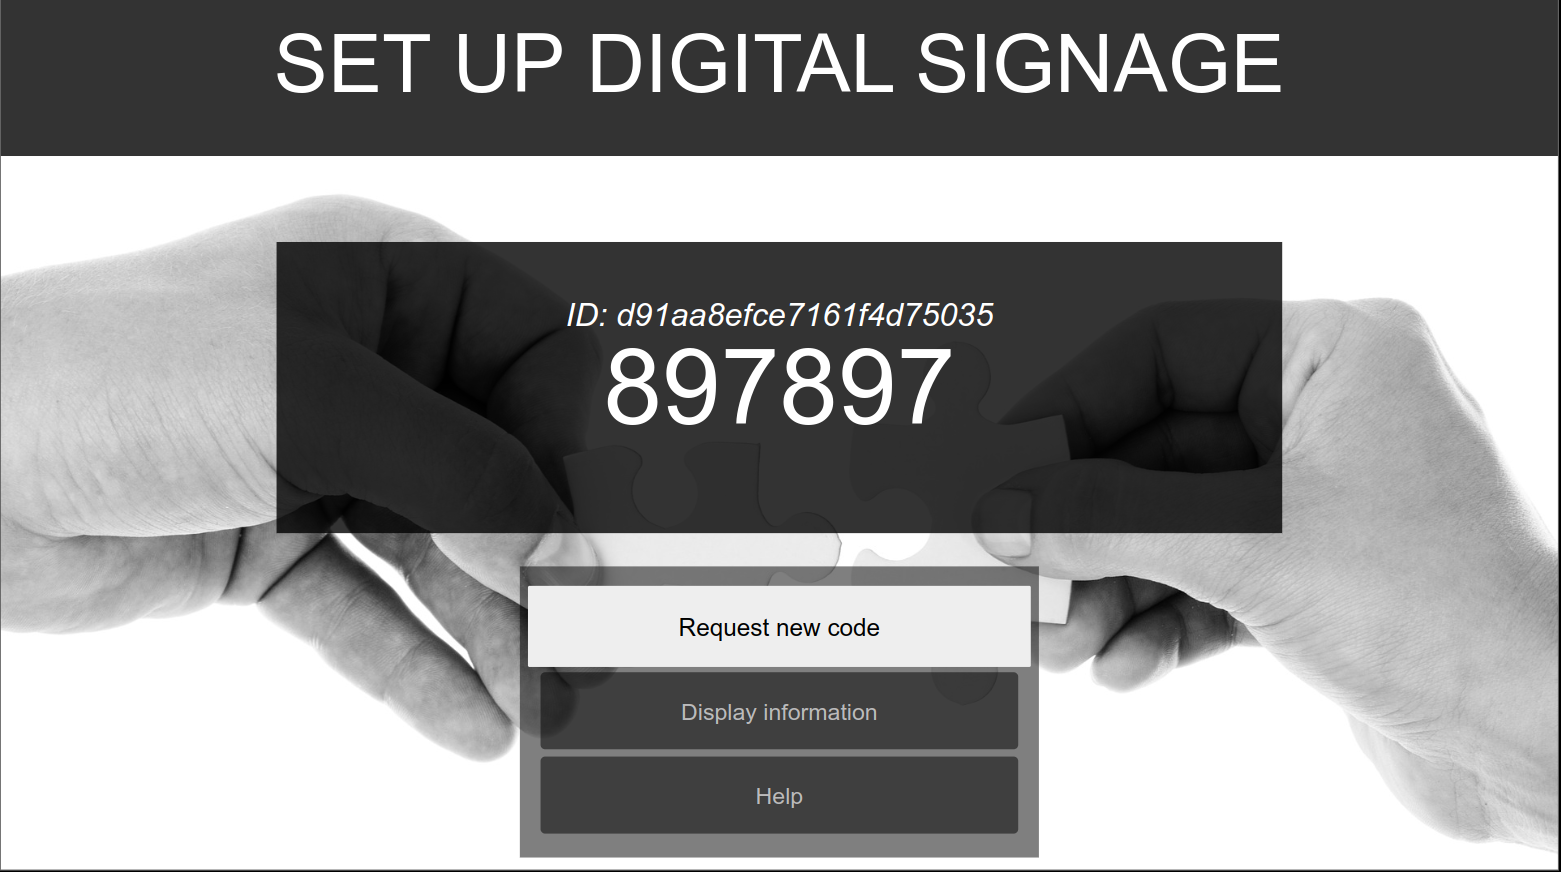
Once a screen has been set up and has loaded the signage application, it will display an installer code. This code is unique to that screen and can be used to claim it in the management portal.
The screen will re-fetch the code about every 2 hours and the old code will become invalid.
Example of the initial install screen displaying:

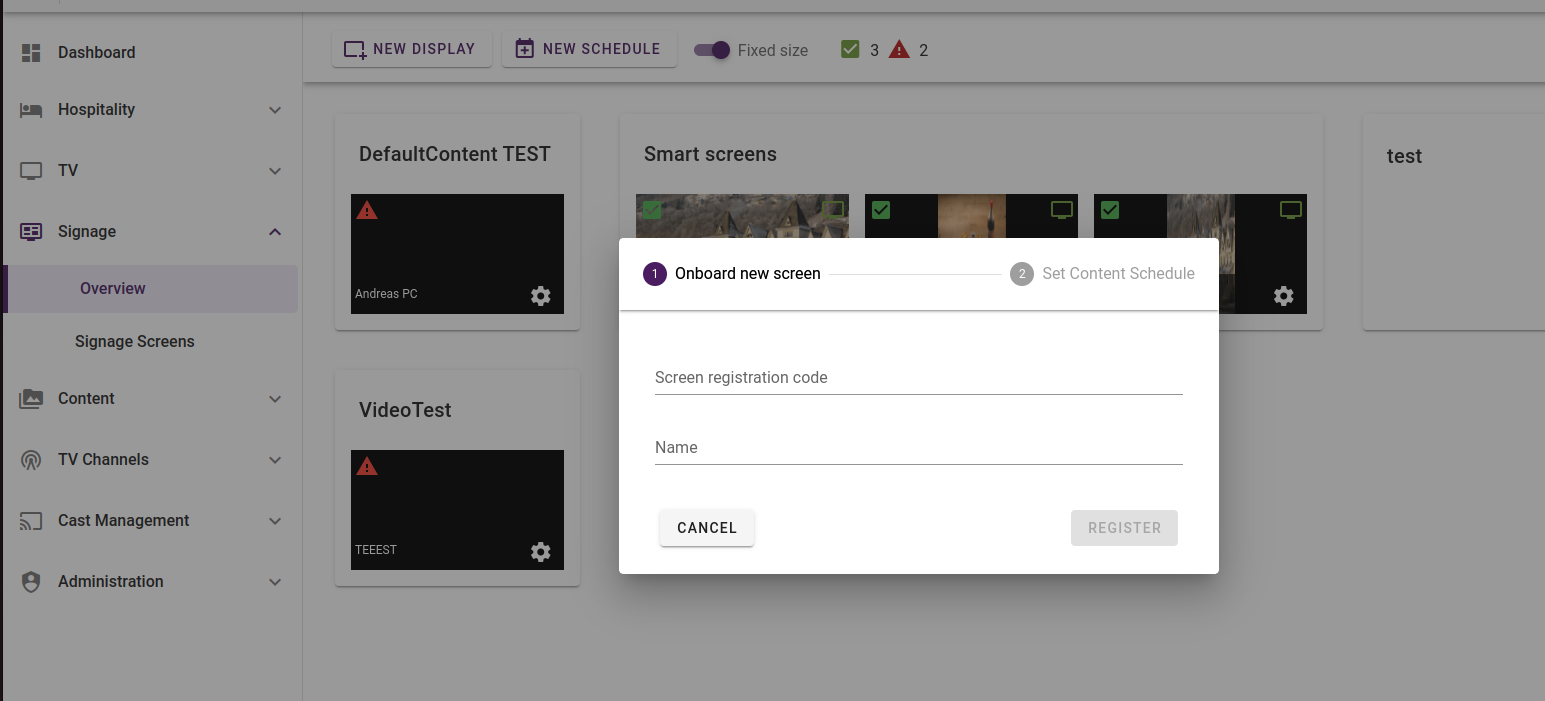
From the management portal navigate to Site -> Signage -> Overview(or Signage Screens) and press the New Display button. This will open the Add new display prompt:

Enter the installer code and follow the instructions to add a new screen. Any signage screen is connected to a schedule and during the display on-boarding process, you will either create a new schedule or add the screen to an existing schedule.
¶ Managing signage displays
The main screen management tool can be found under Signage -> Signage Screens:

This is a powerful status and management page that will allow you to monitor screen status real-time, edit existing screens and remove screens.
¶ Context menu
Right-clicking an entry will bring up the context-menu. This menu will have more options if one single entry is selected than if you have selected multiple entries as certain operations are not allowed or possible on multiple screens.
These are all the actions in the signage display context menu:
- Update status
Force the display to report status instantly. Opening the details view will also force an immediate status updte.
- Details
Open the details view.
- Edit
Edit the display name.
- Manage: Power On
Powers on the selected screens. Instant.
- Manage: Power Off
Powers off the selected screens. One can optionally send a message that will display on the screens for some seconds prior to powering off.
If no message is set the operation is instant.
- Manage: Reboot
Reboots the selected screens. The operation is instant.
- Manage: Push configuration
Pushes the TV-configuration to the selected screens. Causes TV to re-display any visible menu.
- Manage: Rotation
Set the rotation of the display.
- Manage: Reload Media
Force the display to reload all media. This will delete all locally cached content and download all scheudles/media anew.
- Manage: Display Message
Display a text message on the screen for a given duration.
- Manage: Display Address the display device ID and configured location address if set. Useful during installation/troubleshooting.
Displays
-
Manage: Open Client Preview
-
Set Schedule
Expands a menu of available schedules. For easy settings of configuration schedule of one or more screens.
- Delete
This allows you to delete the screen from your site. This will delete the screen authentication and all configuration and the screen will no longer be able to connect to the system. The screen will have to be factory reset.
Deleting a screen is a final operation that can not be undone. To get the screen back into the system, it will have to be factory-reset and installed as a new screen.
¶ Details View
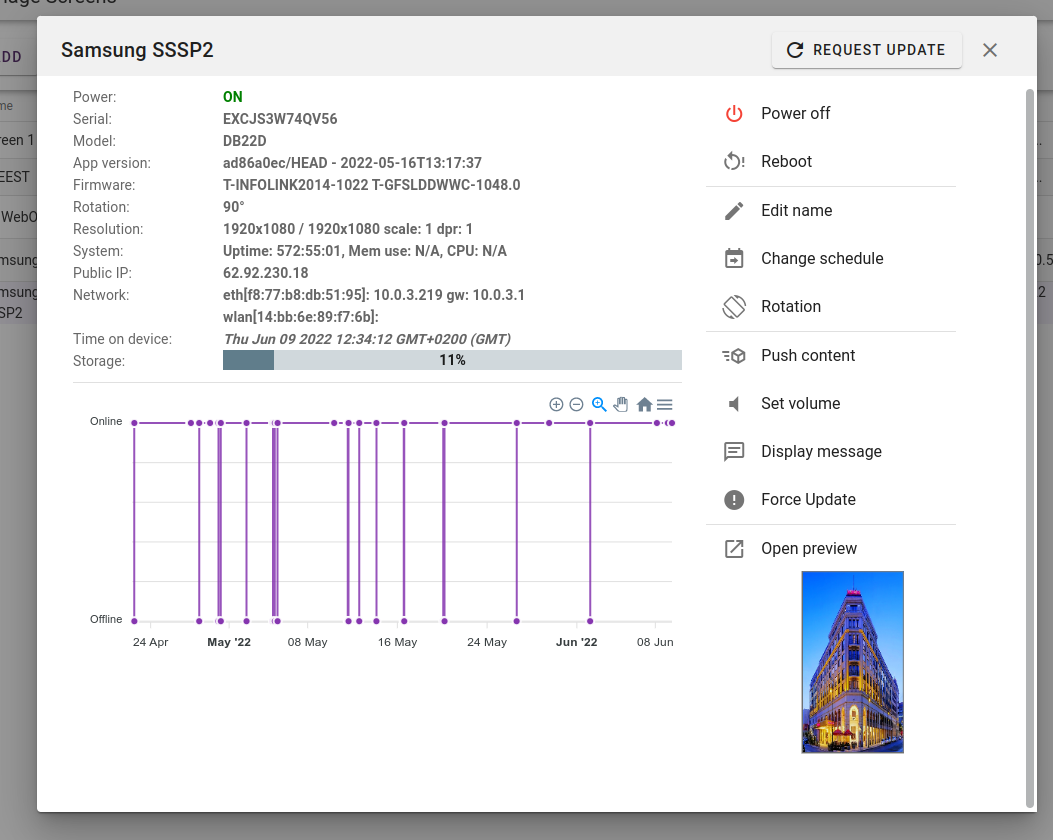
Double-clicking an entry or selecting the details entry in the context menu causes the details window for the given screen to display.

This view provides status-information about the screen, including connectivity history and a screenshot. Also, most of the management functions found via the context-menu are available directly from this view via the right hand buttons.
A new screenshot can be requested by simply clicking on the screenshot area.
¶ Reboot Hour & Minute
Some screens will perform automated daily reboots(LG WebOS). For screens that do not do this automatically, a daily reboot will be triggered by the application. This is to upgrade the application if needed. Here you can define the base time for this reboot. The screen will add a random number of minutes in the range 0-60 to the time set here.
If the screen is powered on, the reboot will be deferred until the screen is powered off.
¶ Disable daily reboot
If for some reason there is a need to disable the daily reboot, this option can be enabled. By default all screens should run the daily reboot.
¶ Offline mode
If a signage display loses its Internet connectivity, it will revert to playing all scheduled content consisting of images or video as this content is locally cached. Dynamic teplates will not be showing in this case.