Events may represent any happening that has a defined start and end time. This could be a meeting, a conference etc.
Events are managed under the Events section of the portal. Here you will be able to create, delete and edit events based on locations, and you can configure what types of locations you want to use for events and more.
¶ Configurations
Before booking or managing any events, let's have a look at the configuration options for the events module.
For more info on creating locations, click here.
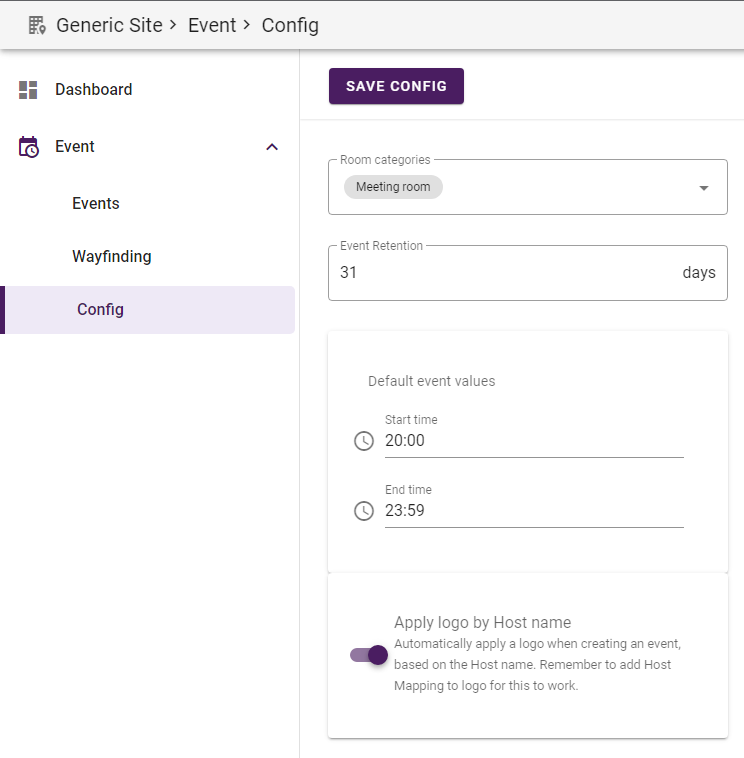
These are the different options in the configurations view:
- Room categories
This is where you define which location types to be used for events. The default category is "Meeting room" but here you can add/remove as many categories as you want. - Event Retention
Here you set how many days until an event is deleted after the event has ended, the default is 31 days. This only applies to events that are booked in the management portal. Events imported from remote systems have their own retention policies. - Default event values
If you know that most of your events will start and end at the same time, you can choose your default values here.
Whenever you create a new event, the start and end time will be set to these default values. - Apply logo by Host name
If enabled, will allow for logos to be automatically applied to events where host matches a Host Mapping set on a logo.
¶ The Event View
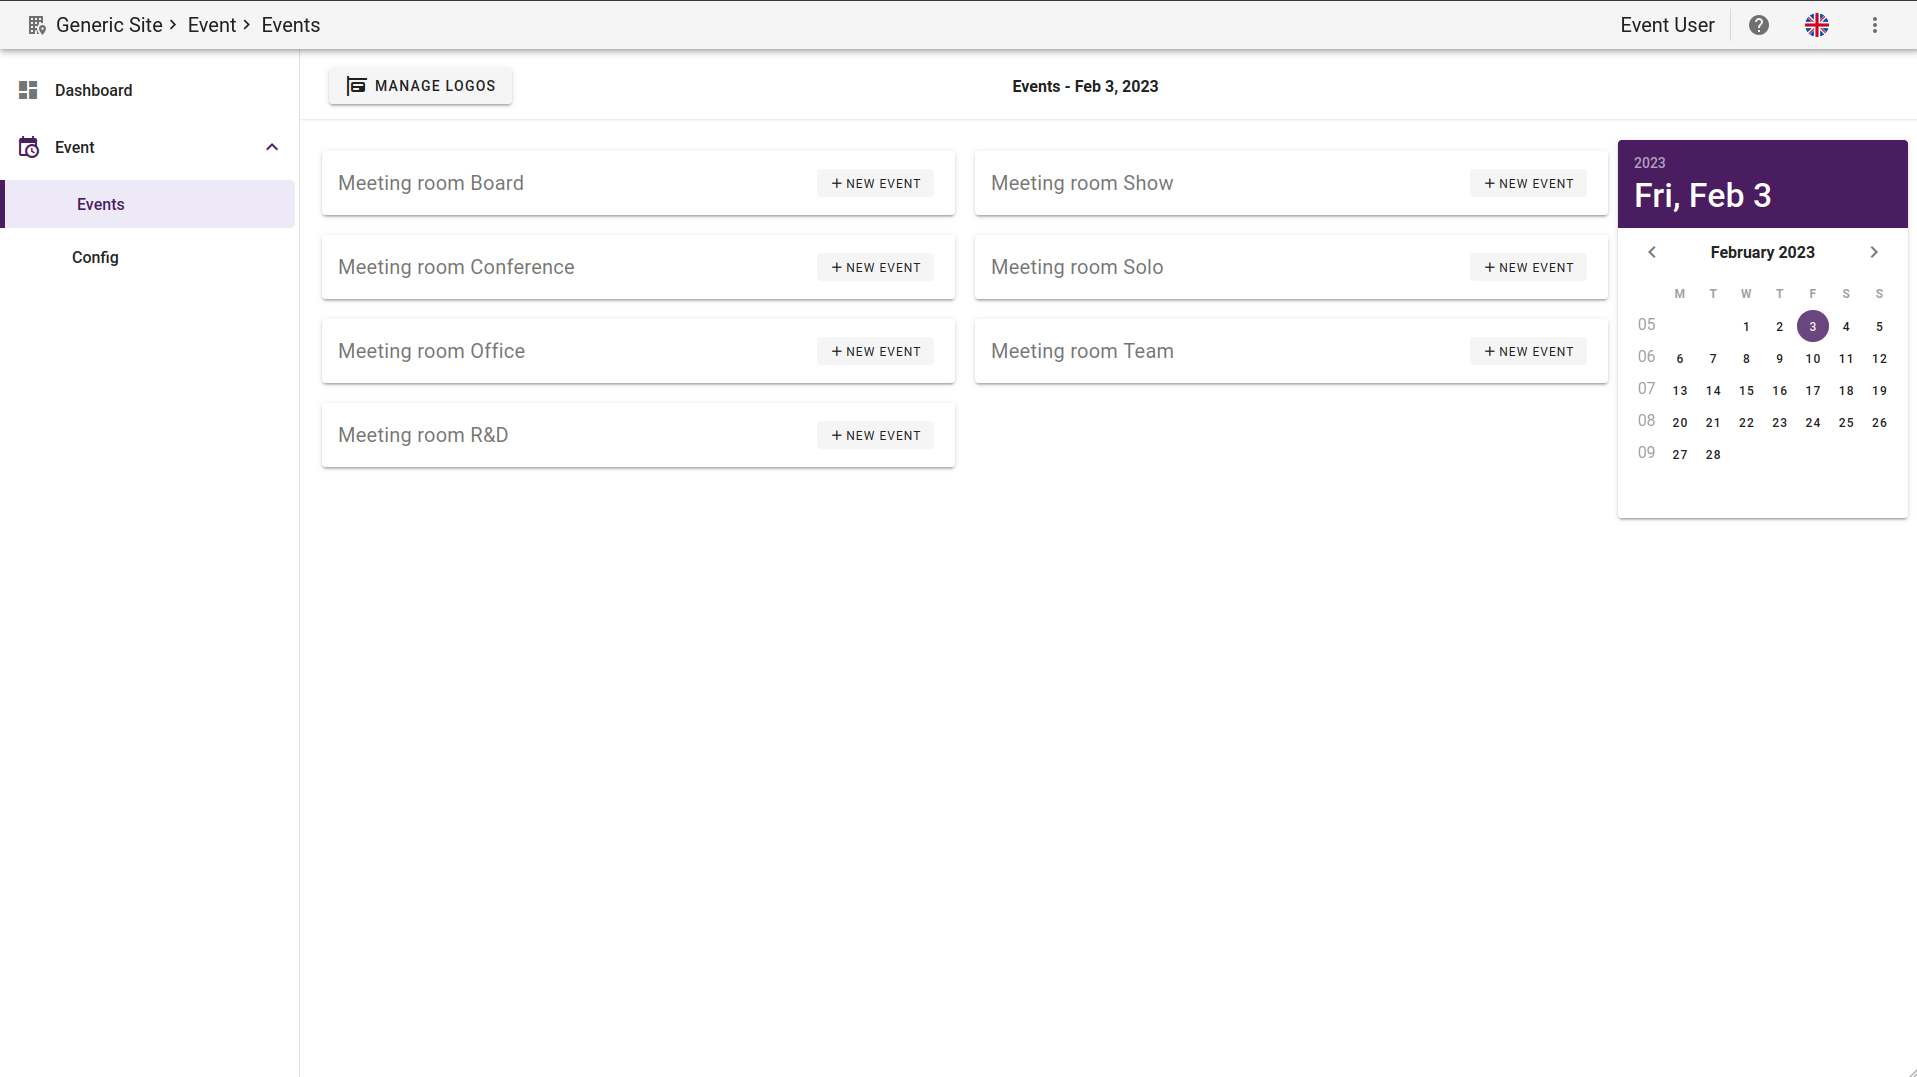
This view is split into a center area listing all locations available for event booking including the ongoing events, and a calendar section where you can change the date for viewing/editing events.
Note that events might span multiple days, in this case the start/end date is shown in the event listing, not the timestamp.
¶ Creating/editing events
Each of the locations has a "+ New Event" button where you can click to open up a new pop up to create your event.
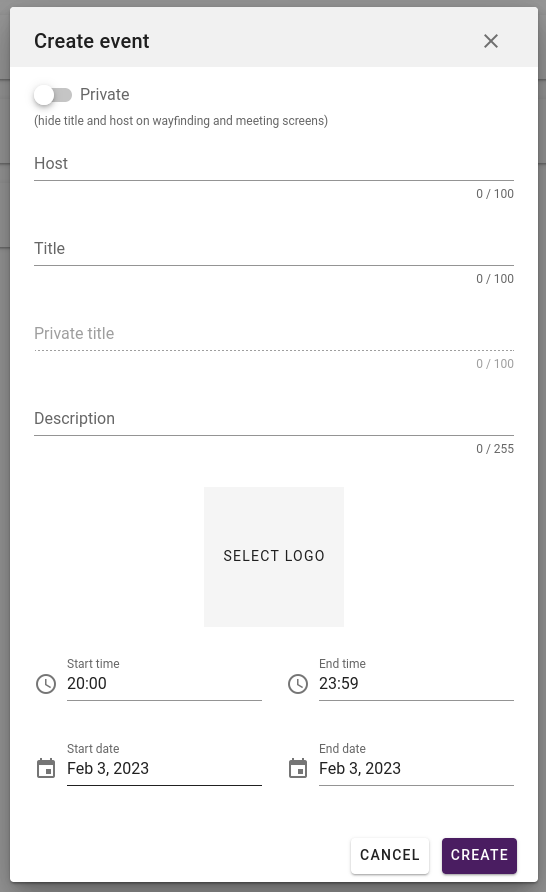
The different options for your event.
- Private toggle: Activate to hide the title and host name. Primarily used by integrations.
- Host: The name of the Host for this event, example "My Company LLC".
- Title: The name of the Event, example "Company Kickoff meeting!".
- Private Title: If private toggle is enabled, this title will show on the meeting screen instead, example "Top Secret meeting".
- Description: The description of the event, example "We will go through our budget for this semester".
- Select Logo: This button will open up a new view where you can upload and/or select a logo to display on this Event.
- Time and Date: Here you can choose the start/end-time and start/end-date for this event (it can be a multiday event).
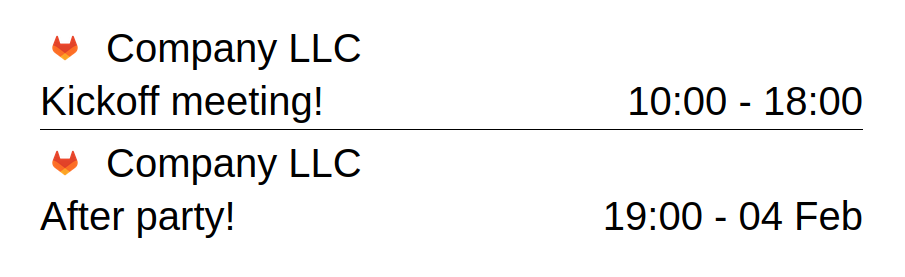
After you have created some events, your event view might look something like this:
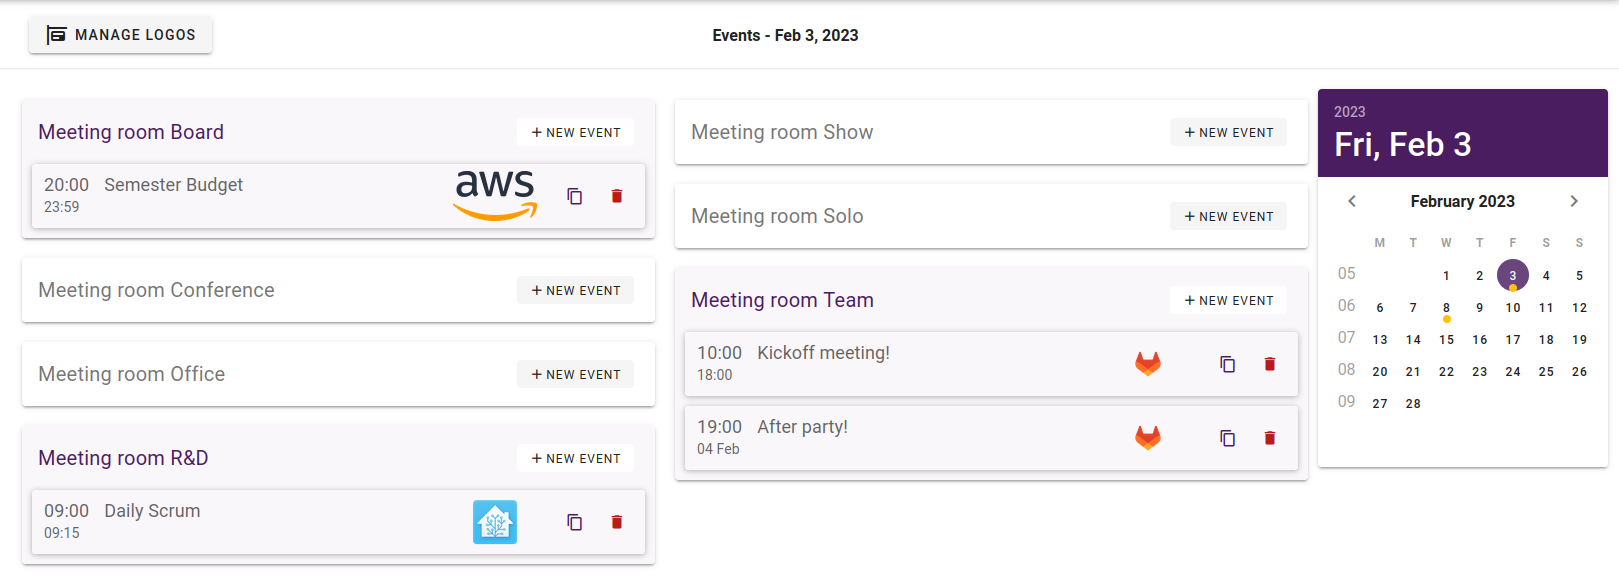
Note that only start/end-time (or end-date if multiday event), title and logo is displayed on this view.
To view the rest of the info, simply click on an event to open up the edit mode.
On the Calendar, there will now be a yellow dot on each date where an event starts.
In case of multiday events, there will only be a dot where the event starts, not when it's current or ends.
In this example, we can see that there's events existing on the 3rd of February (the 3 events currently displayed), and events that exist on the 8th (which are not displayed).
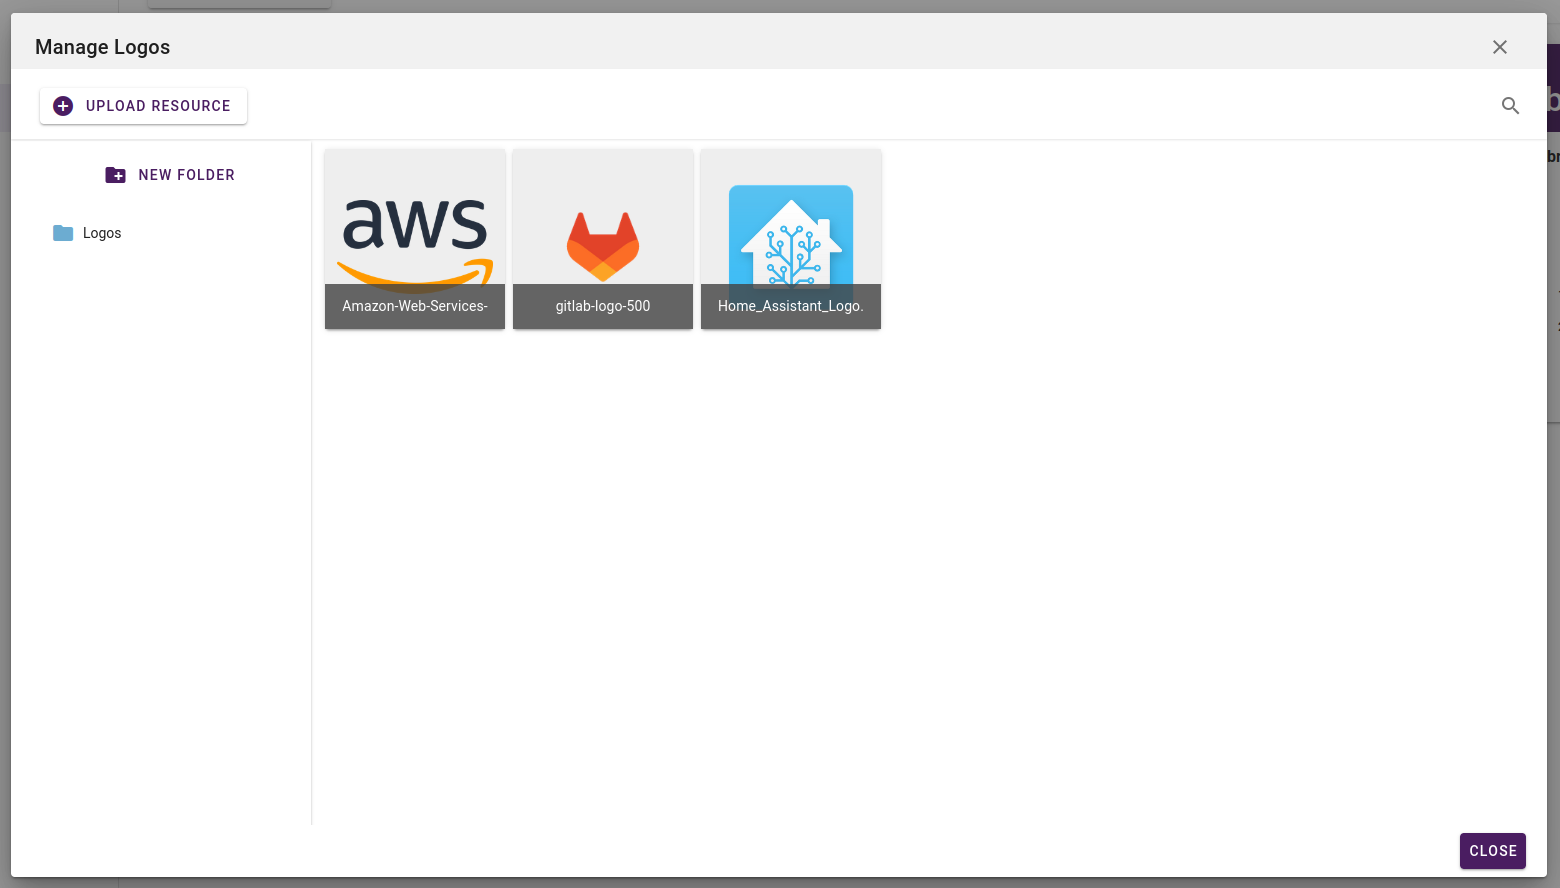
¶ Manage Logos
Logos can be tied to events for easy brand recognition on displays. You can either manage the logos in the "New Event" view, or you can do so by clicking the MANAGE LOGOS button in the top left corner.
This will open up a new window where you can upload/delete logos as well as folders for the logos, similar to the Media view.
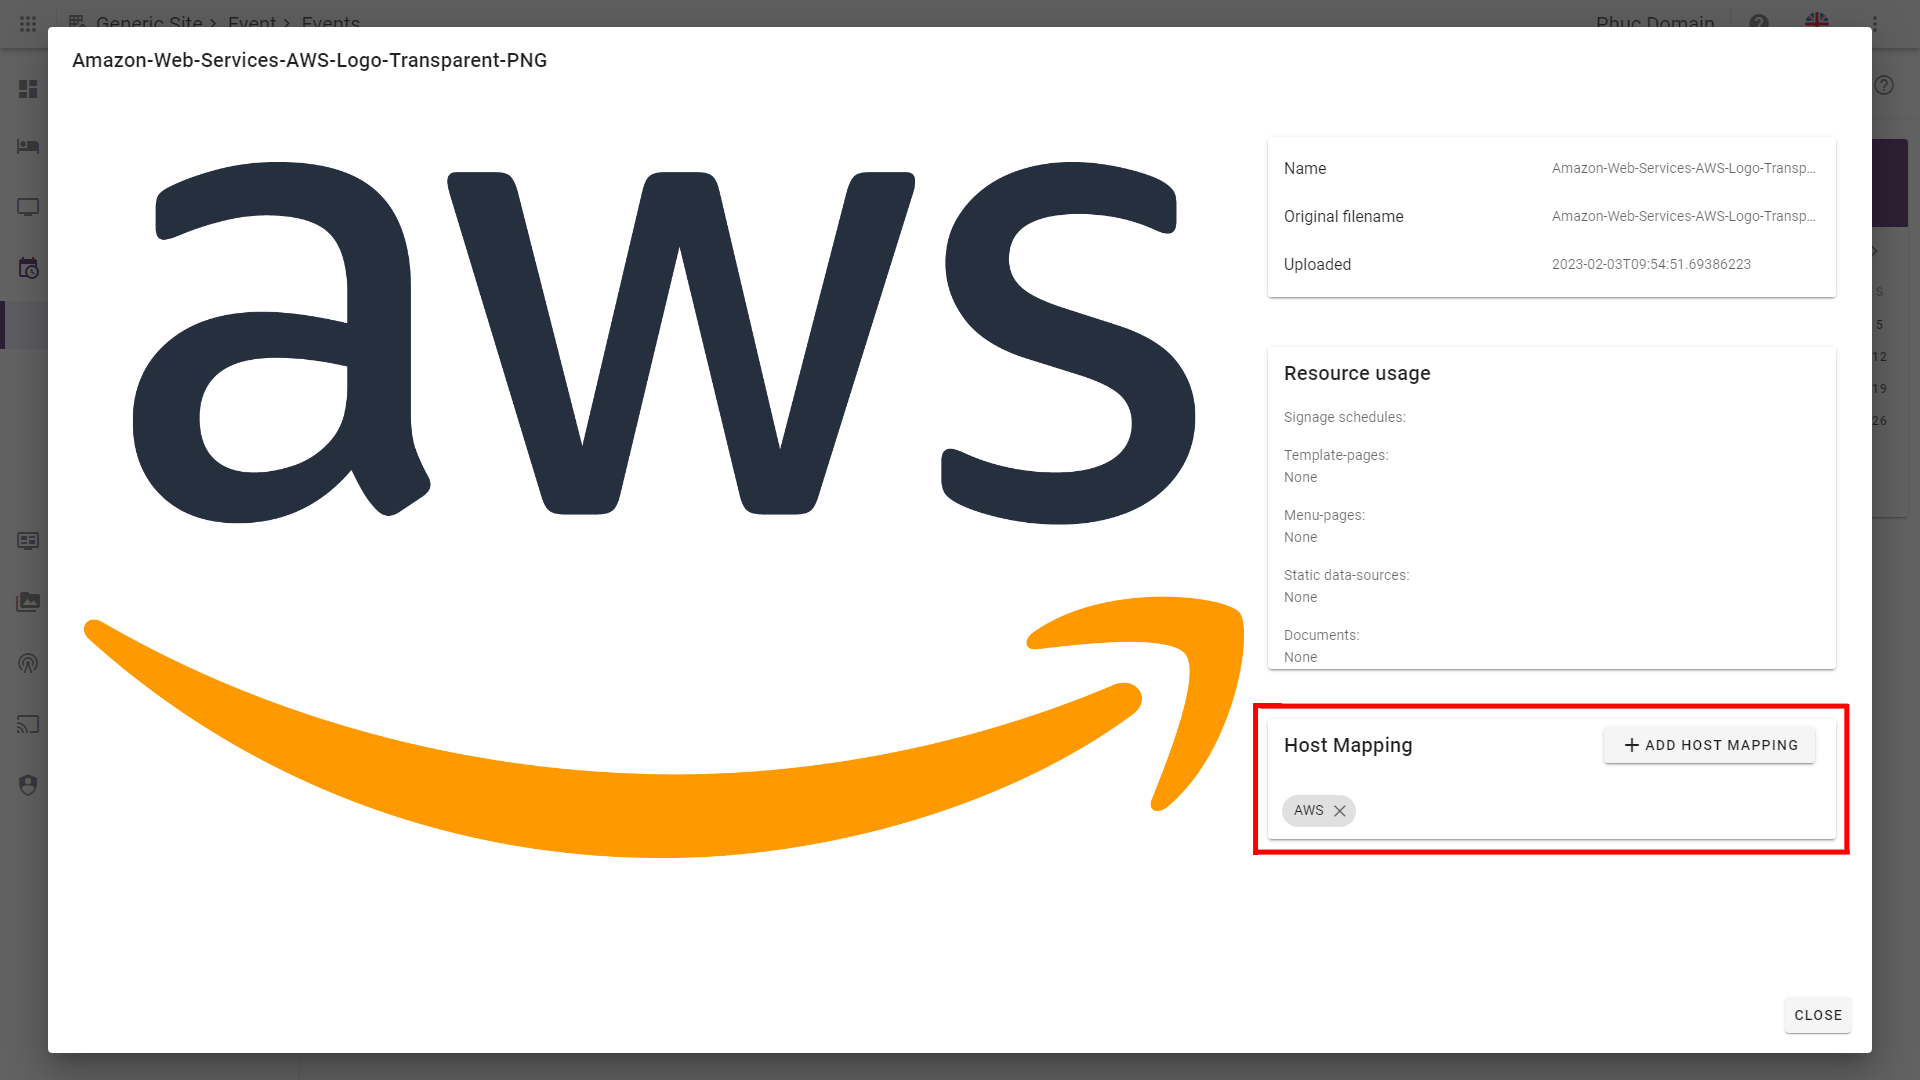
Double clicking on a logo will bring up a detailed window, under "Host Mapping" you can enter host mapping for automatic applying of logos to events, if you have it enabled in the configuration.
Logos are not accessible in the Content -> Media view. To manage logos, you have to do it from the Events view.
¶ Automatically add logos to event
Requires you to have activated "Apply logo by Host name" in the configurations.
When you are managing logos, you can simply double click on a logo to open up a view where you can add one or more host mapping.
As seen in the red box in the picture below, you can simply click on "Add Host Mapping" and type in any host name.
When you create a new event with the same Host name as one of your logo's host mappings, the logo will automatically be applied to your event.
¶ Display our example on a screen
Prerequisites:
- Create a display template including the Room Board widget. Read more here: Room board widget
- Add this template to the screens Content Schedule. Read more here: Content Schedules
Given that you have created events on the location where your Signage Screen is connected to, you should be able to view the events like so: