¶ Digital Signage - Scheduling content
For a connected digital signage display to display content it will need to be linked to a schedule. When onboarding a screen, it is automatically linked to a content schedule. Multiple screens can share the same content schedule.
A content schedule defines what content should be displayed when and in what order. Content is grouped in timeslots. You can think of a timeslot as an appointment in a calendar, but instead of the time slot containing invitees, title, notes, room allocations etc, it contains a content playlist.
You can define daily recurring timeslots, weekly recurring time slots or date specific time slots. In addition you can set a default content playlist that the display will fall back to if there is no current active timeslot.
Under the Signage -> Overview section in the portal, displays will be listed grouped by their connected schedules. This view will also show the display connectivity-status and, if the display is online, a preview of the current content reported to be showing by the display.
The display preview in the overview section is NOT a screenshot, but rather a thumbnail version of the content the screen has reported to be showing.
In this example, three displays are linked to the same schedule, while another schedule has no displays linked.
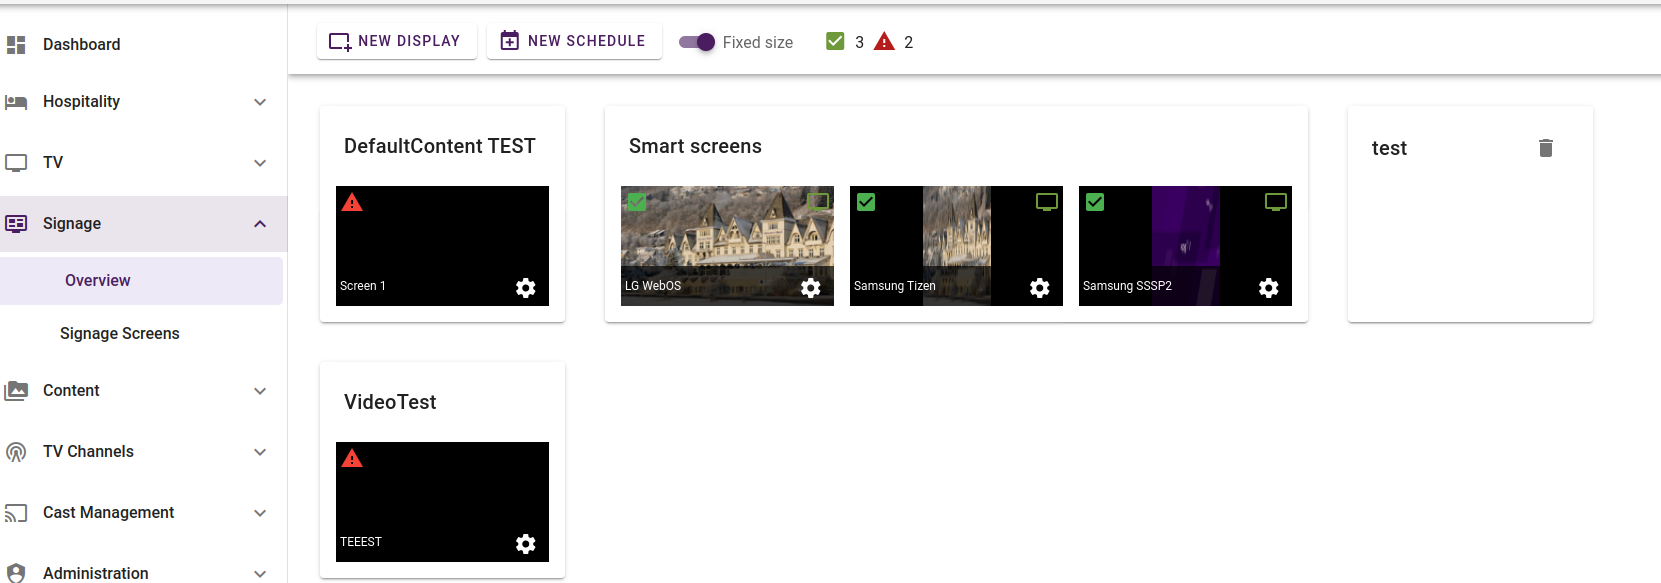
Even if multiple displays are using the same schedule, the content is not synchronized, meaning that the displays will display the same playlist, but depending on various factors the content will not be playing synchronized.
In the above view, clicking on the cog symbol on a display preview will open the detailed status window for that display. Clicking anywhere else within a schedule group will open the schedule editor.
You can only delete schedules that have no linked displays.
¶ The schedule editor
The schedule editor contains a set of tabs representing the different scheduling options and visualizing the order of priorities.
¶ Default
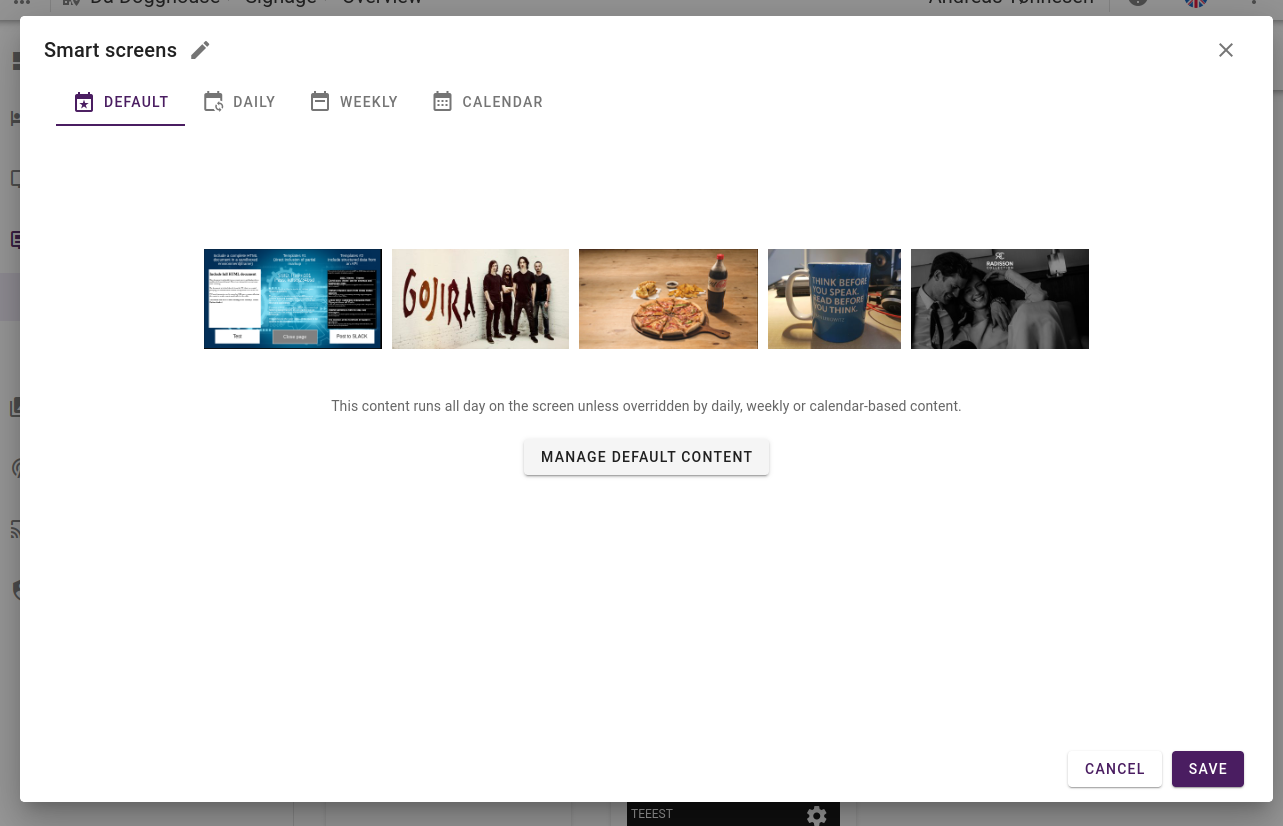
This tab contains the default content. A display will revert to this content if there are no matching timeslots for the current time. If this content is empty, the display will power off (if supported).
¶ Daily
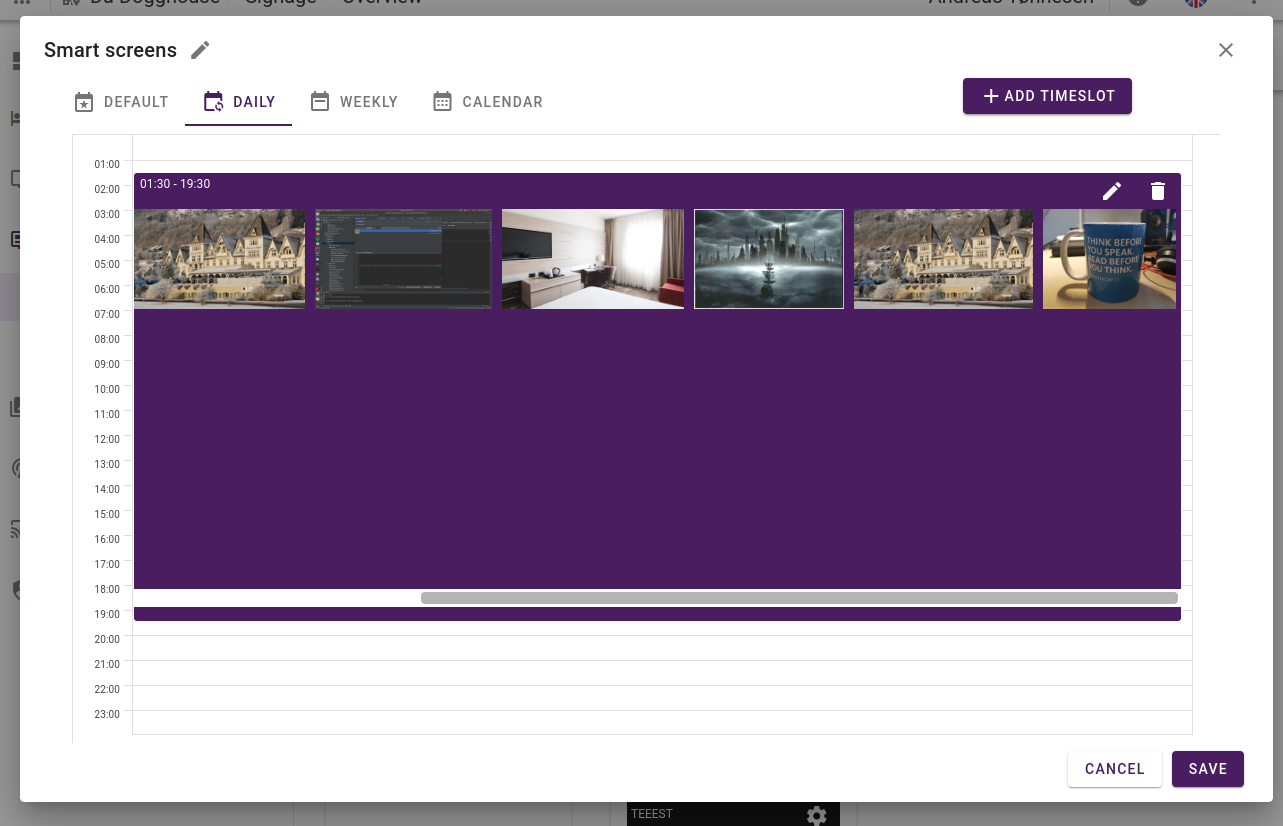
The daily content defines daily recurring timeslots. These override the default content.
¶ Weekly
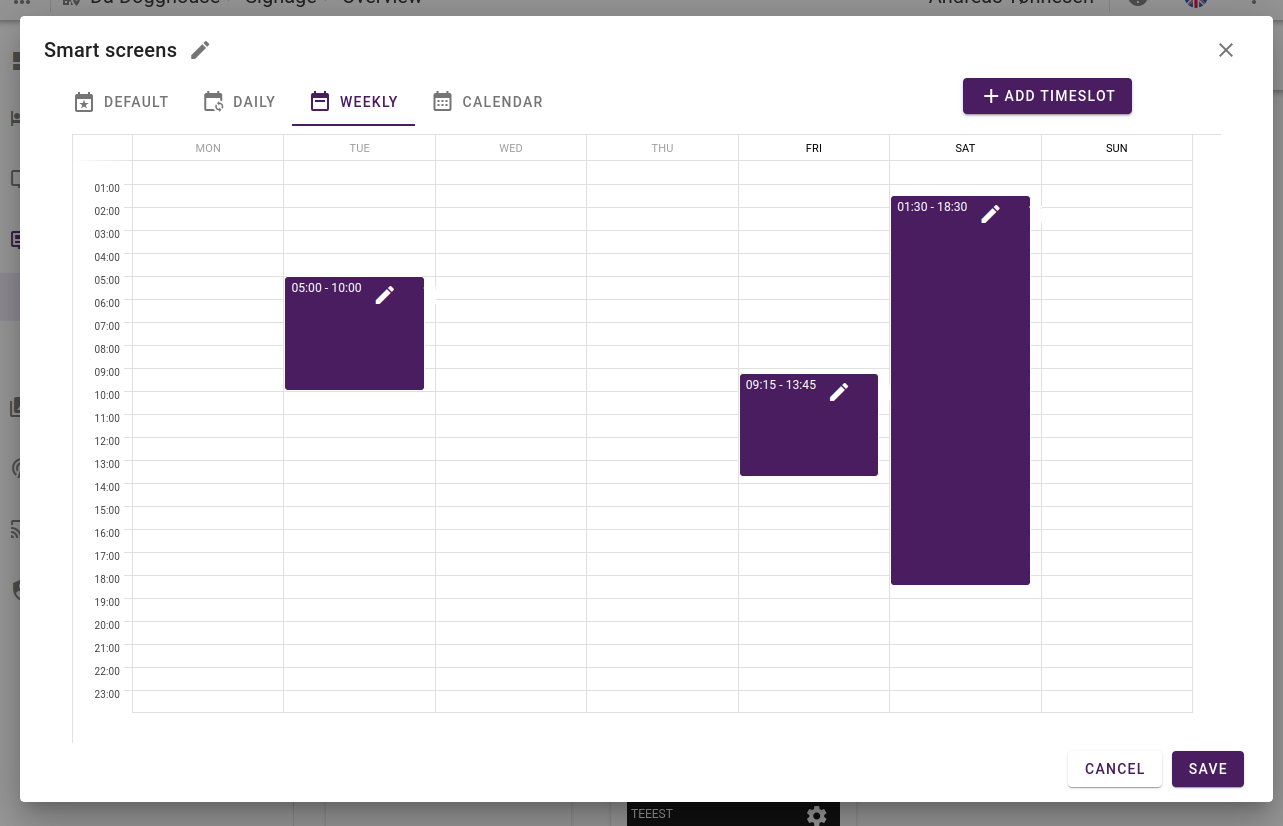
The weekly recurring tab contains the editor for weekday-based, recurring timeslots. These override the daily recurring timeslots.
¶ Calendar
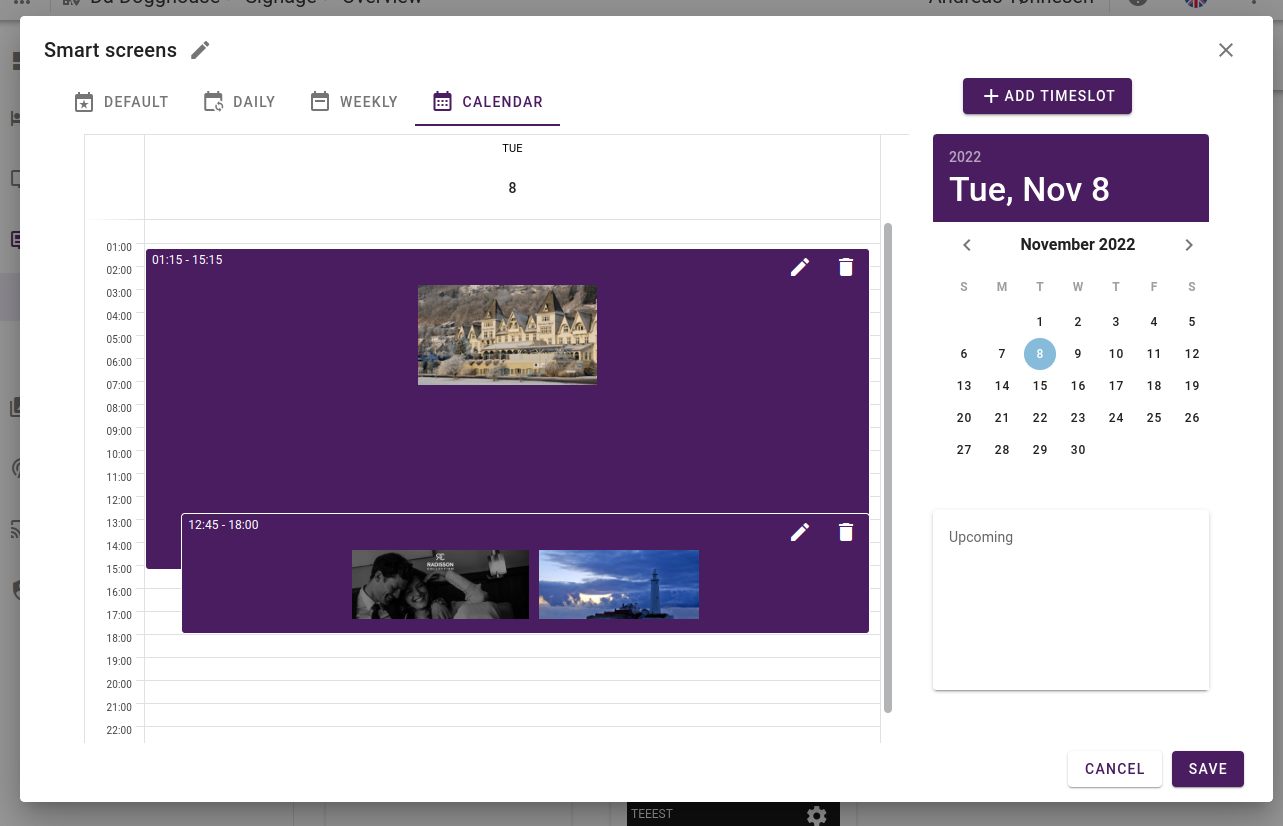
The calendar view represents date-spesific time slots. These are one-time events that will override all other content.
¶ Working with timeslots
As we have seen, timeslots are basically playlists that are scheduled. Even the default content can be seen as a timeslot as it contains all properties of a timeslot except the start/end times.
Timeslots can overlap within the same priority level. Content in overlapping timeslots are merged for the duration of the overlap.
You can move timeslots around or change their duration simply by dragging them with your pointing device. You can create new playlists by clicking on free space in the calendar, or by clicking the "Add timeslot" button in the top bar.
You can delete timeslots by clicking the trash-bin icon on the timeslot entry.
Clicking on a timeslot will open the timeslot editor:
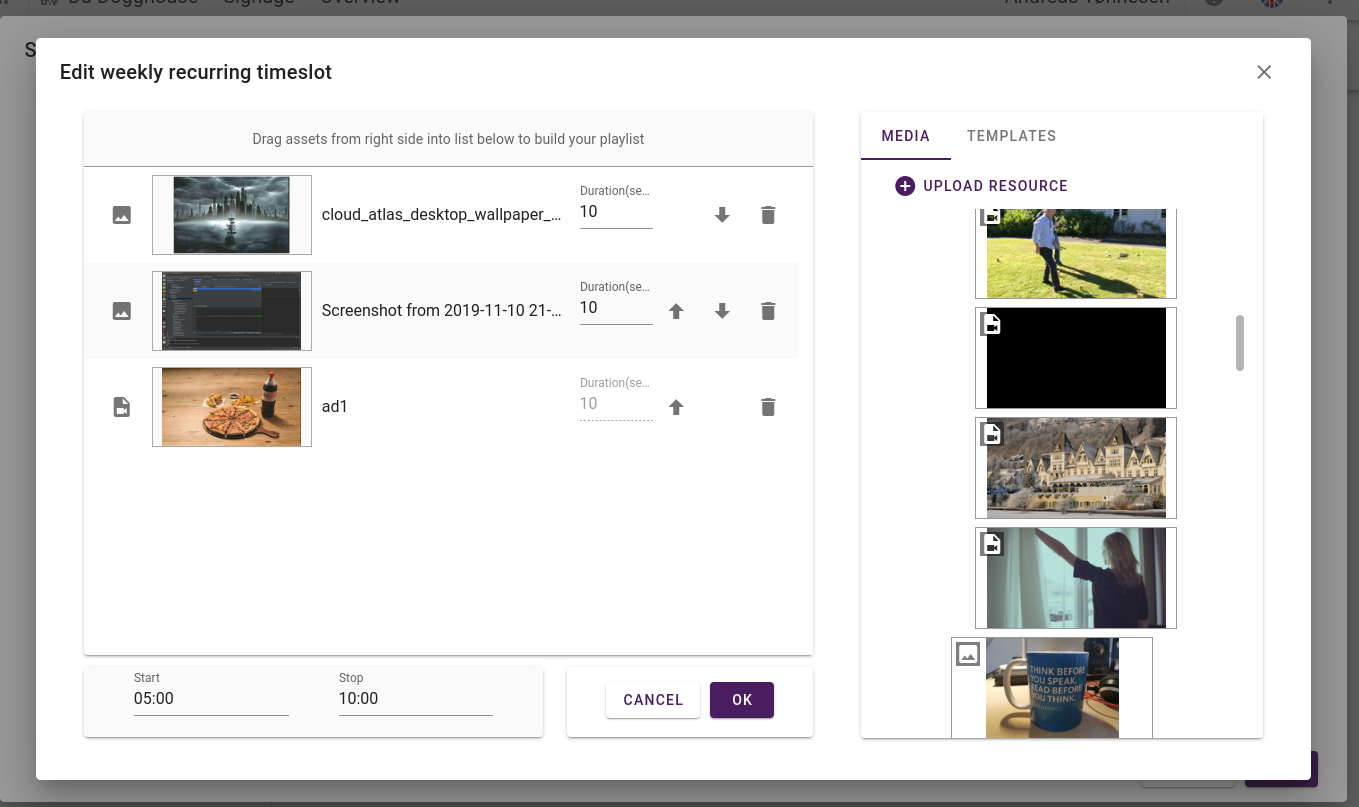
The timeslot editor consists of a main area showing the playlist of the timeslot, a lower area where potential timings for the timeslot can be set (e.g. start/end times for a recurring timeslot) and the right hand media picker.
In the playlist area all items added to the playlist are shown. Here you can change the duration of display for images and templates (videos will receive the timing of the entire video automatically) and you can rearrange the order of the items. Adding an item is done by simply dragging it in from the media-picker or pressing the "add" button of an item in the picker.
The media-picker section consists of one tab where all the static assets (images and video) are available. You can also upload assets directly here by pressing the "upload resource" button. Under the templates section dynamic templates are listed and can be added to the playlist.
¶ Schedule Plans
Schedule Plans are presets containing display/schedule setups that enable rapid switching of content for all screens on a site at once. Each Schedule Plan keeps track of all displays on a site and which content schedules they use. A Schedule Plan can be active or inactive, and only one Schedule Plan can be active on a site at a time. When a Schedule Plan is set to active, all displays will be instantly set to display the content defined by the display/schedule setup in this Schedule Plan.
¶ Create Schedule Plan
When you create the first Schedule Plan on a site, a Default Schedule Plan will be created in addition to the Schedule Plan you define. This Default Schedule Plan will contain your current Schedule/Screen setup.
After you have
- Name - The name of the Schedule Plan
- Schedules - Defines how the screen-schedule relationships will be created for the new Schedule Plan:
- New for each screen - Each screen on the site will have a blank schedule created and assigned to it.
- Single new for all screens - All screens on the site will be assigned to a single new blank schedule.
- Copy from existing Schedule Plan - Copies all screen-schedule relationships from an existing Schedule Plan (Only available if there are existing Schedule Plans).
¶ View Schedule Plan
To select a Schedule Plan, click the Schedule Plans button and either right click or click the ... on a particular Schedule Plan in the list, then choose View. The view will then populate with the Schedules/Screens associated with the chosen Schedule Plan.
¶ Add/Edit Schedule
Adding, editing & re-ordering schedules on a Schedule Plan works exactly the same way as without them. If you have multiple Schedule Plans and switch to a particular one, only the list of schedules on that Schedule Plan will be affected.
¶ New Display
When adding a new display, you onboard it exactly the same as without using Schedule Plans.
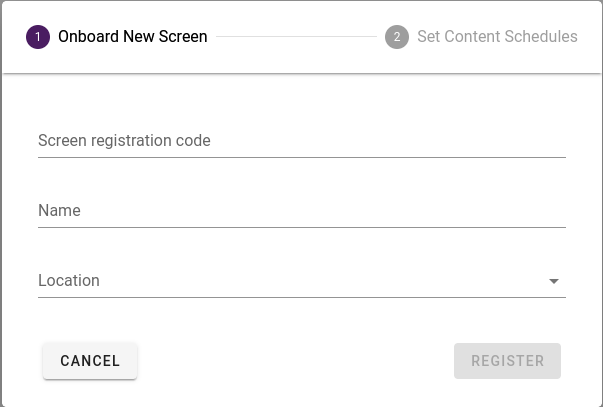
However, step 2 is a little different:
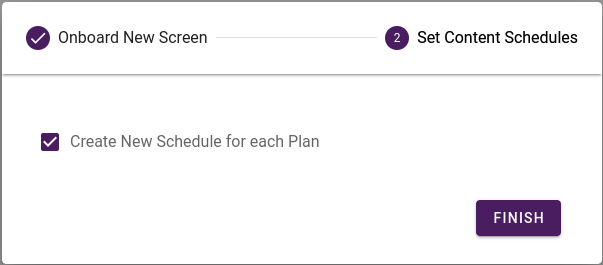
The default choice when setting content is to create a new schedule for the onboarded screen on each existing Schedule Plan. If you uncheck this option you will be presented with an option to choose whether to create a new schedule or assign an existing schedule to the onboarded screen on each Schedule Plan as seen below:

¶ Removal of Schedule Plans
When removing a Schedule Plan, all the schedules associated with it will also be removed from the system. It is also possible to delete the 'Default' Schedule Plan, but only after all other Schedule Plans have been removed first. The system will then revert to a pre-Schedule Plan state.
¶ API Access
Third party app access to Schedule Plans is available through the public API and requires an Access Token..