¶ Site Agent
¶ Software
Certain system functions requires access to resources on the local on-premise network where screens are installed. To enable this a local server running a custom linux image can be installed. This server will run a software called the agent which will connect to the cloud system and manage the local device.
Examples of functionallity that requires the on-premise device is the FIAS interface, Cast solution and local videos.
NOTE: Only one agent can be used for each site.
¶ Installation
Download the latest ISO image.
Contact your assigned support personel for information on where to download the image from.
-
Burn the ISO image to any USB stick (Using the latest version of Rufus.)
-
Boot the server from the USB device
-
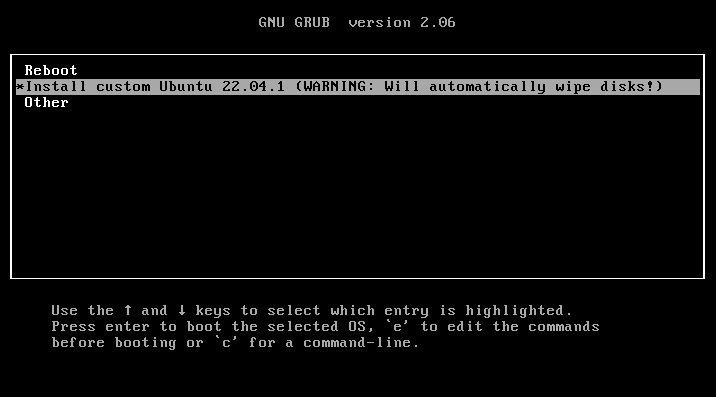
Choose "Install custom Ubuntu 22.04.1" and press enter.
-
Now wait for the ISO to install to the hard drive. This will take a couple of minutes. It will show "Start: and Finish:" frequently. This is normal. It will reboot automatically when finished.
-
When rebooted it will show "Ubuntu 22.04.1 LTS unconfigured tty1". Press enter and login with user: setup and password: setup
-
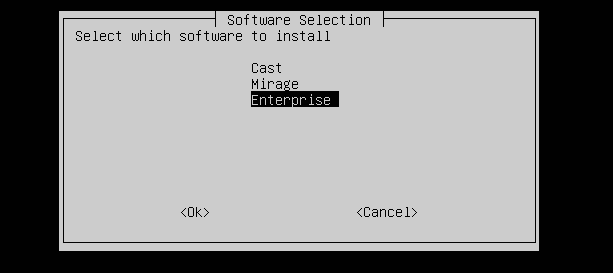
And after some seconds, the wizard appears:

-
Upon login after it has installed all necessary packages you should get a selection of software to install. Select "Mirage" if the site is not having a Chromecast solution. Select "Cast" if you have both PMS and Chromecast solution.
-
Fill in the language code for the country this installation is for. E.g. "no" for Norway.
-
Fill in the hotel name, all lowercase letters and use dash for space. E.g. "hotel-palace-building" for "Hotel Palace Building". When done it will ask for a hostname confirmation.
The data given in step 8 and 9 is for the hostname of the server.
-
Set the tech user password, please use a unique password for each installation and keep them safe. The password is personal and nobody can see it after it has been set.
-
Installer will now start installing the software needed and when done it will prompt you to login as tech user with the tech password. Setup user will now be disabled.
¶ Authentication
To authenticate you must login as a "tech" user, the software will be up and running connected to the cloud-portal system. Go into the "Mirage" menu when logging in and select "Status" and this window will pop up:
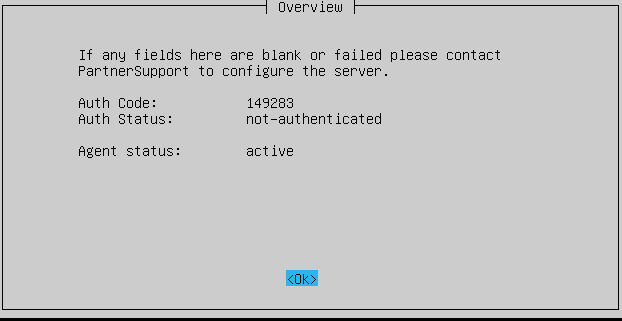
To install the agent to a site you login to the site portal and select: Administration -> Agents -> Add
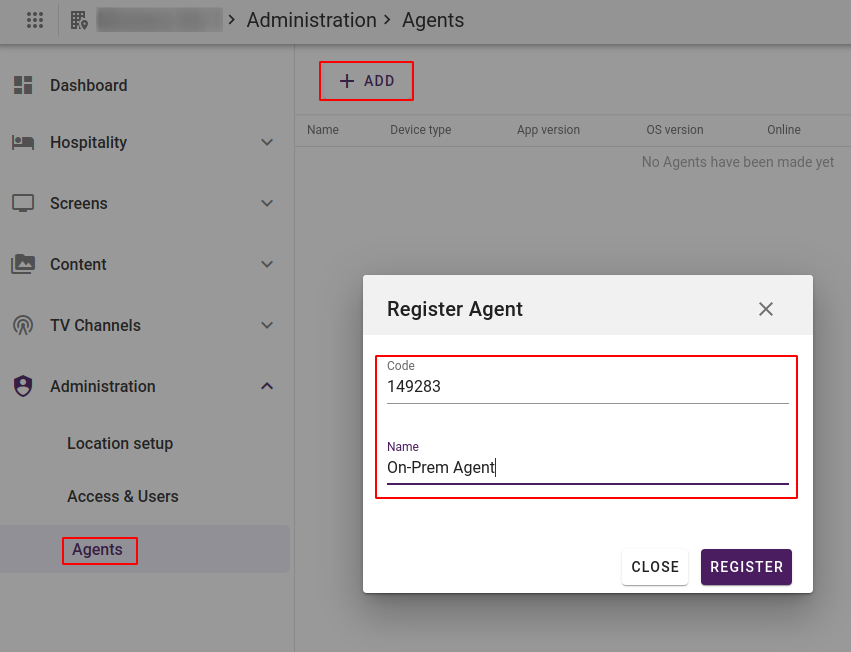
Fill in the details and press Register and the server should be configured and authenticated.
More functionality is currently under progress and will be announced later.
¶ Site Agent - HTTP Video Server & Sync
The HTTP Video Server & Sync services allows for hosting and playing videos over HTTP.
¶ Prerequisites
Site Agent installed on site.
¶ Getting started
- License Activation: To begin, add the 'Site Agent - HTTP Video Server' license to a site.
- Installation: Upon license activation, the local agent will handle the installation process for the service automatically.
¶ Resource Management
- Automatic Downloads: Upon successful installation, Site Agent - Resource Sync begins downloading resources to the local storage.
- Updates & Additions: The system continuously monitors for new resources and downloads them as they are added.
¶ Configuration for Resource Server
After activating your license, a 'Configuration' sub-page appears under the 'Content' section.
- Access Configuration: Navigate to the 'Configuration' sub-page.
- Port Settings: The default port is '8770', but you have the option to modify this as needed. To check that the port is set correctly, click 'Check Configuration', if it's correct, it will say 'Configuration OK'.
NOTE: Due to the updated port being sent to the MSA, it can take a couple of seconds for the port to validate.
- Internal URL Setup: By default, this is set blank, to not automatically choose the wrong network interface IP.
- Network Interface Dropdown menu, containing list of available network interfaces to use.
¶ First time setup.
First time setting up Resource Server configuration, internal URL and network interface is left blank, to avoid any confusion. Toggle the manual override, and select a network interface to automatically generate URL based on IP and port, or update the URL manually.

After updating and saving the configuration, the configuration should look something like this.

The port and internal URL is used by the TV's to locate local resources.
Note: The port and internal URL settings are crucial for TVs to access local resources. Ensure these settings are accurate to prevent disruptions.
¶ Portal
When 'Site Agent - HTTP Video Server' is licensed to a site, each media item (Content/Media) is visually assigned a sync-indicator to indicate whether it has been downloaded(synced) to local storage or not.
When a media item is not synced with the local hardware yet it displays a red sync-indicator

When a media item has been synced it displays a green sync-indicator

¶ Uploading and using local videos
¶ Upload
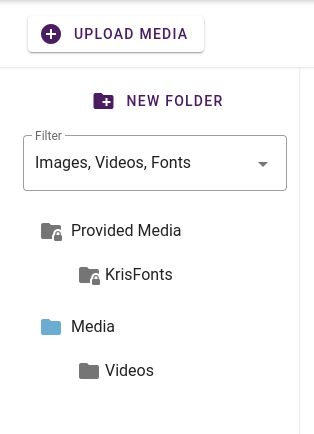
To upload a video for the Resource Sync Service to sync and download, navigate to the site which the agent is installed. Navigate to Content, then the Media sub-menu.
Click the Upload Media button above the folders.
When the dialog appears, select the video to be uploaded.
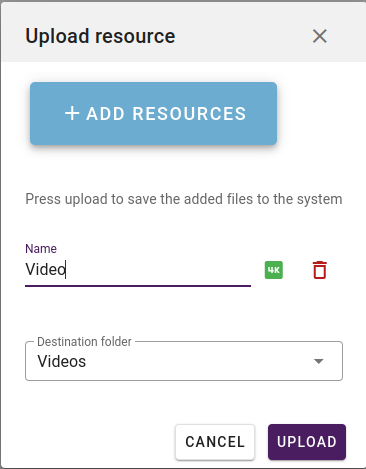
When the upload is complete, as mentioned in the Portal section above, the sync-indicator will appear on the video thumbnail, red color for not synced, and green for synced.
When green, the Resource Sync Service has successfully downloaded the video locally and set it's status to synced.
¶ Usage
Local video in TV templates
To use the local videos, in for example an TV Template, follow the instructions that can be found here (menu-elements), specifically the Video Player and TV Content sub-pages.
Local video in TV channel list
To use local videos in the TV channel list, you need to identify the url to enter into the media configuration:

First, access the media folder where the video is located, double click it and find the "Local filename":
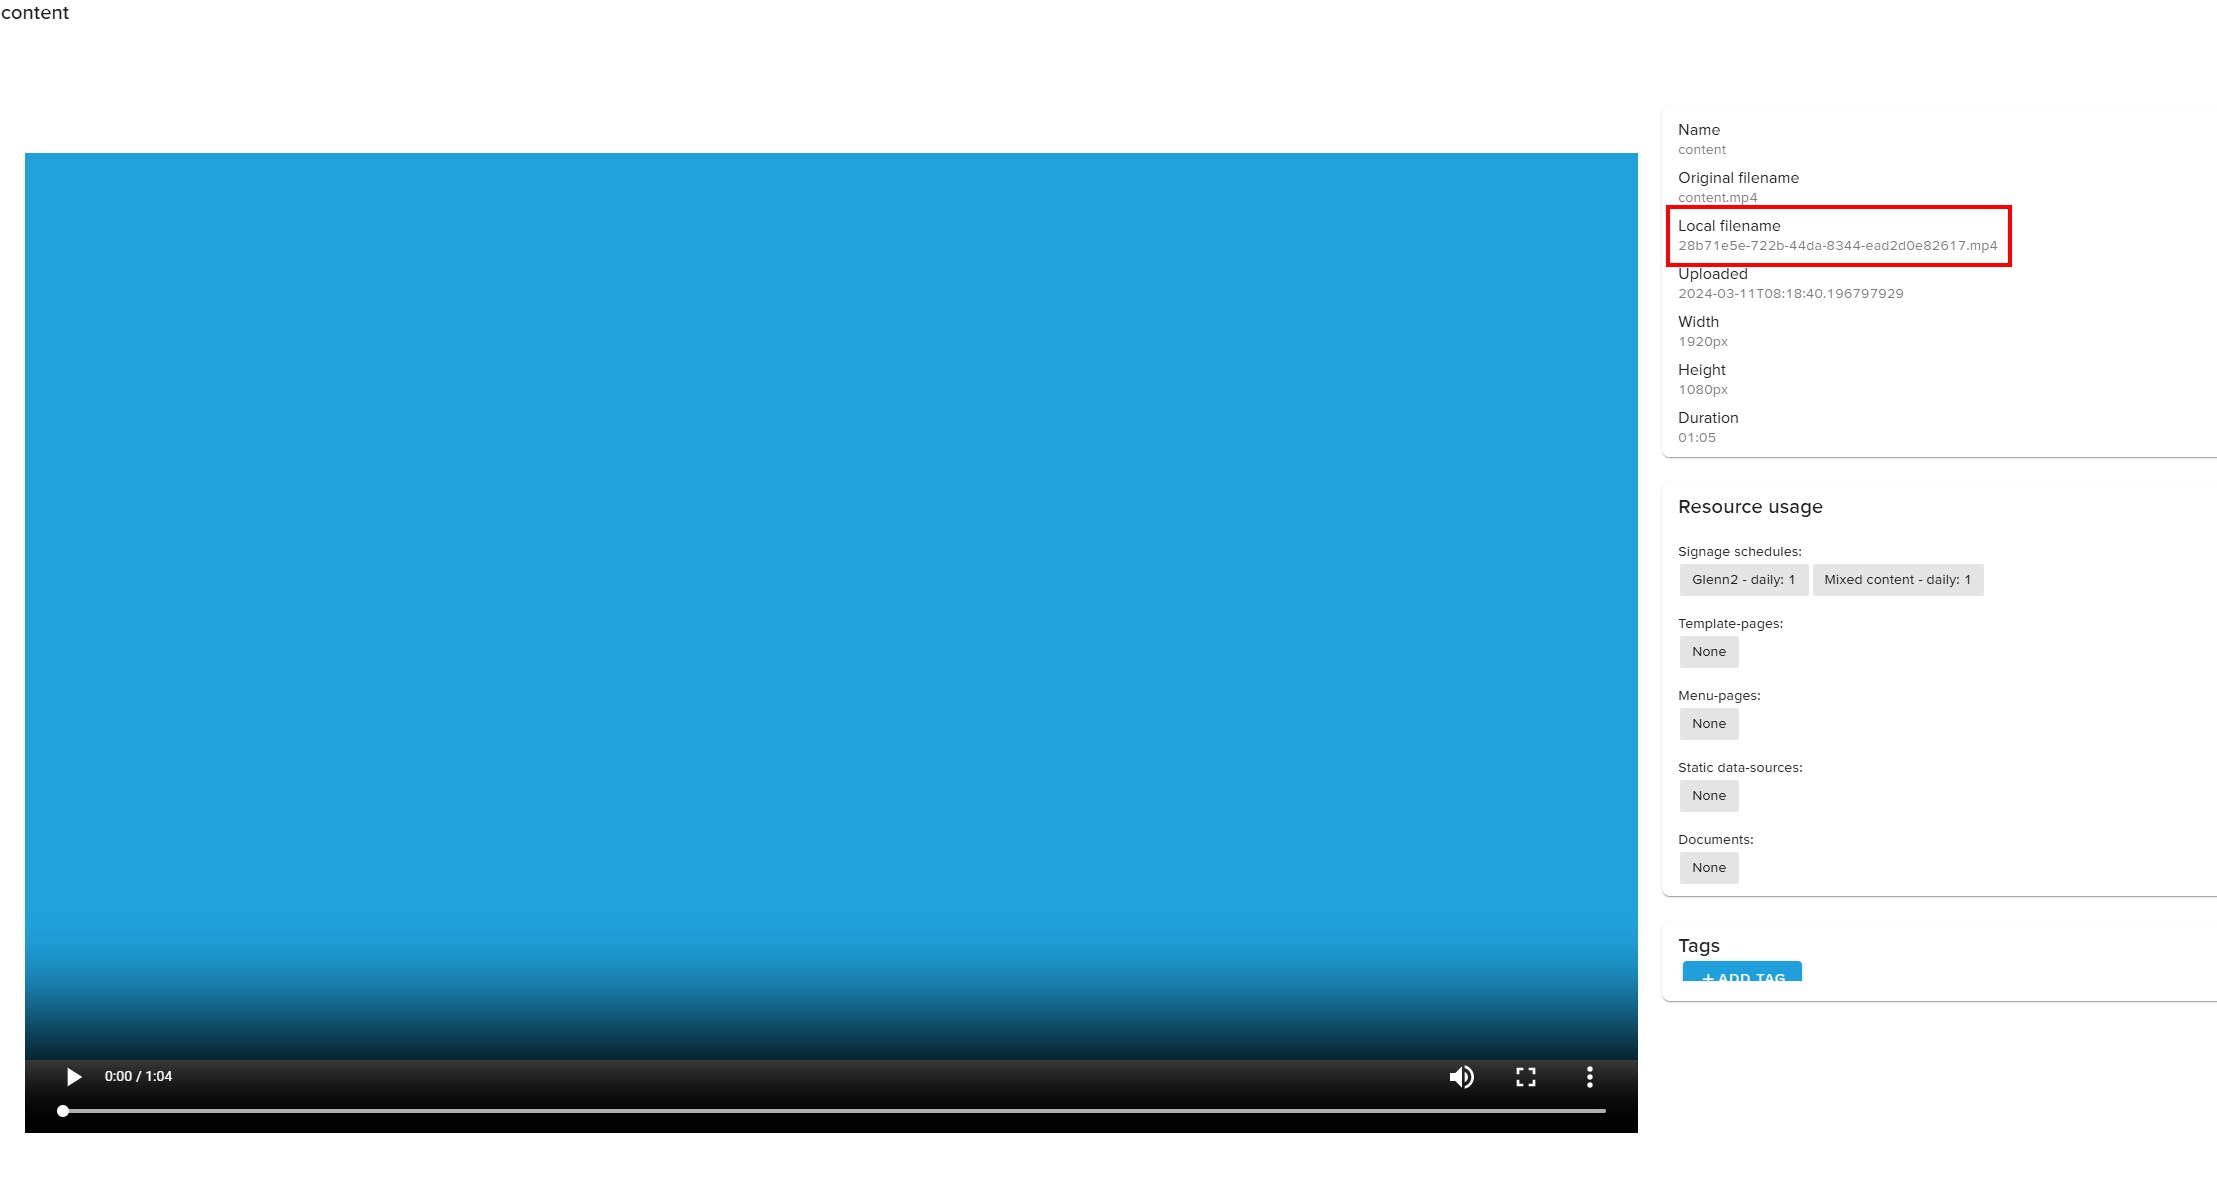
Then, go to Content -> Configuration to find the rest of the url:
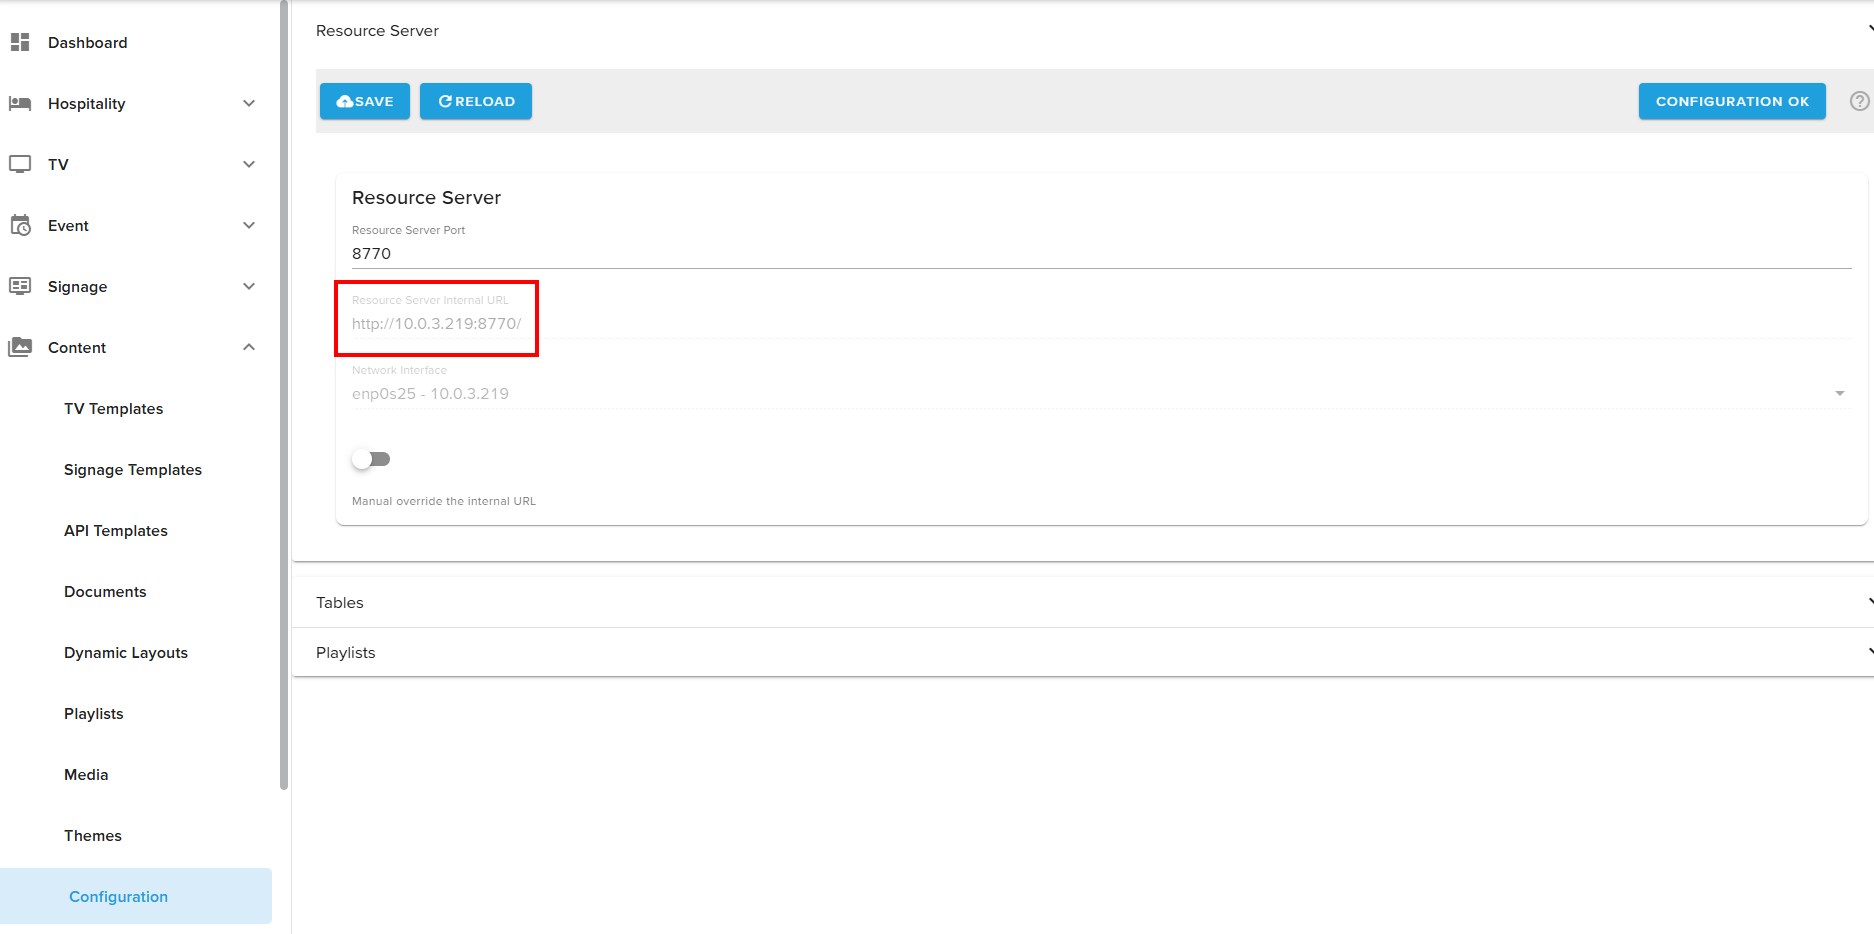
Finally, enter the complete url into the Media Configuration:

Now the local video can be added to the channel list like any other external media sources such as for example UDP channels.
"Use Internal TV URL" configuration
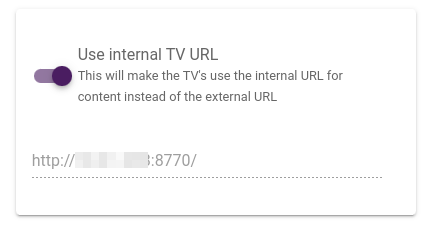
To have the TV's use internal videos by default, you need to enable a setting called 'Use Internal TV URL' under 'Hospitality - Configuration'. This will make the TVs use a URL that points to the videos on our local network.
This does not affect the standard way of using videos.
After enabling this setting, don’t forget to restart the TVs for the changes to take effect.
¶ Troubleshooting
Common Issues
- Incorrect Port/URL Settings: If resources are not accessible, first check your port and URL settings in the Resource Server configuration.
- TV not playing local video: If the TV is unable to play the video, here is a few things to check:
- Check the license is added.
- Check that the Hospitality Configuration has Use Internal TV URL enabled
- Check the network if the server is reachable from the TV