Welcome to the signage template editor section!
A template consists of a base template of a given size with a configured background color or image, plus various overlaying widgets. These widgets offer various static or dynamic content.
Keep in mind that templates should only be used when you need to build content that is not a full-screen video or image. There is no need to create a template to load static, full-screen content.
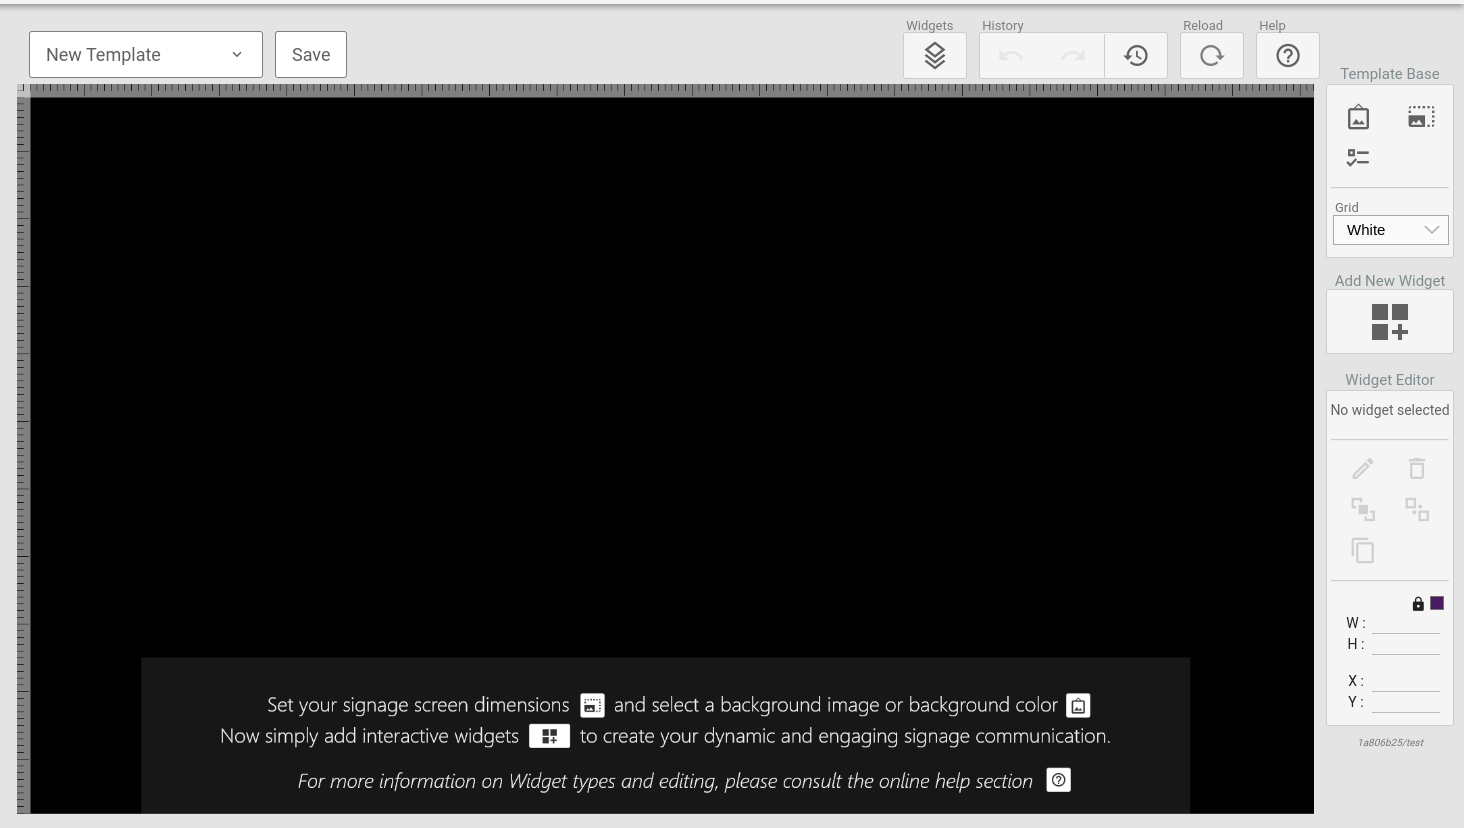
Let's start out by familiarizing ourselves with the editor application basics. This is what the editor looks like when creating a new template-page.

¶ Editor tools
¶ Top bar
These are the tools available in the editor top bar:
¶ Template browser drop-down
This drop down lets you select the template to load, create new templates, edit template names, move templates, delete templates and create/delete folders,
Read about templates & widgets here
¶ Save button
Used to save the current template state.
¶ Widget list
Brings up a selectable list of all the widgets in the page, useful if you have invisible/small widgets or many overlaying widgets.
The list is ordered by the widgets rank in the Z-axis. This means any widget higher up on the list will overlay any widget lower on the list visually. To re-arrange this order, use drag and drop in the list(or the bring back/front tool-buttons in the toolbar).
This list also allows you to change the visibility of widgets for editing purposes. Making a widget invisible by clicking the visibility icon here will NOT make the widget invisible on a real screen, neither will this state be saved.
¶ History
This section provides the undo history tools. Tools are only available if they have data to provide E.g, undo is not available until there is an actual change to undo.
¶ Undo
Steps back to the last undo-point in the internal history.
¶ Redo
Steps forward to the next redo-point in the internal history.
¶ Open history list
Opens a list displaying the history. Here you can select items to revert to.
¶ Reload
Reloads the current template, reverting all unsaved changes.
¶ Help
Opens the documentation related to the editor(this page).
¶ Right hand toolbar
¶ Template Tools
For a detailed description of the template tools, see the Templates & Widgets page.
¶ Template Background
Clicking this icon brings up the main template background settings.
¶ Template Size
Clicking this icon opens the template-size configuration tool.
¶ Template Display Conditions
Clicking this icon brings up the display conditions tool.
¶ Add New Widget
¶ Add Widget
The add widget toll brings up a list of all availabe widgets based on the site's licenses. Select a widget from the list and click CREATE to add it to the template.
¶ Widget Tools
This section contains tools for working with menu elements. Most of these tools are also available as direct shortcuts on the selected element overlay.
¶ Widget Settings
Click the pencil icon to open the editor for the currently selected widget.
¶ Delete Widget
Click the trash bin to delete the currently selected eidget.
¶ Bring forward
Click this icon to bring the currently selected widget forward in the Z-stack, overlaying other widgets.
¶ Send backward
Click this icon to send the currently selected widget backwards in the Z-stack, overlayed by other widgets.
¶ Duplicate Widget
Click the duplicate icon to create a duplicate of the currently selected widget.
¶ Lock Position
This option will lock the currently selected widget in place, preventing any movement or resizing.
¶ Working with widgets
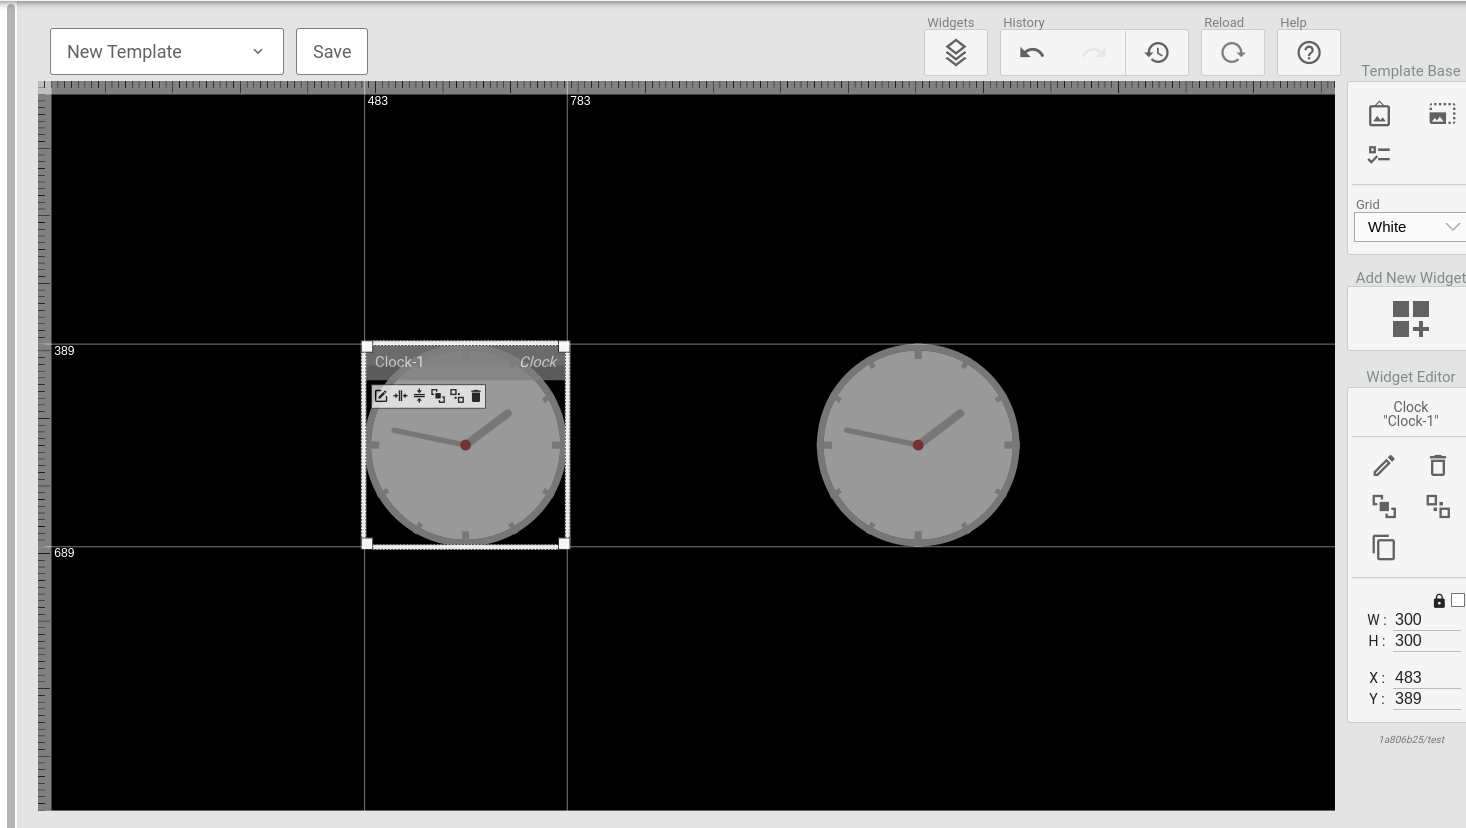
Template widgets can be selected by hovering them and clicking. The target widget you hover will turn a tint of green until you select it. In all our examples we will have the Border setting set to White to add helper borders and positioning helpers to all widgets.
Here is a simple example of a template with two clock elements where Clock 1 has been selected for editing:

¶ Shortcuts
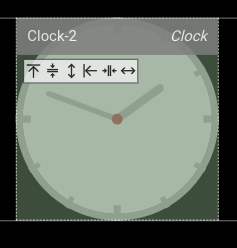
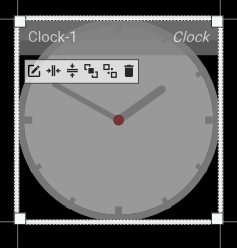
Hovering a widget will bring up a set of shortcuts on that element. The shortcuts available depends on if the widget has been selected or not.
¶ Non-selected widgets
The shortcuts for non-selected widgets mainly deals with aligning position and size with the selected element.

- aligns the top of the widget with the top of the selected widget.
- aligns the vertical center of the widget with the center of the selected widget.
- copies the height from the selected widget.
- aligns the left with the left of the selected widget.
- aligns the horizontal center of the widget with the selected widget.
- copies the width from the selected widget.
¶ Selected widgets

- open the element editor.
- center align element on page vertically
- center align element on page horizontally
- bring the currently selected widget forward in the Z-stack overlaying other widgets.
- bring the currently selected widget backwards in the Z-stack overlayed by other widgets.
- delete the element.