¶ Description
A Table is a spreadsheet-like document that can store dynamic data which can be accessed by a display. An example of this would be a display located in a restaurant setting that uses a food-item stored in a table to display today's menu.
Tables are currently only available to use with Signage solutions.
¶ The editor
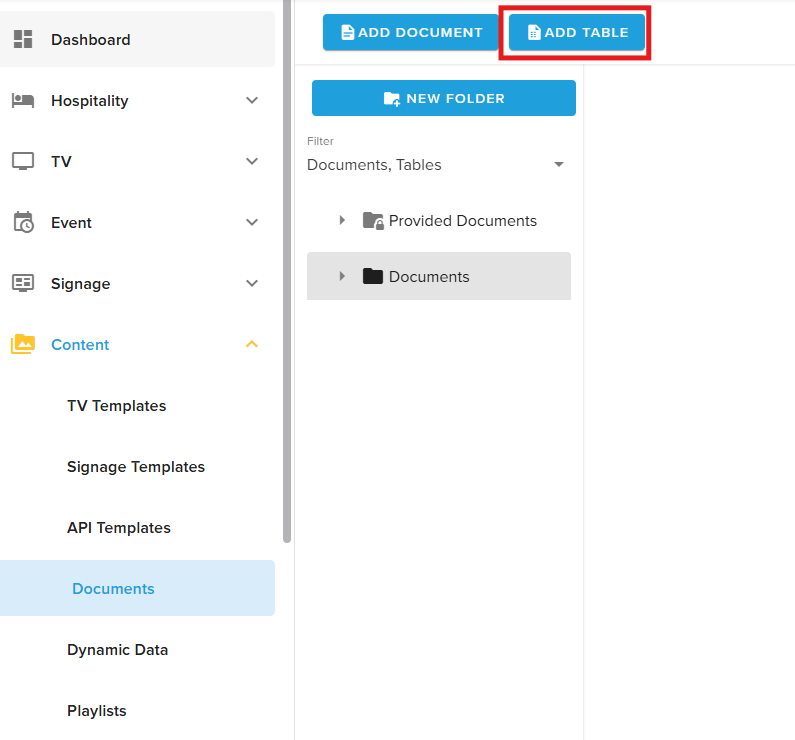
The Table editor is available under Content -> Documents. If enabled on your site or theme, an 'Add Table' button will be visible in this view.
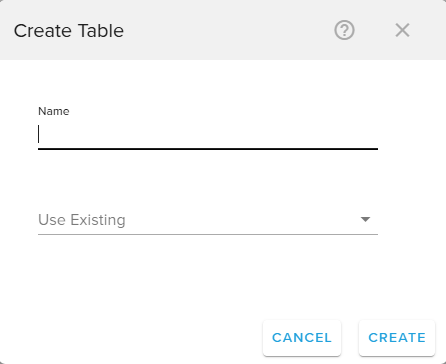
Once clicked, part 1 of the editor appears with the following inputs:
Name - The name of the Table (Not required in this section of the editor).
Use Existing - If you wish to use an existing Table as the starting point for a new one. This will copy any existing Table and insert it into the editor.
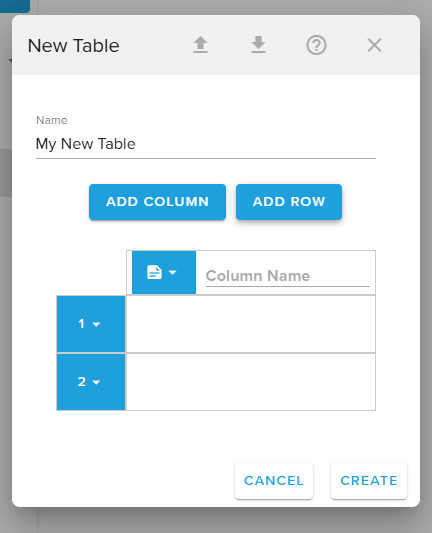
After pressing the 'Create' button, part 2 of the editor is shown. This is the main part of the editor where all associated data is managed.
Much like other spreadsheets, there are columns and rows to be added. After 1 more more columns are added, rows can be added to them. Here we see rows are numbered, starting at 1, and column names can be defined.
Both columns and rows have an associated drop-down menu that allows further editing.
¶ Column drop-down Menu
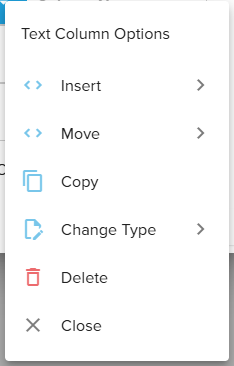
Clicking on the drop-down button associated with each column will display the options for the selected column.
- Insert
Insert column before - Inserts new column left of currently selected column.
Insert column after - Inserts new column right of currently selected column. - Move - If the Table has more than 1 column the move option becomes available, enabling moving columns either left or right.
- Copy - Copies the currently selected column, meaning its name, row values and other defined values.
- Paste - Once a column has been copied, the paste option becomes available. This works the same way as insert, except you are inserting the copied column instead of a new one.

- Change Type - Columns are available in several different types. Currently, the 4 supported types are:
- Text Column - The default column type where standard text is defined.
- Image Column - Enables selecting an uploaded image for each row cell under the selected column.
- Value List Column - Enables the creation of lists of values that are unique for each column. Once selected, the 'Manage Value List' option in the column options list is available.
- Map Location Column - Allows users to input an address from a map view, using either a searchable address bar or latitude and longitude fields. This field is necessary when a Table is used as a source for either the Data Table or Dynamic Layouts widgets AND connected to the Map widget. The Map widget populates with addresses to display points of interest and directions, and the Map Location type ensures the address is properly formatted for this configuration.
- Delete - delete the entire column along with associated row values.
¶ Managing Value List Columns
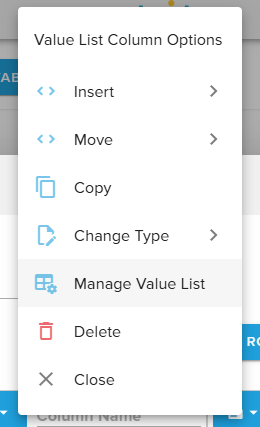
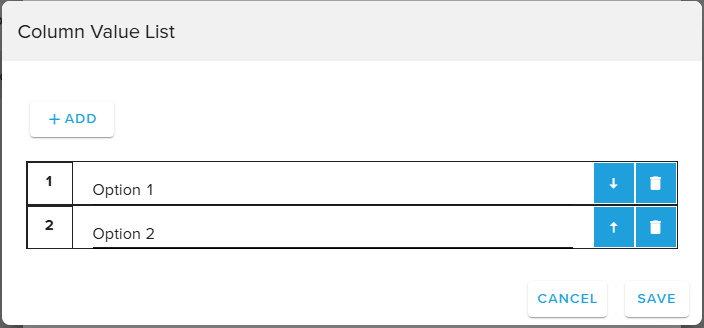
After choosing this option, the Column Value List editor appears, enabling us to add values for the selected column. Here we have added two values, 'Option 1' & 'Option 2'. We may add, edit, delete & change the order of these values. The order that the values are defined in is the order they are shown on an assigned display.
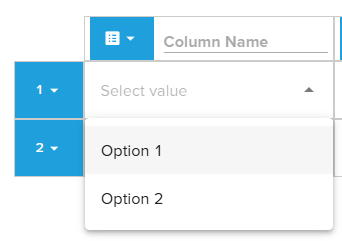
Once we save these new values, we are able to select them in each row under the selected column.
Row drop-down Menu
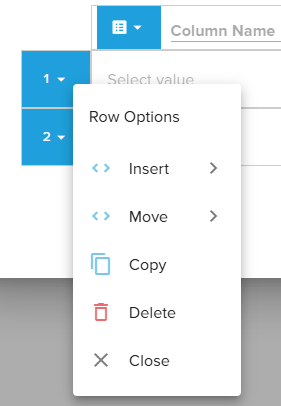
For the row drop-down menu we can see we have many of the same options as for the column options.
- Insert - Insert a new row above or below the currently selected row.
- Move - Move the currently selected row to the top, up one, down one or to the bottom.
- Copy - Copy the currently selected row.
- Insert - Insert the copied row above or below the currently selected row.
- Delete - Delete the currently selected row.