¶ Customization Guideline for the Thor theme
This guide provide you with some help on how you can modify the Thor theme for your specific need.
¶ Import the theme
Start by importing the theme to your site.
Note: If you want to customize the theme for use on several sites, you should first create your own theme and import Thor here. Work on the modifications on your own theme site, and then the modified theme can be exported to new hotel sites. This way you only have to do any work once, and not for each seperate site. Contact Support if you have questions on how to do this.

¶ Global style sheets
The look of the Thor theme is based on the configuration defined in a set of global style sheets. This means that much of the layout of the menu structure can be modified from the Global CSS manager:
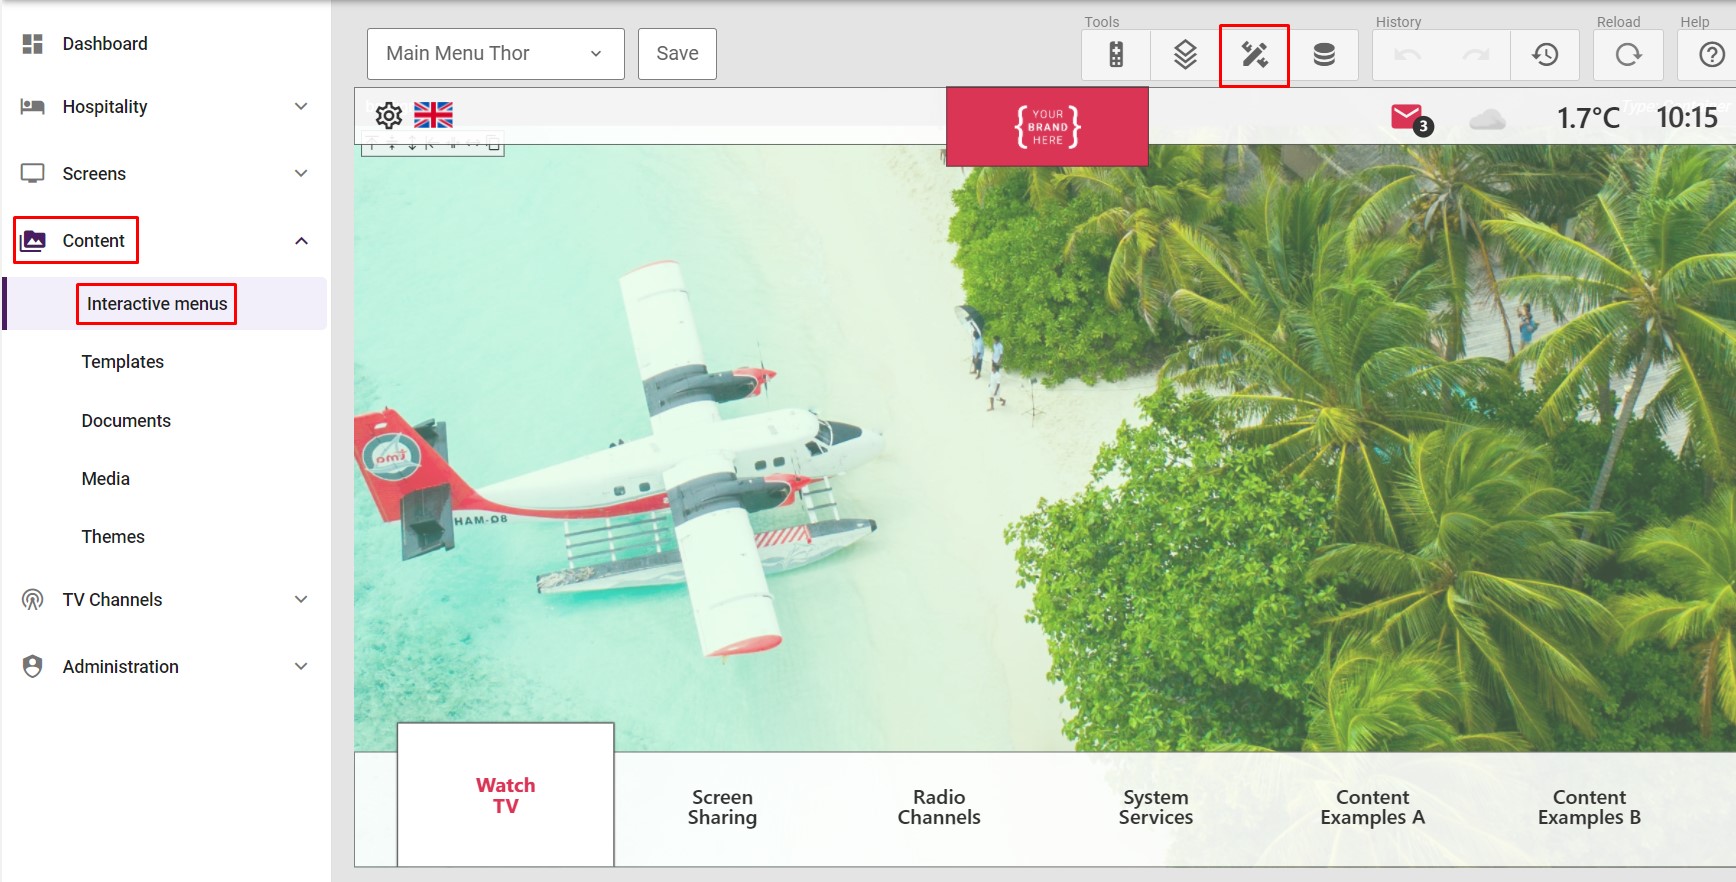
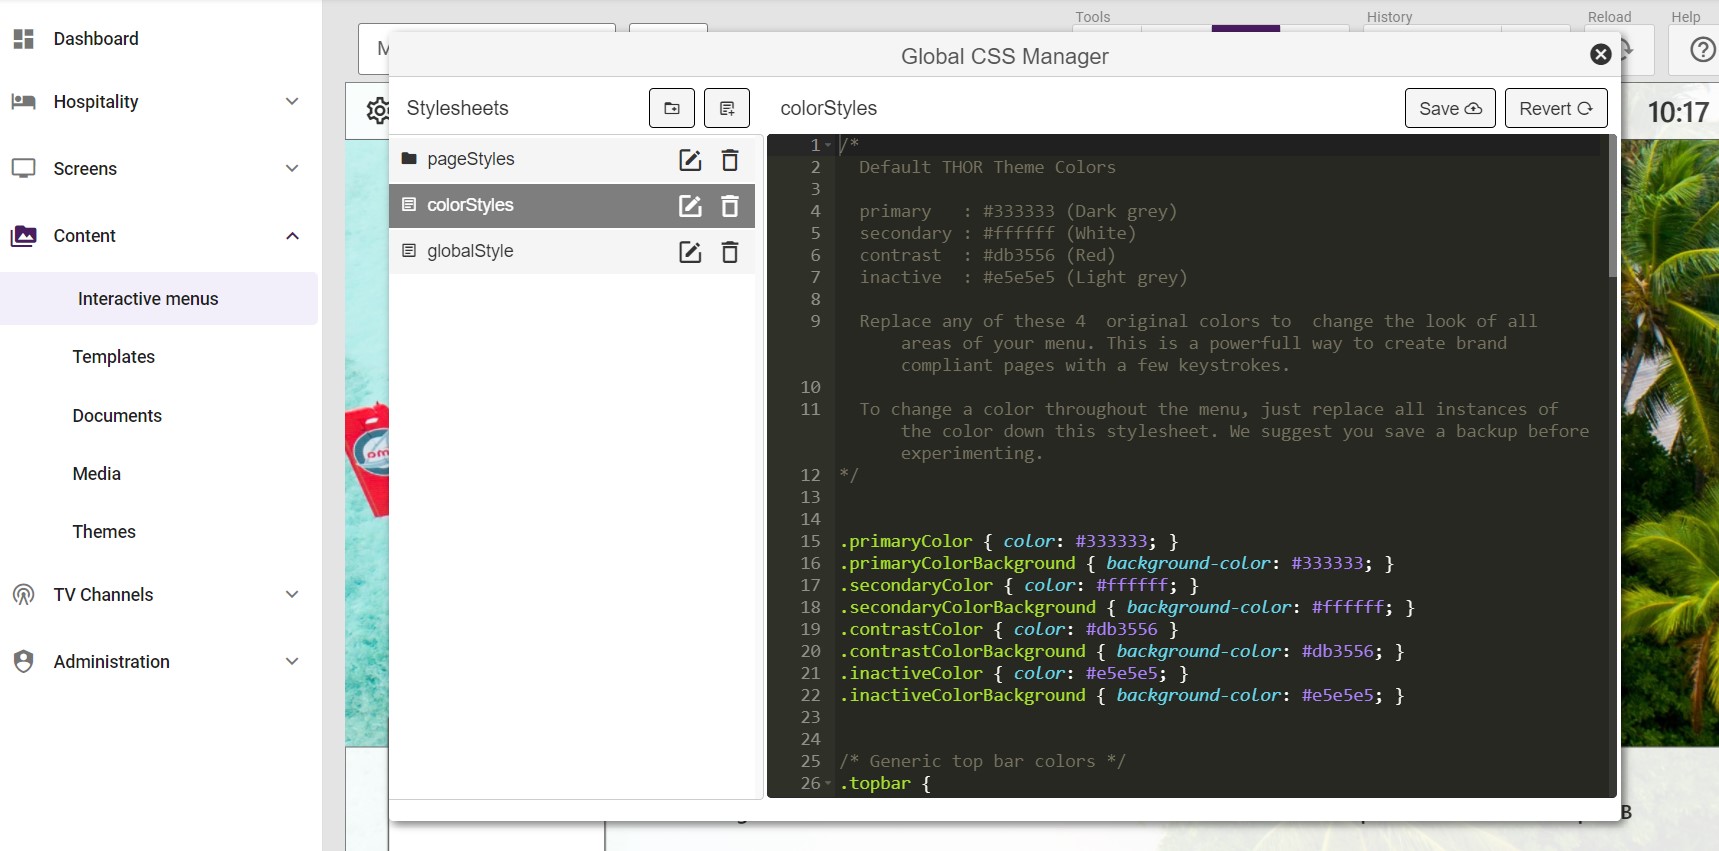
There are defined 6 different gobal style sheets:
- colorStyles (defines the colors and images used throghout the whole menu structure)
- globalStyle (defines default fonts and style of elements that are common for several pages)
- mainMenuStyle (defines main menu page style specifics)
- subMenuStyle (defines sub menu page style specifics)
- serviceStyle (defines service page style specifics)
- infoPageStyle (defines info page style specifics)
Together this style sheet architechture allow you to radically change the look and feel of the menu system from one central location.
Colors, backgrounds, fonts, layout and much more.
See next section for a definition of the page types.
¶ Page types
The Thor theme is build of mainly 4 different page types:
- The Main menu page
- Submenu pages (pages that contain a list of links to other pages)
- Service pages (pages like wake-up, news, flight, weather etc)
- Information pages
¶ Customize the colors and images of the Thor theme
Customization of the colors and images in the Thor theme is done within the "colorStyles" style sheet. This section guides you through how this can be done.
¶ Base colors
The theme is based on 4 different base colors:
- Primary color (default #333333, dark grey)
- Secondary color (default #ffffff, white)
- Contrast color (default #db3556, red)
- Inactive color (default #e5e5e5, light grey)
To change the base colors, enter the "colorStyles" style sheet. Search and replace the various colors to fit your need. As an example, if you want to change the Primary color, search for all places where #333333 is defined, and replace it with your color code. The Primary color will then be changed throughout the whole theme.
¶ Topbar
Topbars will use the base colors unless anything specific is set.
To override the default topbar style, you can use the .topbar selector in the "colorStyles" style sheet:
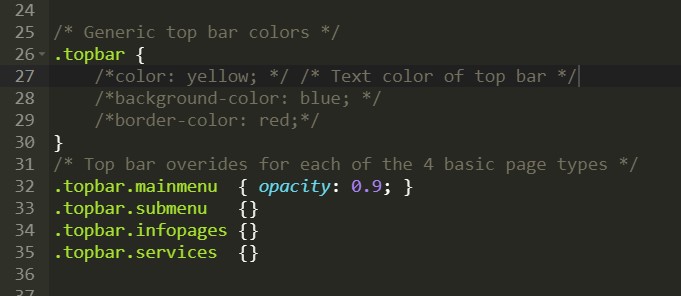
The .topbar selector alters the style of all topbars in the theme. Per default, the .topbar selector his empty, which means the base colors are used.
Topbars can also be customized per page type. There are specific selectors for this within the "colorStyles" style sheet:

Default the topbar on the main page has a different opacity on the background color than the rest. Use CSS to set the topbar style on the various page types as you want.
¶ Background
The default theme background is defined by the .background selector in the "colorStyles style sheet:

The .background selector sets the background on all pages. Change the url in background-image or set a different color in background to set a custom background.
To have specific background on any of the page types, use the specific selectors for these. Above you can see that the info pages and service pages have different background configuration than the rest of the theme, where a light grey color is set to replace the background image.
IMPORTANT NOTE: The Samsung Orsay screens requires some special considerations when it comes to the background on pages that contain embedded video. For the Thor theme, this applies to the "Wake Up Alarm page 2". With the default CSS configuration, the video window will not be visible on Orsay screens. However the audio from the configured media source will still play. To have a visible video window on this page, contact Support for guidance.
¶ Submenu Overlay
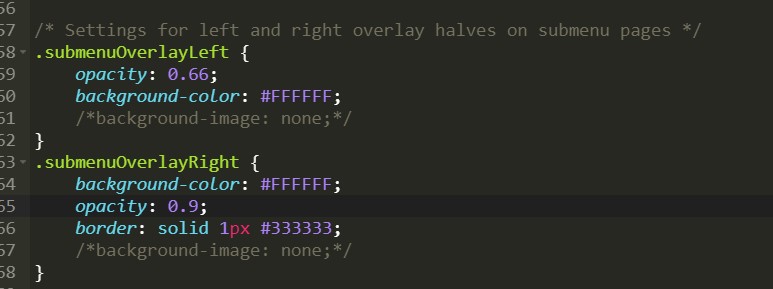
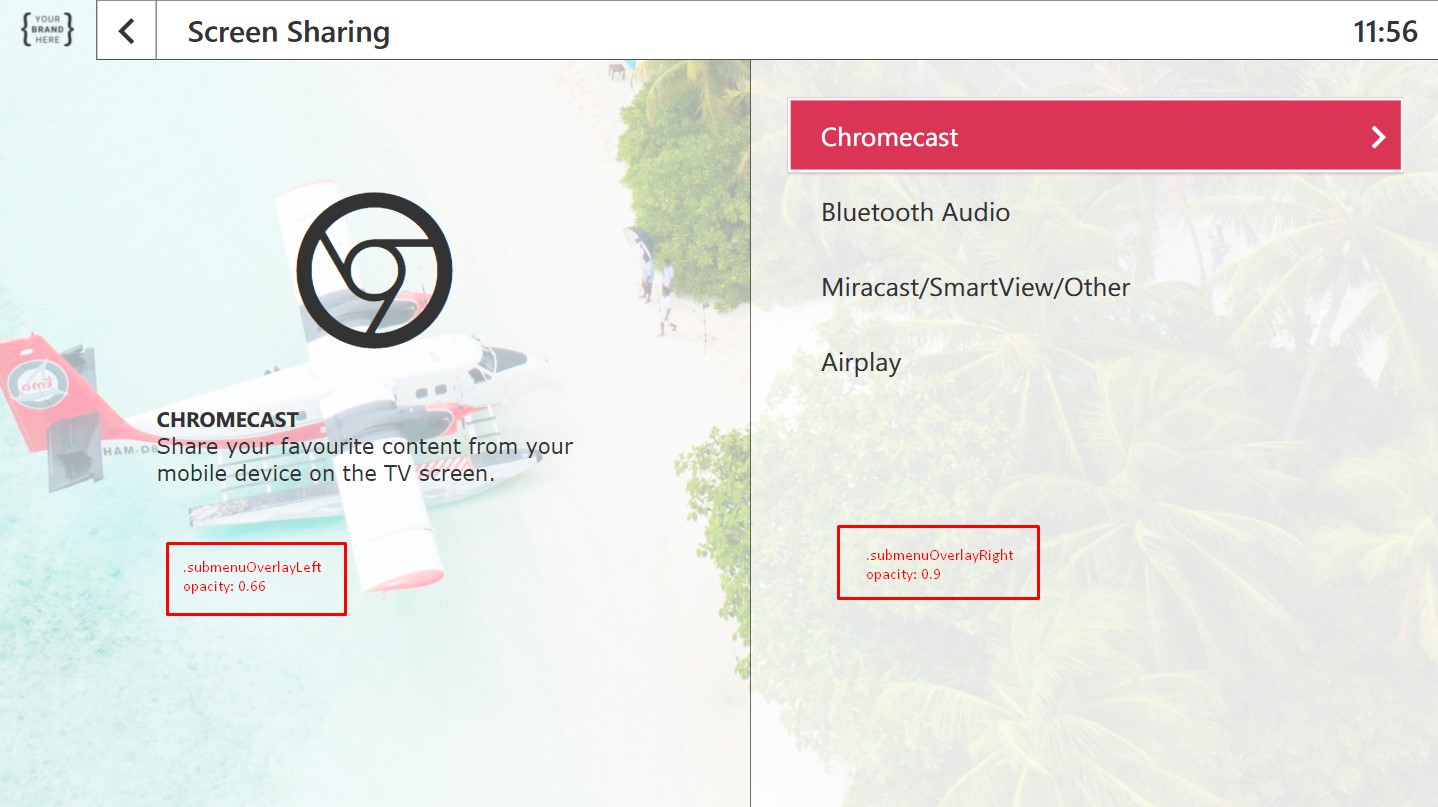
The submenus has an overlay on top of the background image. The color and opacity of these overlays can be altered in the .submenuOverlayLeft and .submenuOverlayRight:
¶ Other elements
There are there are other elements defined in the "colorStyles" style sheets, such as buttons, main menu tiles, list elements etc. These use the base colors. You could style them specifically if you want, but normally these should just follow the base colors of the theme.
¶ Define the fonts of the Thor theme.
The default fonts of the Thor system are defined in the "globalStyle" style sheet:
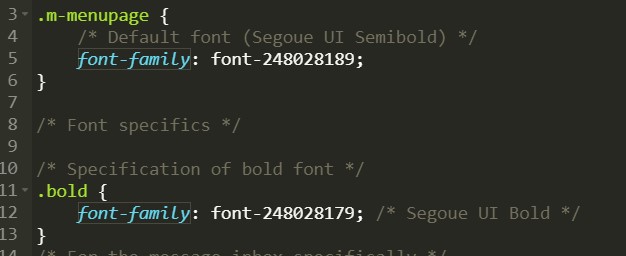
In .m.menupage selector, the default font for the theme is set. In the .bold selector, the bold font for the theme is defined.
To replace a font, right-click and select the new font-family.
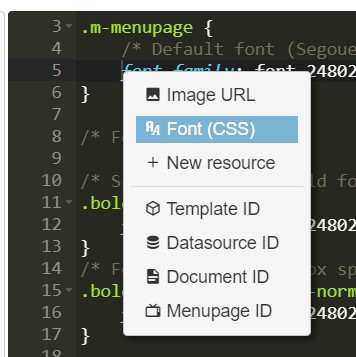
Note: Due to technical reasons, some elements has its font defined outside the menupage and bold selectors. So, when changing font, all style sheets should be searched for the "font-family" property. All places where a font is defined, it is marked in the comment if it is a bold, semibold or regular font used. Simply replace all font defintions with the font of your choice, and make sure it has the same font weight.
¶ Configure the main menu
¶ Choose your main menu version
The Thor theme contains two different main menus: One with and one without icons:
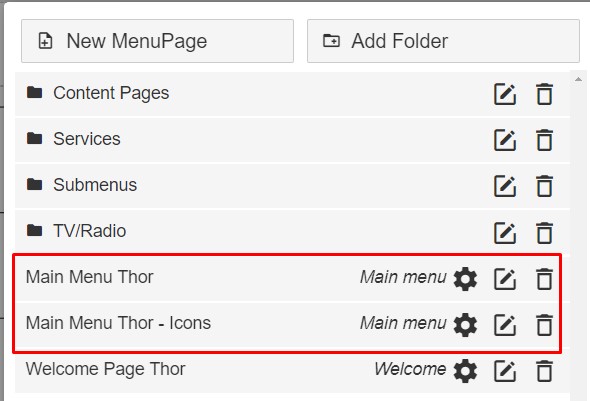
Please note that the Netflix version of the Thor theme does not include the icon version.
Choose the one you want and set it up in the config:
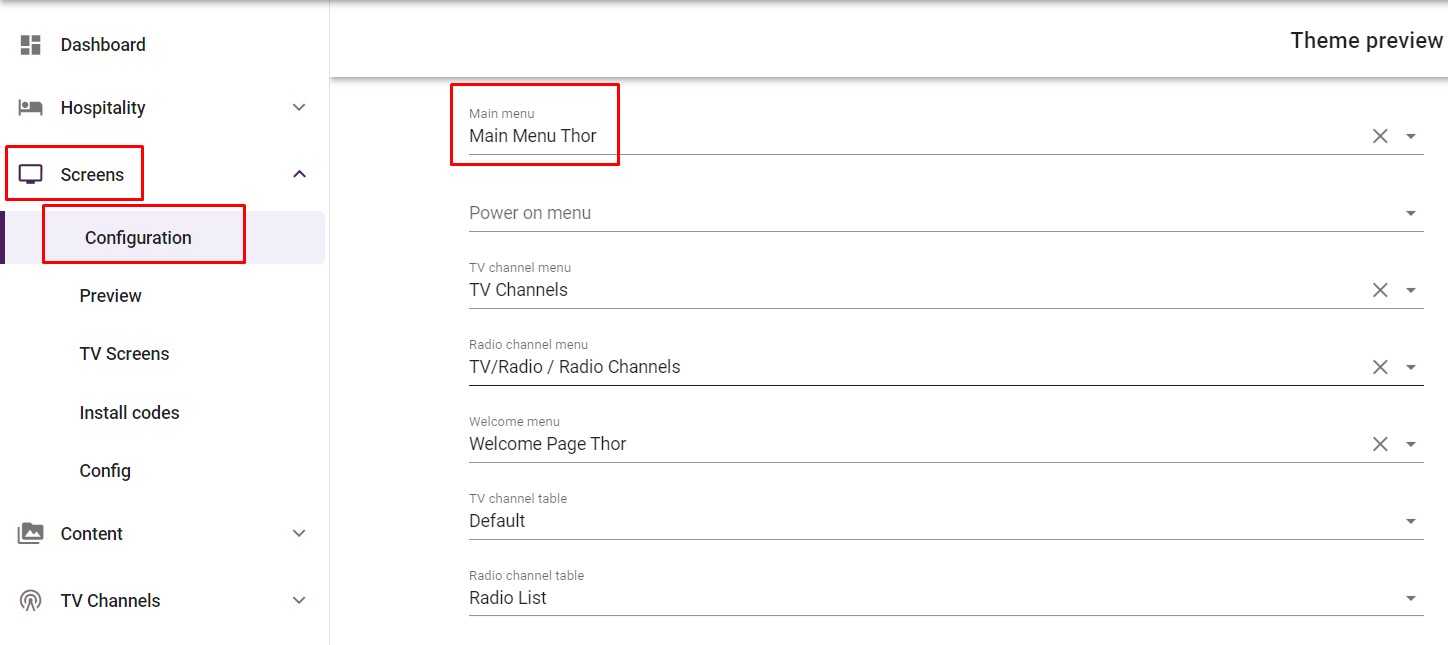
¶ Change the menu items of the main menu
To change the menu items of the main menu, click the item you want to change.
The name of the item is defined in the Normal Content page:
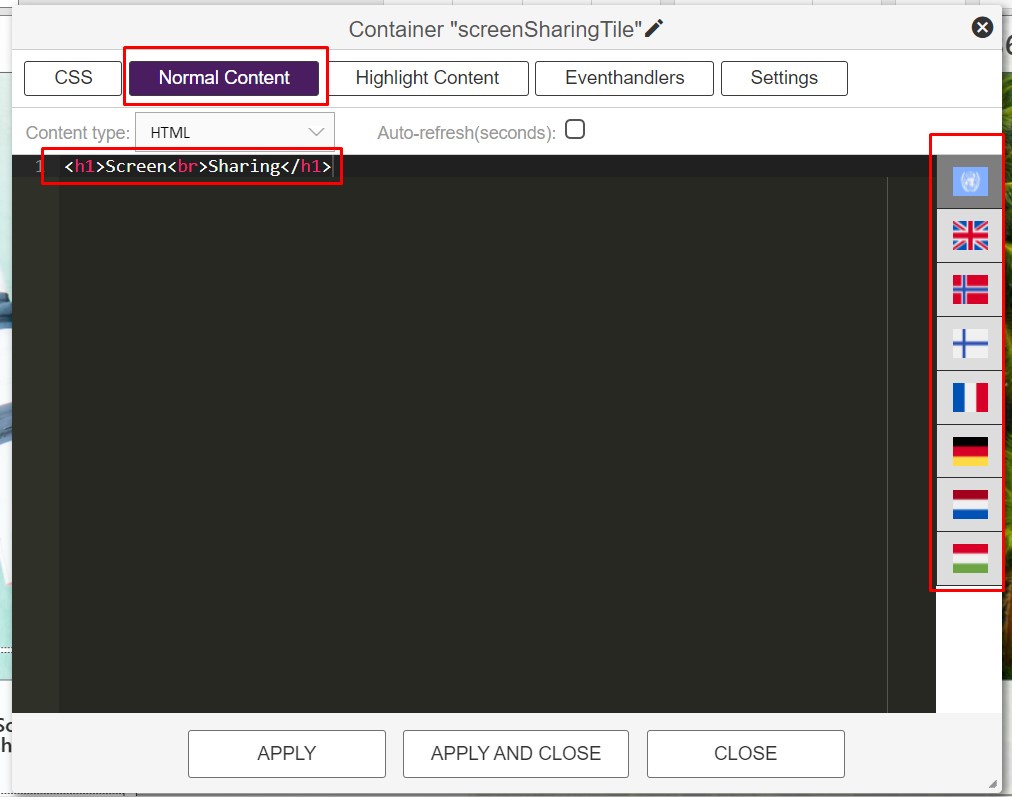
If you use the version with icons, you can also change the icon name. The list of supported icons and the corresponding names can be found at https://materialdesignicons.com/. Leave the "mdi mdi-" test there, and only replace the name, like "television" in the below images.
![]()
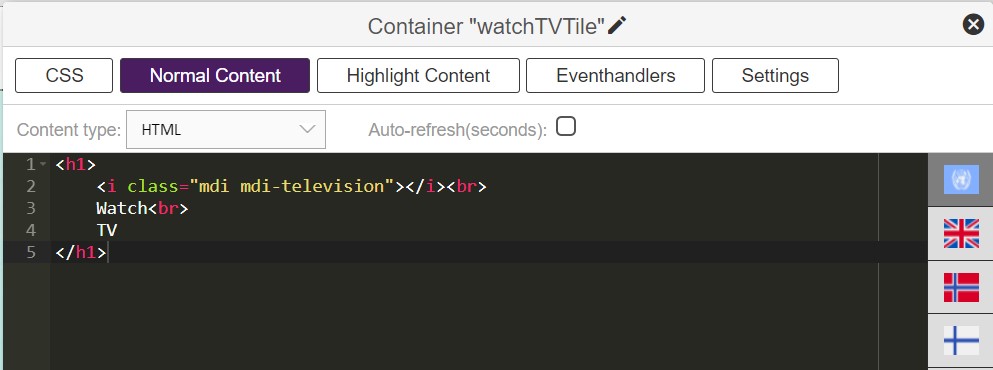
Also note the flags on the right, where translations can be added.
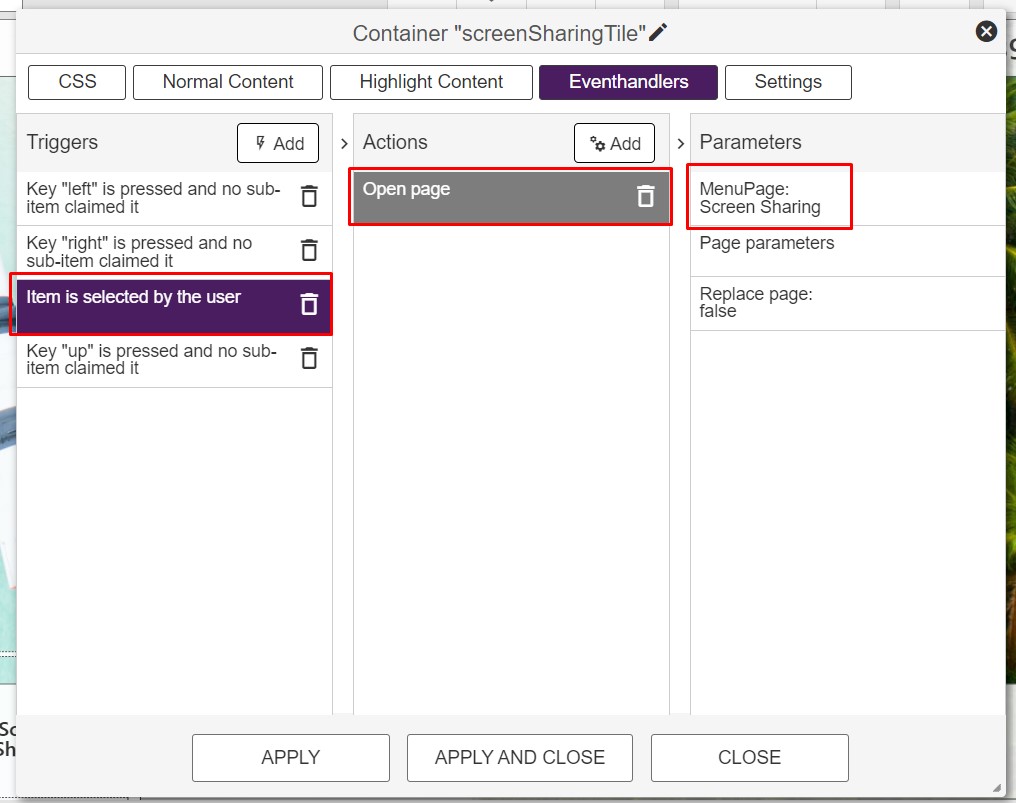
The behaviour when selecting the item is defined in the Eventhandlers pane. In the below example the menu page Screen Sharing should be opened. However, other actions can be configured instead if wanted, for instance to open an embedded TV application such as YouTube.
¶ Customize a sub menu
Inside a sub menu it is possible to change the list items as well as the corresponding icons and service description. The header may also be adjusted.
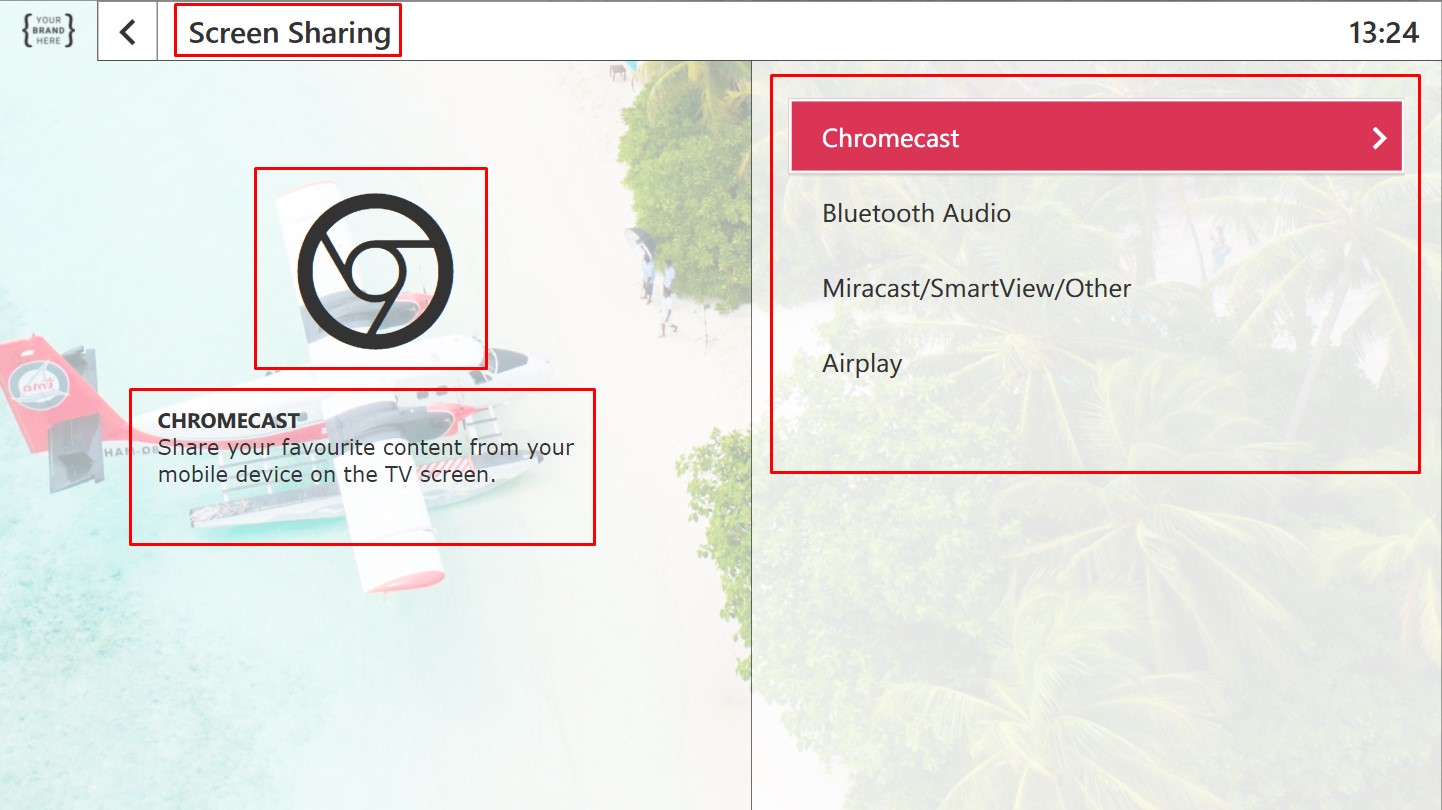
¶ Change the header text
The header text is adjusted by clicking the header element on the page in the editor. Under Normal content the text is defined:
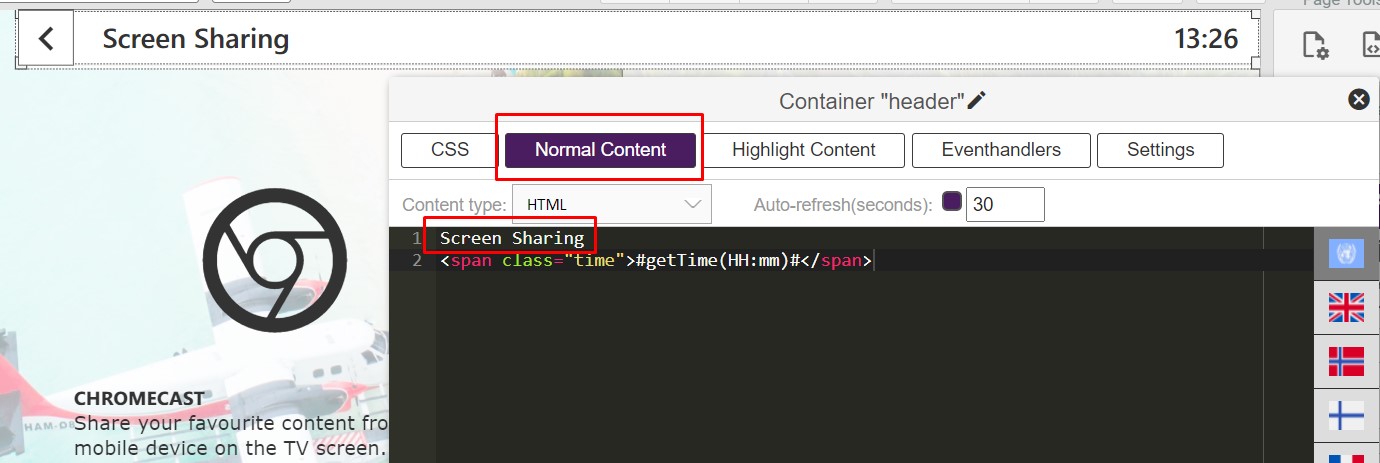
Please remember to apply the changes and save the page.
¶ Change the content of the list element
The content of the list element in the sub menus are defined in a data source. The data source is chosen by clicking the list element in the sub menu page and select it in the Settings pane:
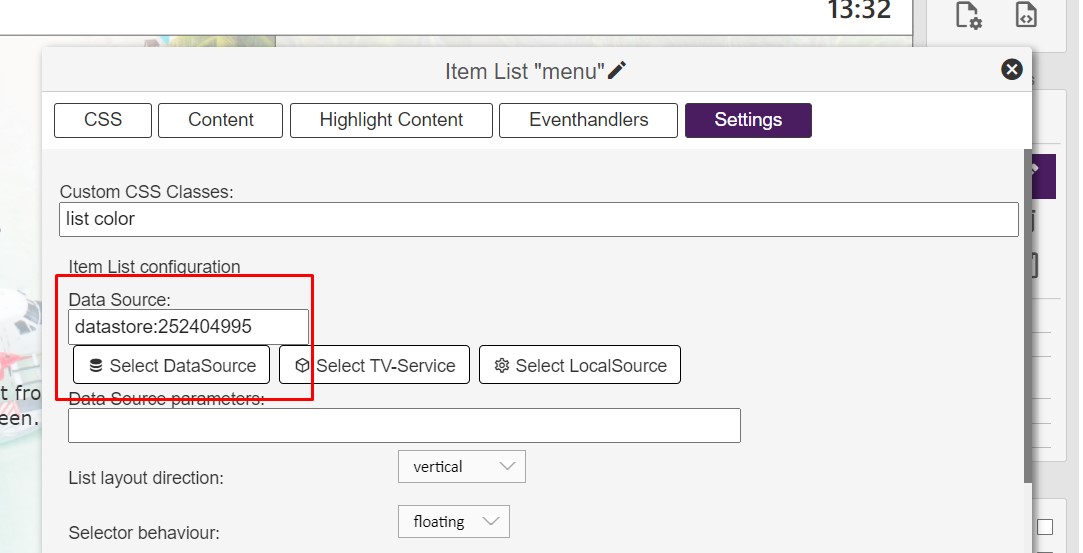
Data sources are created and adjusted in the Data Source Editor:

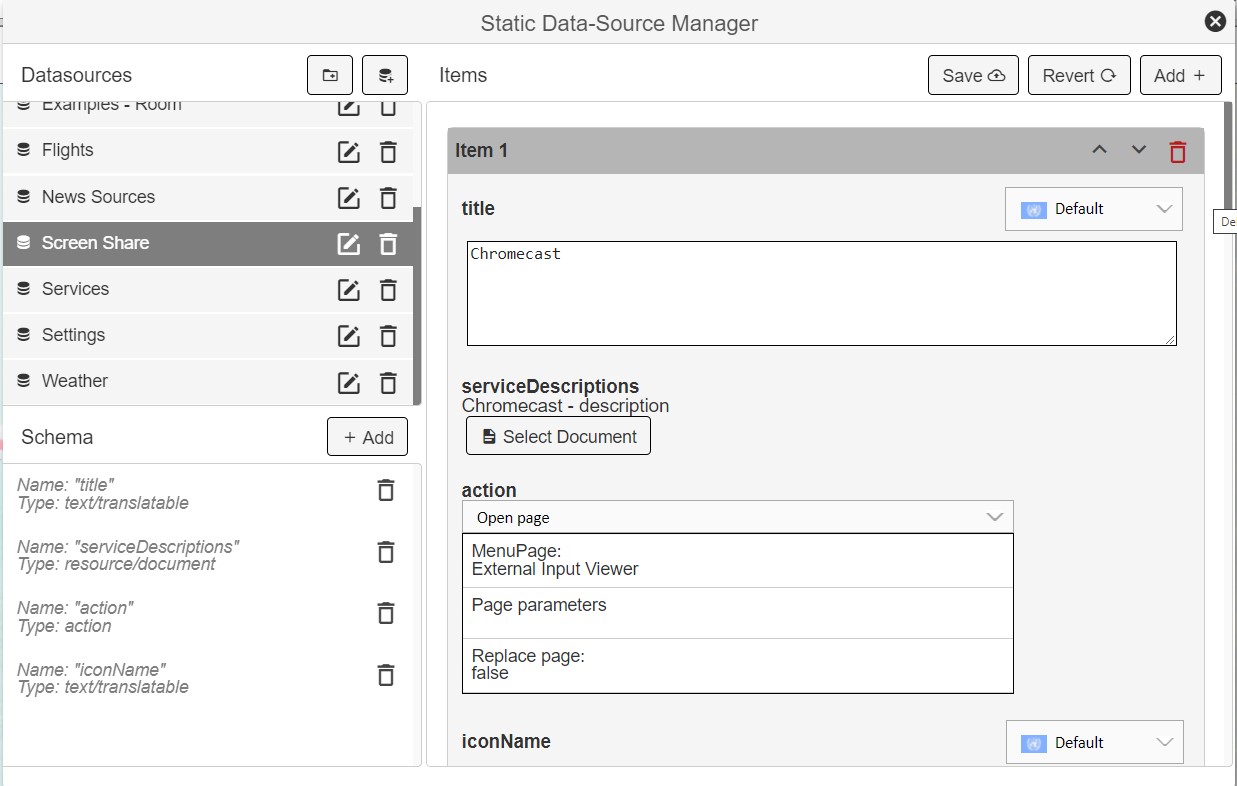
The data source defines:
- The title of each item in the list
- The link to a service description/sub menu helptext. The service descriptions are written as "Documents". When writing a new document containing a service description, use Heading 1 and Paragraph formatting. Avoid all other text formatting in the document.
- The action that should be performed when a user is selecting the item.
- The name of the icon that should shown when this item is highlighted. The icons to select from can be found at https://materialdesignicons.com/
Adjust the list of items, descriptions, actions and icons to fit your need. Add new or remove unwanted.
¶ Netflix version - submenu with images instead of material icons
As the Netflix logo does not exist as a material icon, some adjustments are done to the "Your Content" submenu in the Netflix editon of the Thor theme. Here the highlight images are not material icons, but rather regular images in jpg/png format. This means that the submenu and the corresponding data source has a slighly different build-up than the other sub menus:
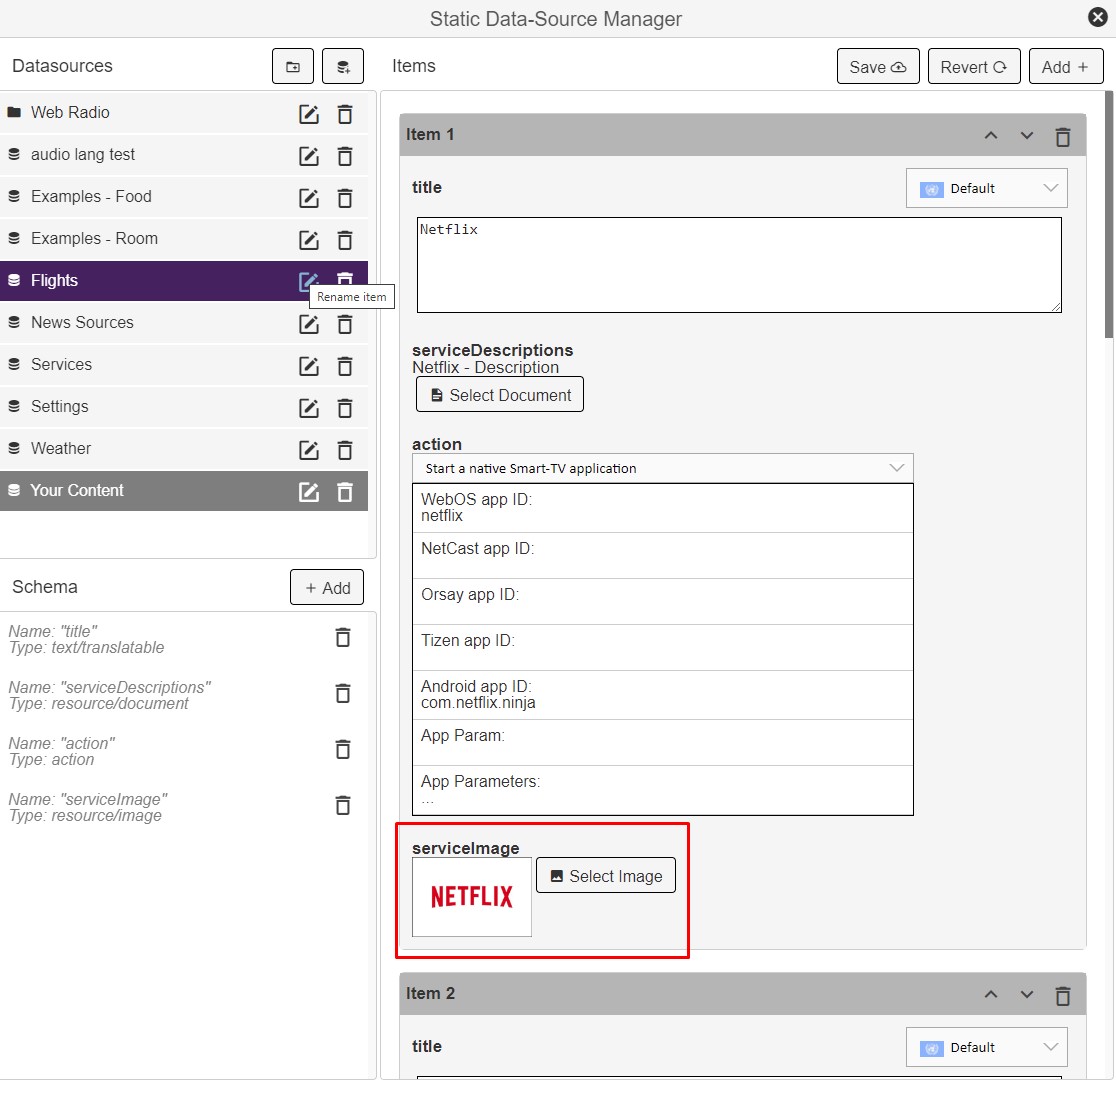
This also means that if you want to add other submenus with use of images instead of material icons, you could use the Your Content submenu/data source as a template.
¶ Define weather locations
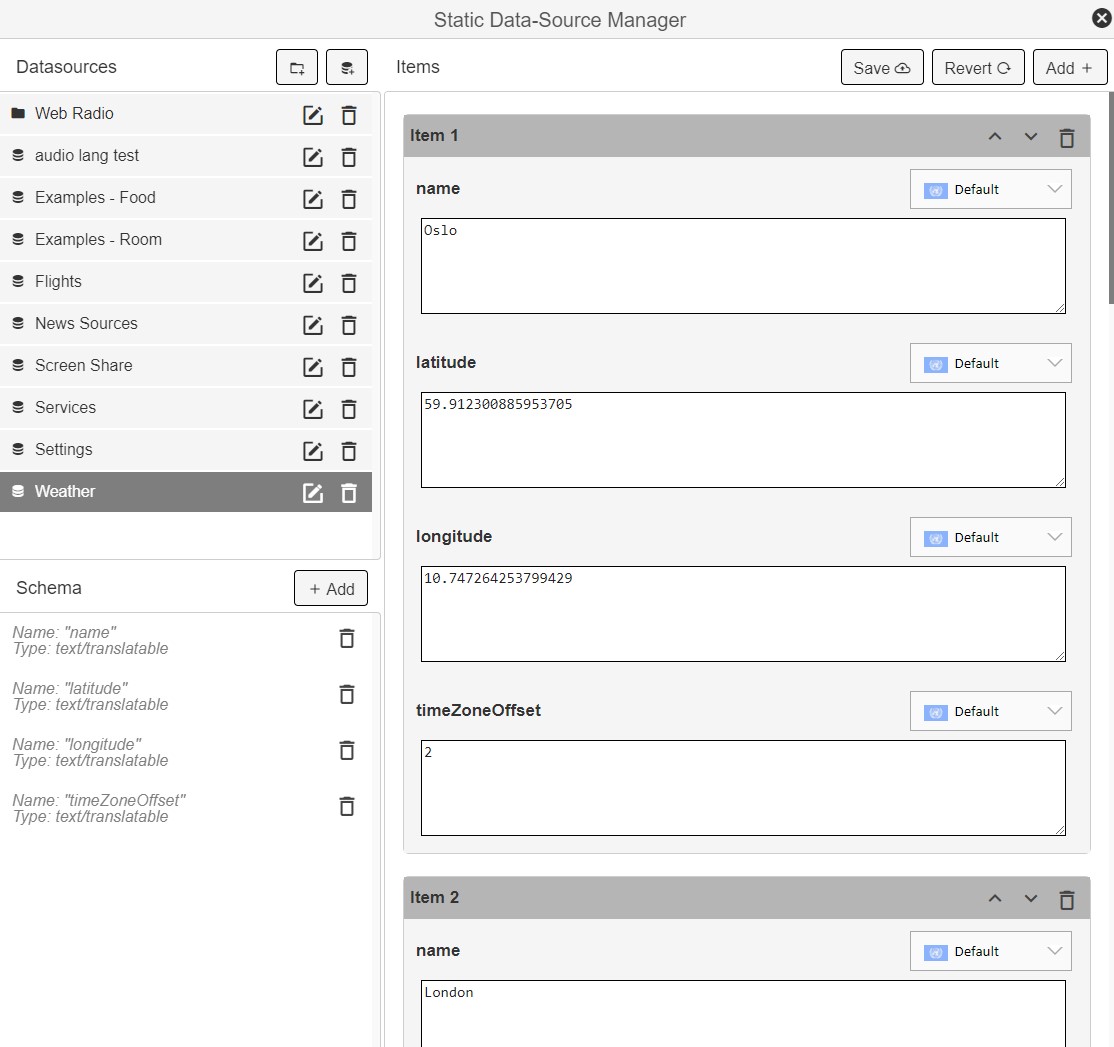
Weather locations are defined inside the data source called Weather. Each item contains the name, the latitude and the longitude of the location. Configure your locations by adding name, latitude, longitude and time offset for the location (compared to UTC time).
¶ Define News Sources
The News sources are defined inside the data source called News Sources. Each item contains the title, the url from which to fetch the data and also the number of news to show.

¶ Set up the Web Radio service
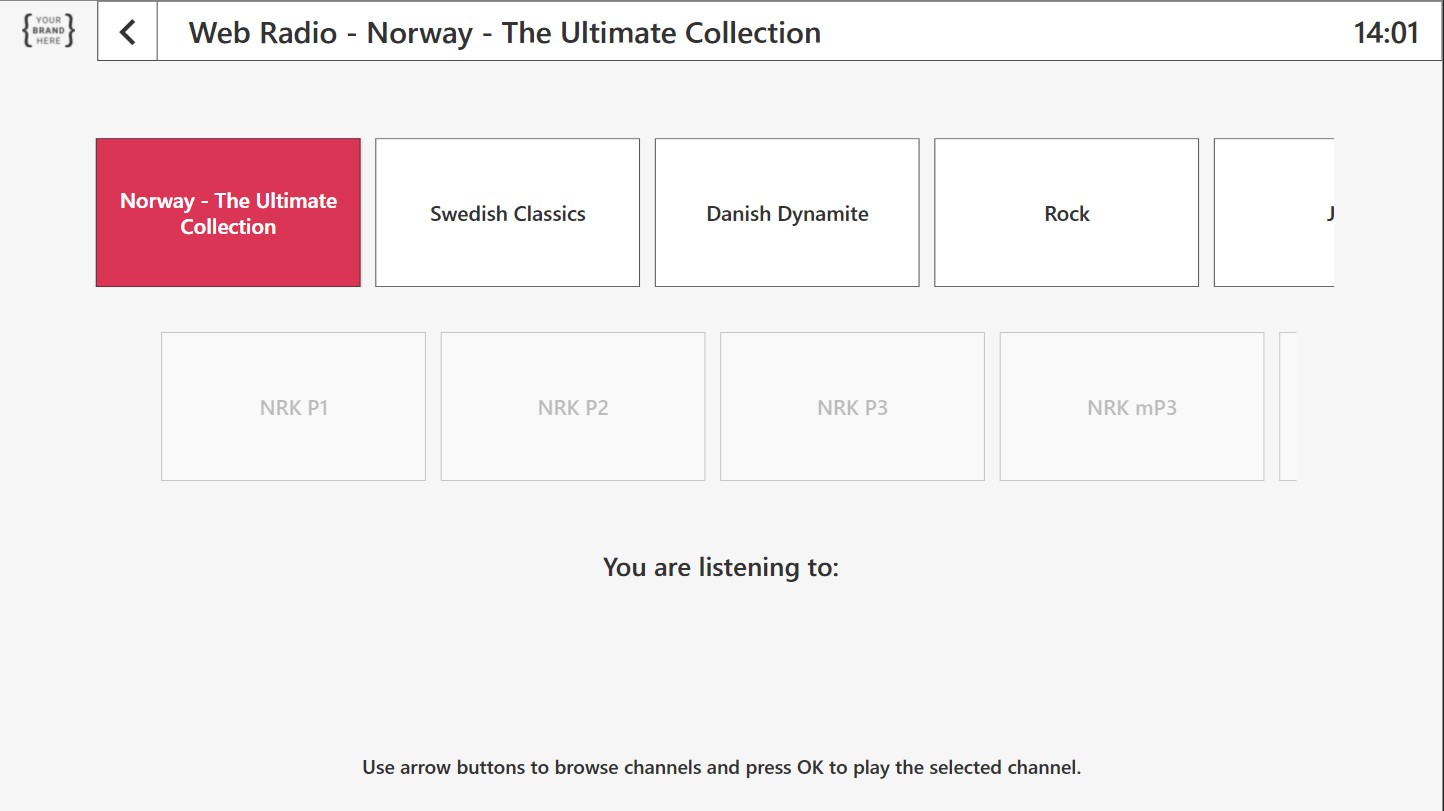
The Web Radio service is configured by a set of data sources.
First, set up one data source for each category you want:
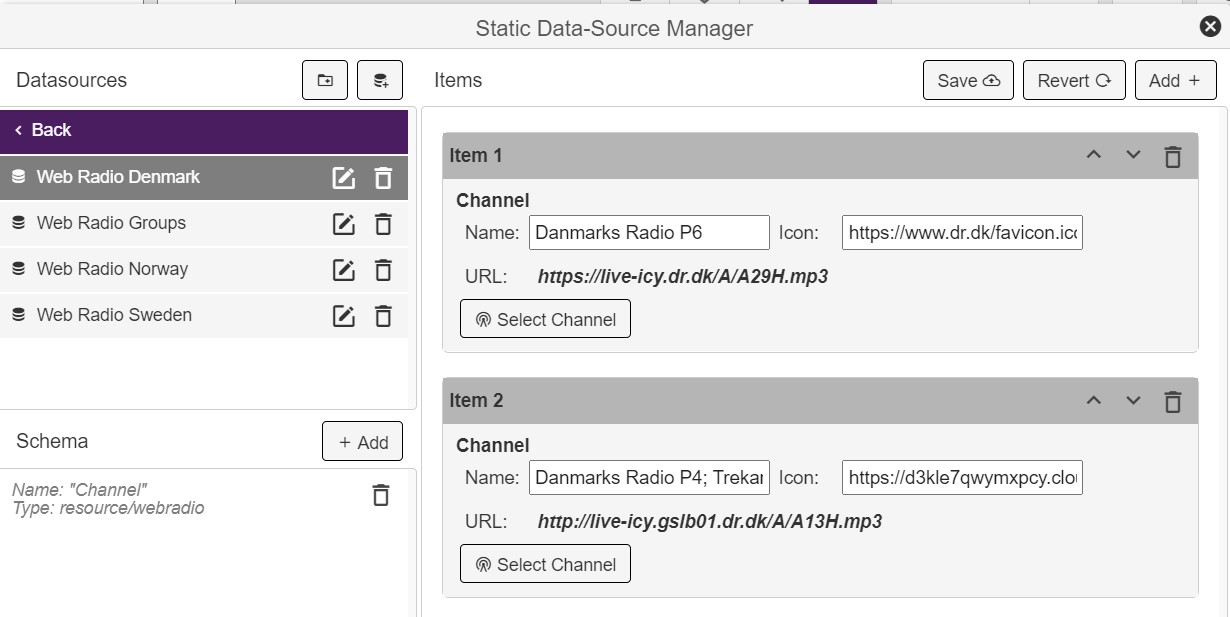
Default in Thor there are set up 3 category pages: Web Radio Denmark, Web Radio Norway and Web Radio Sweden. These can be renamed and used again.
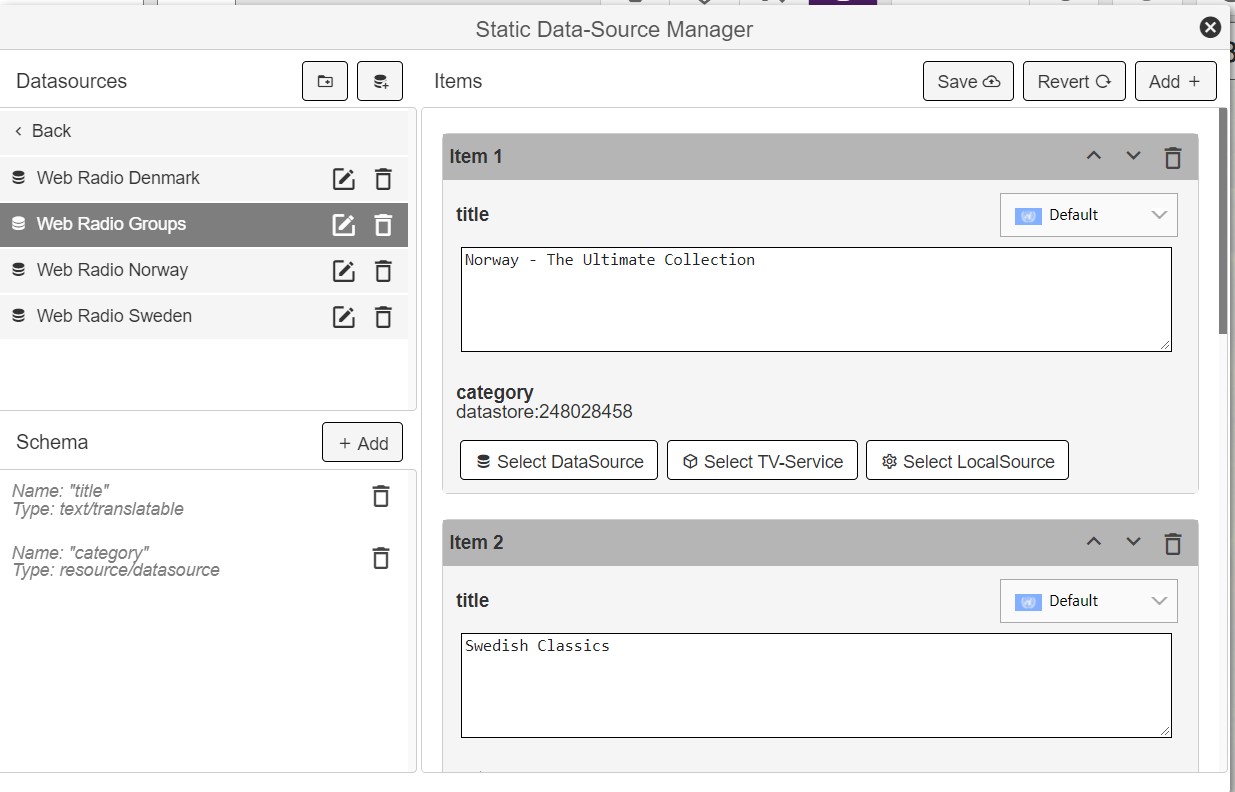
When all category data sources are set up, there are a data source called Web Radio Groups that links all the categories together. Each item in this data source contains a title and a link to the corresponding category/data source:
¶ Set up Flight locations
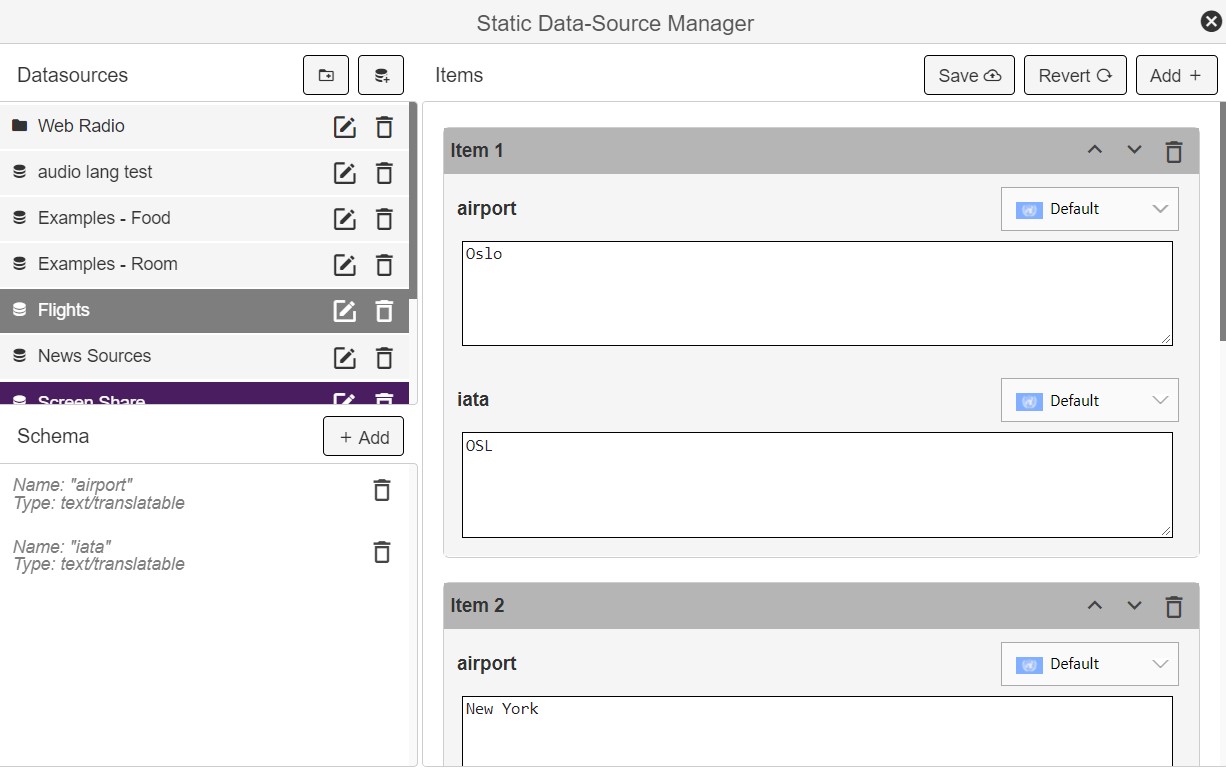
Flight locations are defined in the data source called Flights. Each item contains the name of the airport and the iata code. Simply set up the items that fit your need:
¶ Set up a new info page
¶ Make a copy of the preferred template
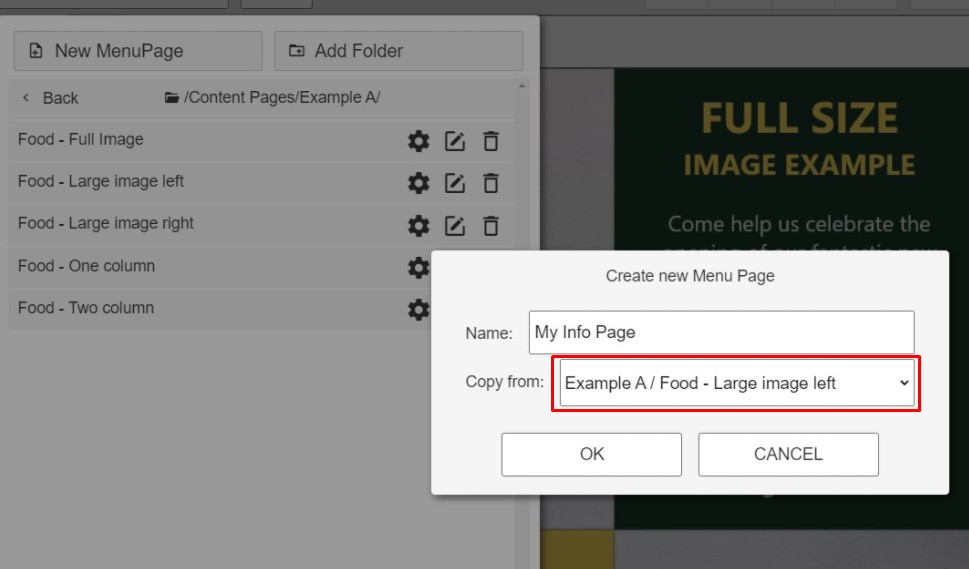
To set up a new info page, start by make a copy of the template that has the layout you want. The Thor theme contains several different info page templates.
¶ Add a new document
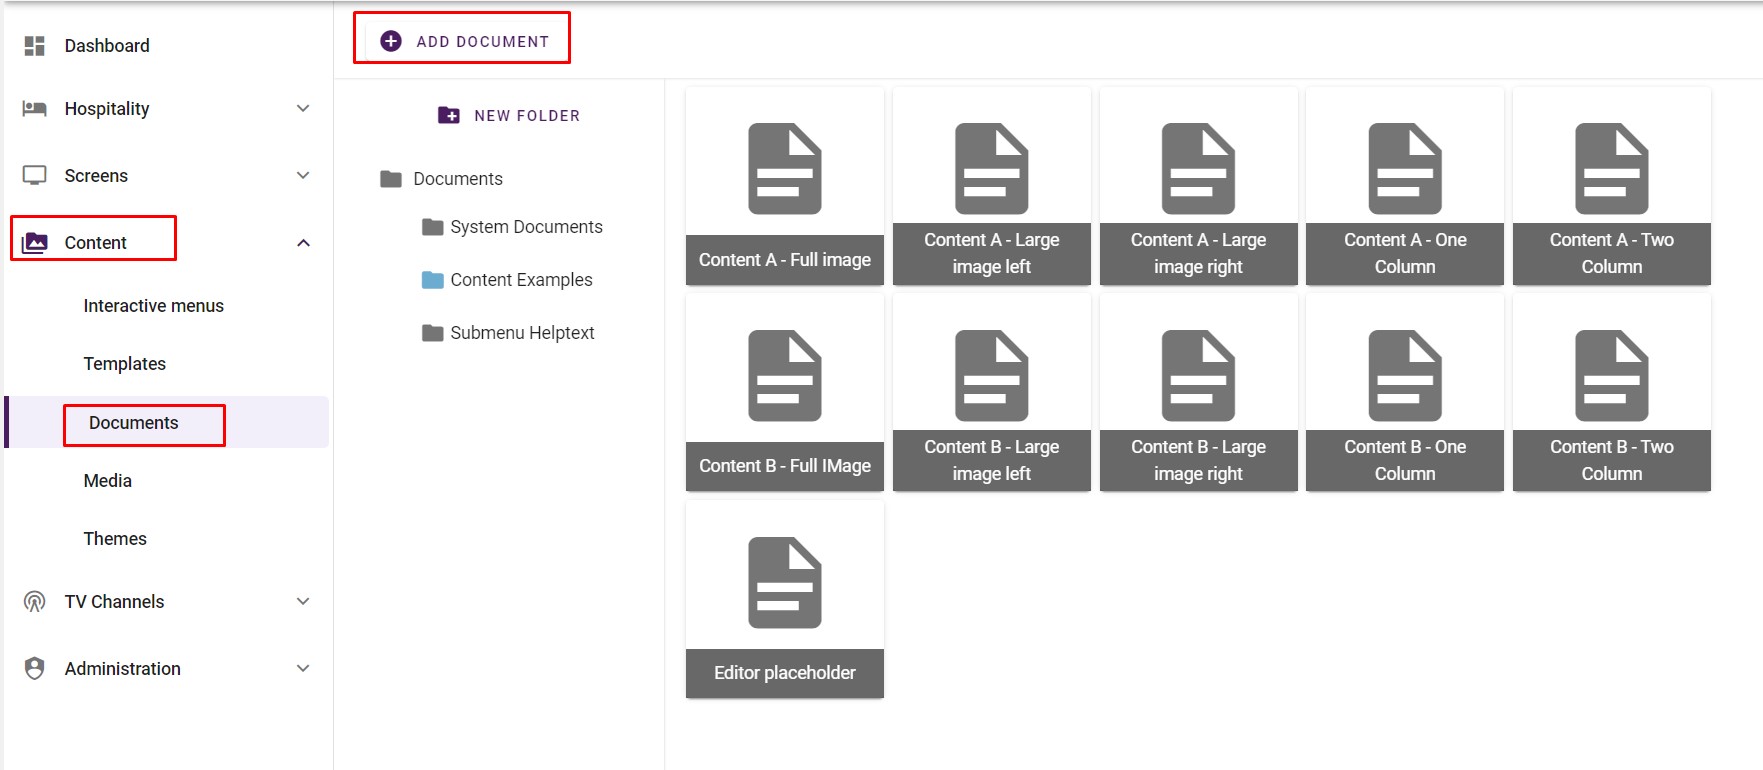
Info pages in the Thor themes are based on Documents. To add a new document, click "Add document" in the Documents section under Content:
Inside the document, add your text and images. Use Heading 1, Heading 2 and Paragraph for formatting. The text will then get the correct font, size and color inside the menu.
¶ Link the new document
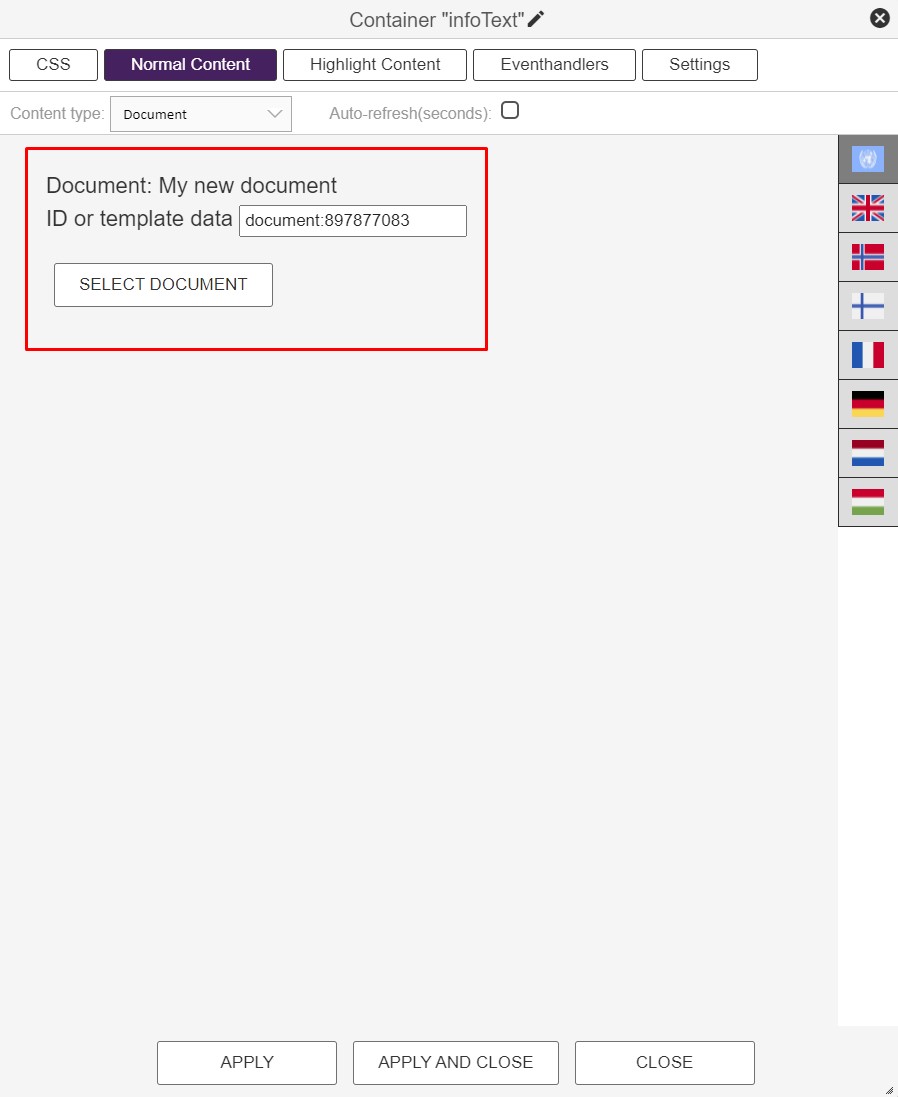
To link the new document on the new info page, click the text item on the new info page. In the Normal Content pane, link to to correct document. If you want to have different languages on your new info page, link separate documents, using the flags in the right.

¶ Add the new heading
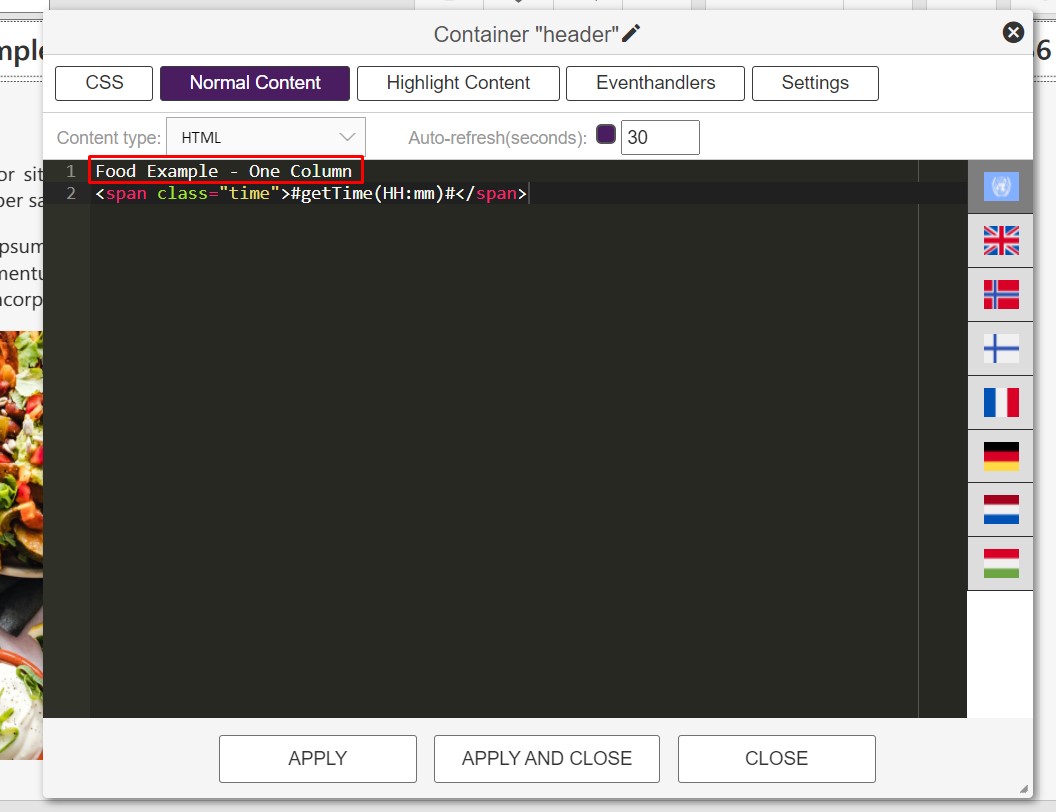
To configure a new heading on your info page, click the header element and adjust the text in the Normal Content page:
¶ Add the new image
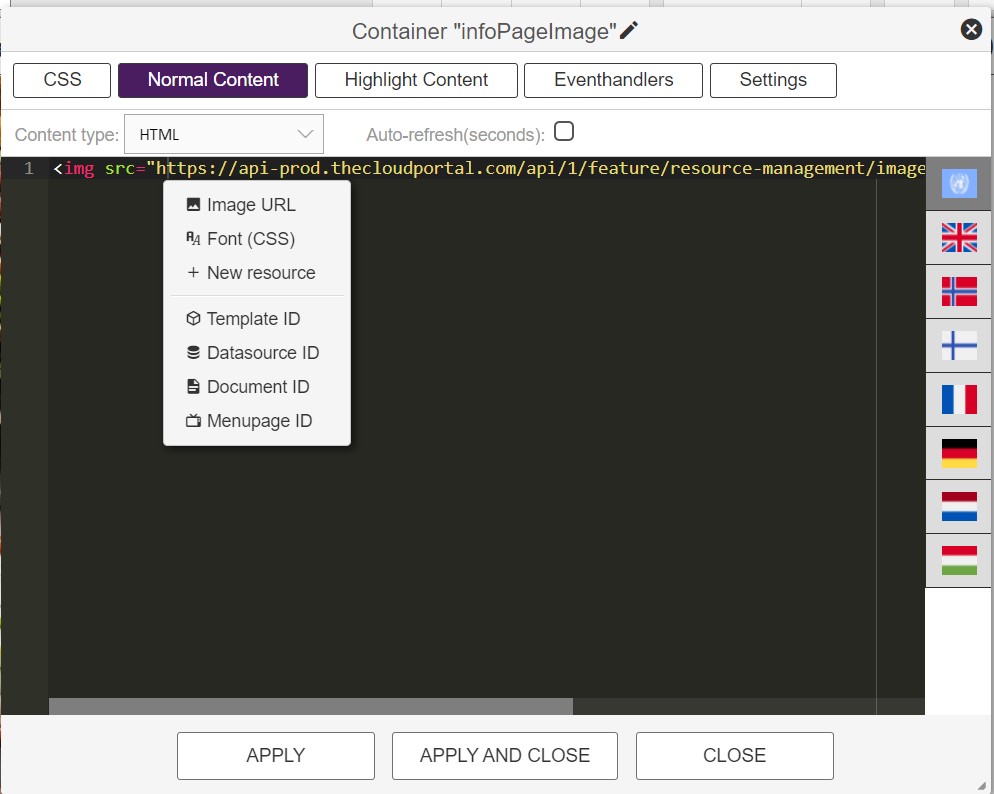
If you have chosen one of the pages that include an image either on the left or on the right, or a full image page, click the image element on the page to change it. Inside the Normal Content pane, set the correct url by right clicking and choose your image:
¶ Configure the Power-On slides
The Thor theme contains a page showing power-on slides.
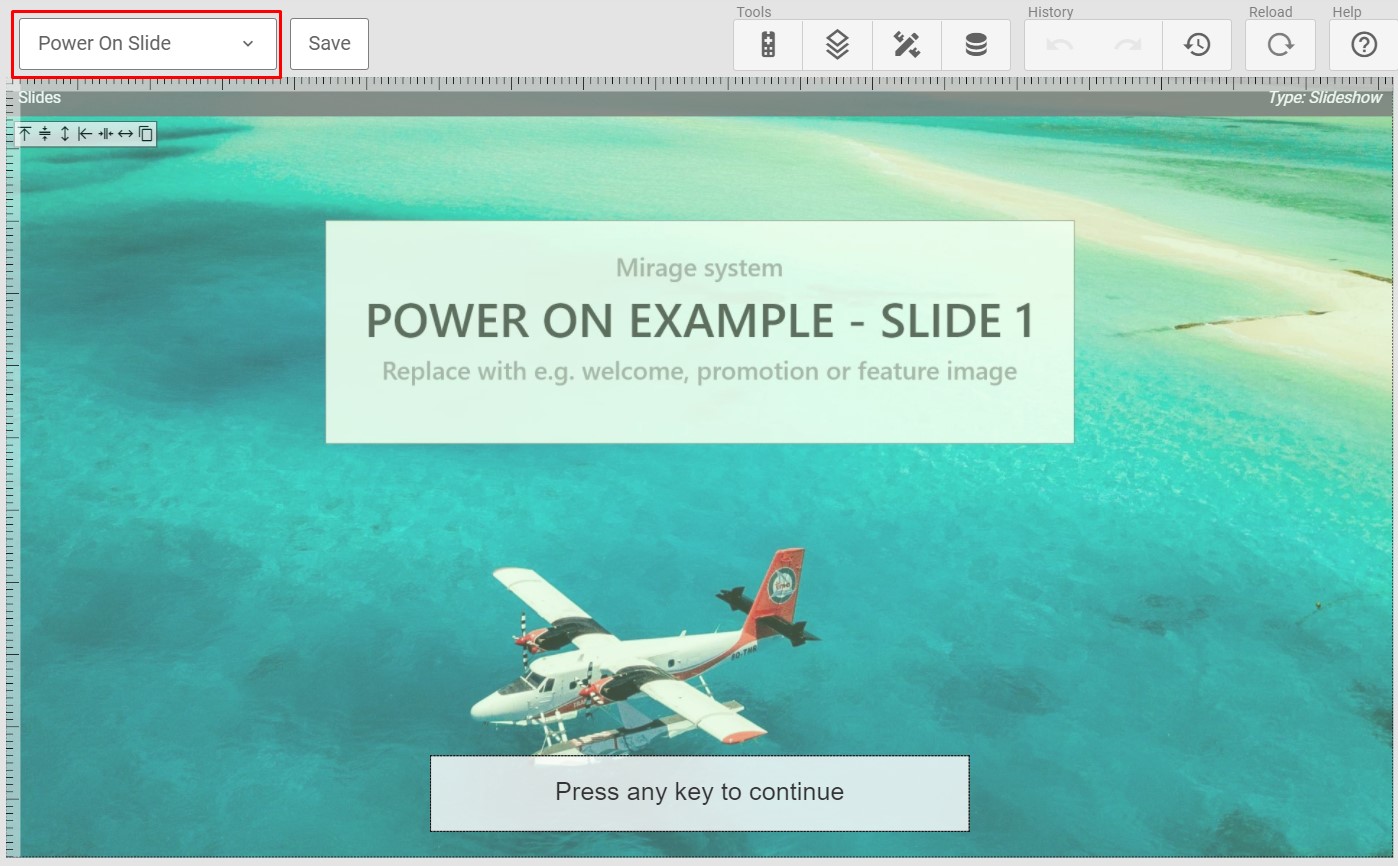
To change the images in the slideshow, click on the Slides item on the page. In the Playlist pane, the slideshow can be configured.
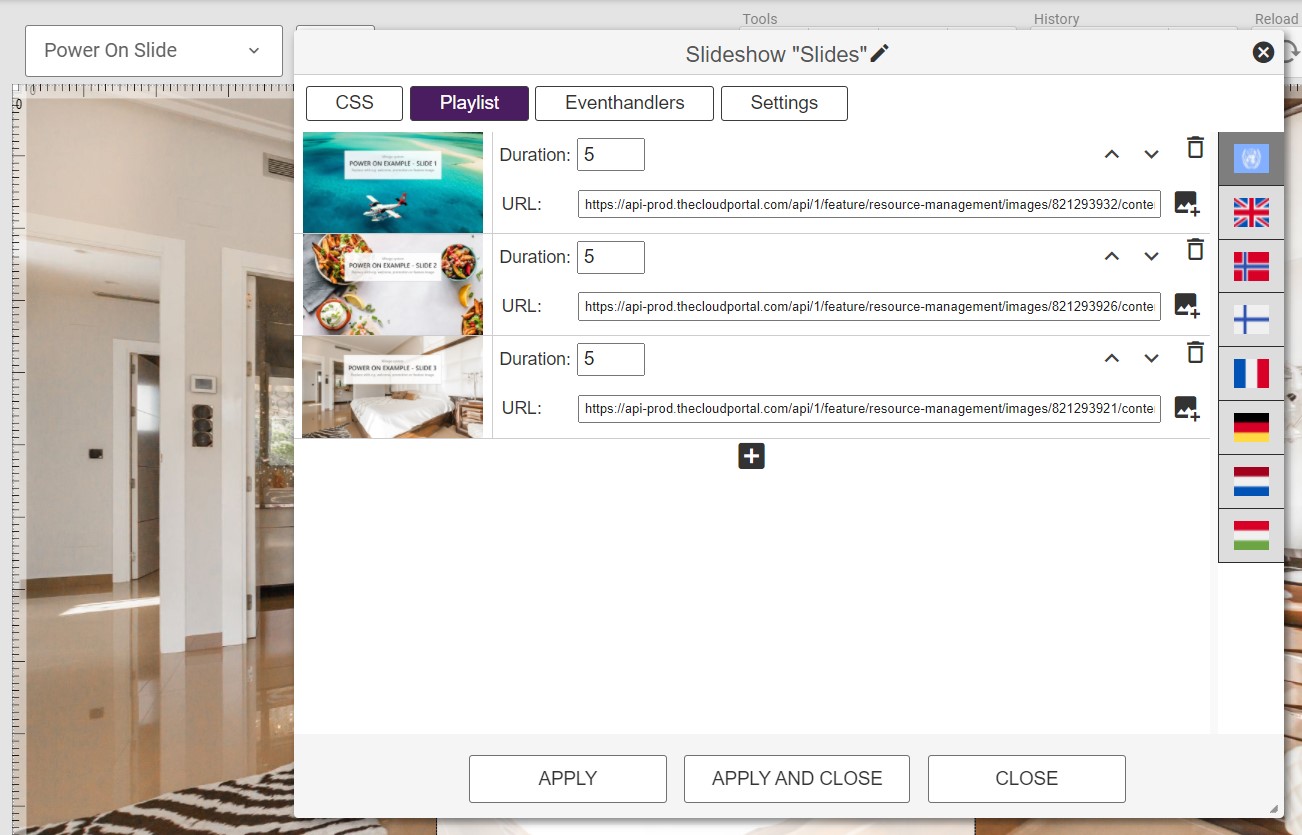
Remember to apply and save your changes.
¶ Set up the Radio Channels page
The Thor theme contains a page for listing radio channels.
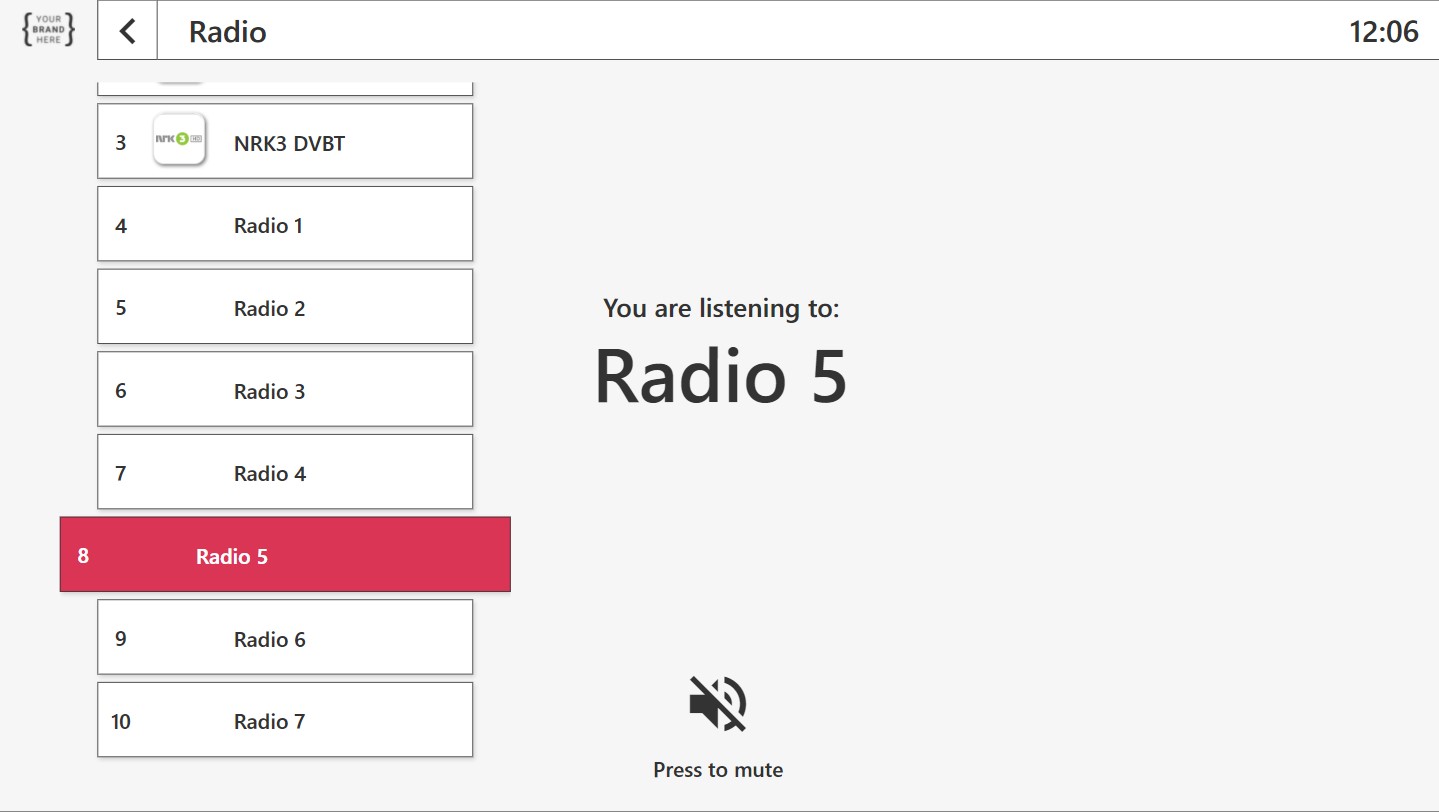
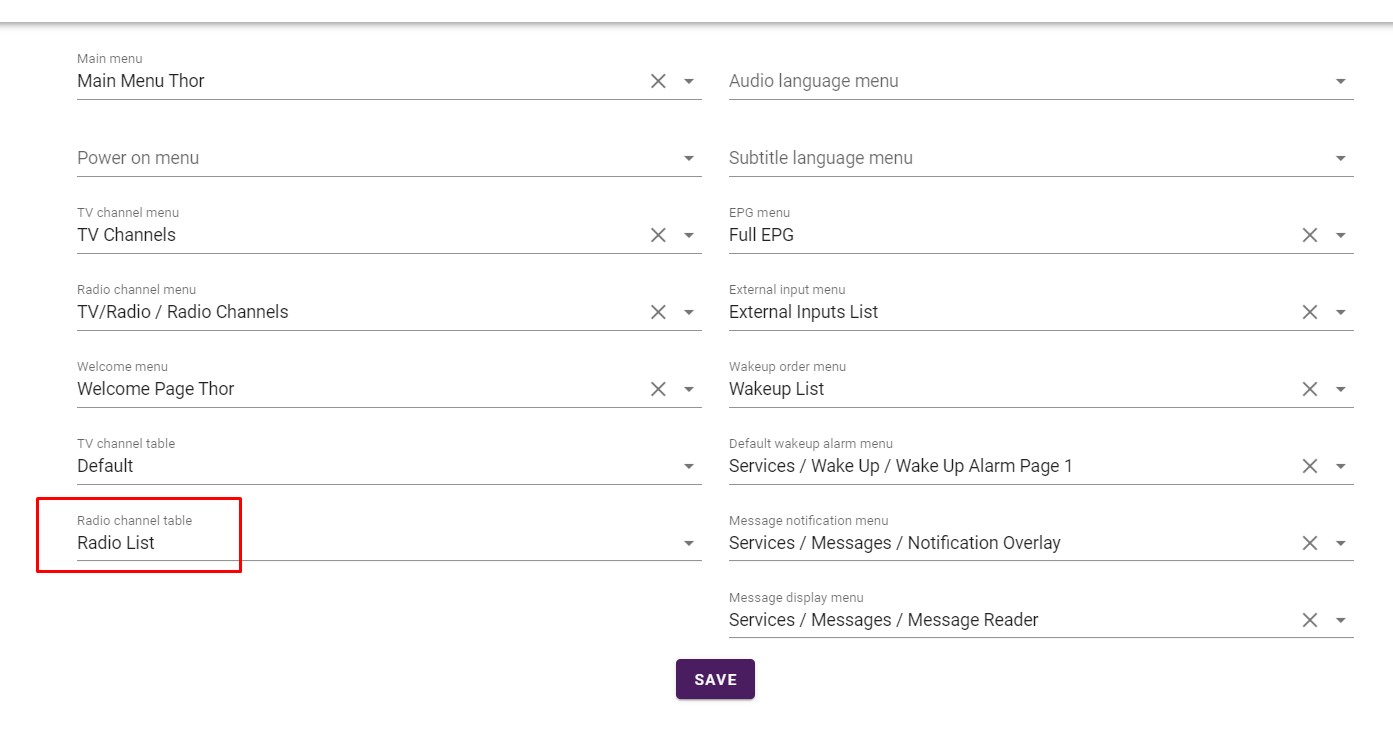
The Radio Channels page is configured to list the channels in the Radio Channel table set up in Screens->Configuration:
Once you have set up a Radio channel table in the configuration, the Radio Channel Page should list these channels.
¶ Change the brand logos
The Thor theme has 2 different places where brand logos are located: On the main page and in the upper left corner of submenu/service/info pages.


¶ Change the main menu logo
The main menu logo is changed by first clicking the logo item on the main menu page. Then, in the CSS pane, right-click on the url and insert the correct logo.

Note: The default size of the logo element is 280x110 pixels.
¶ Change the logo in the upper left corner
There is a logo placed on most pages in the upper left corner. This can be replaced in the "globalStyle" style sheet.
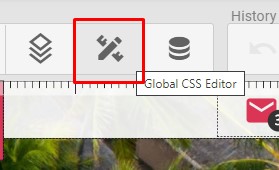
Open the Global CSS Manager:
Replace the image by right-clicking on the url in the .logo selector:

Note: The default size of the logo element is 130x80 pixels.
¶ Configure the Wake Up service
¶ Set the correct video source
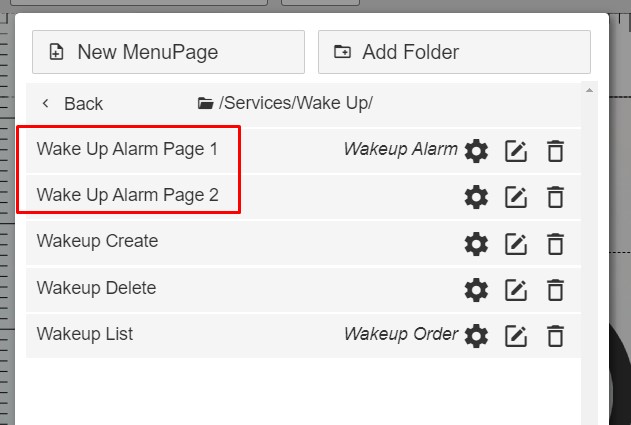
You need to set up the correct videosource for the wake up alarm pages. The wake up alarm is a 2 step process that consists of the pages "Wake Up Alarm Page 1" and "Wake Up Alarm Page 2":
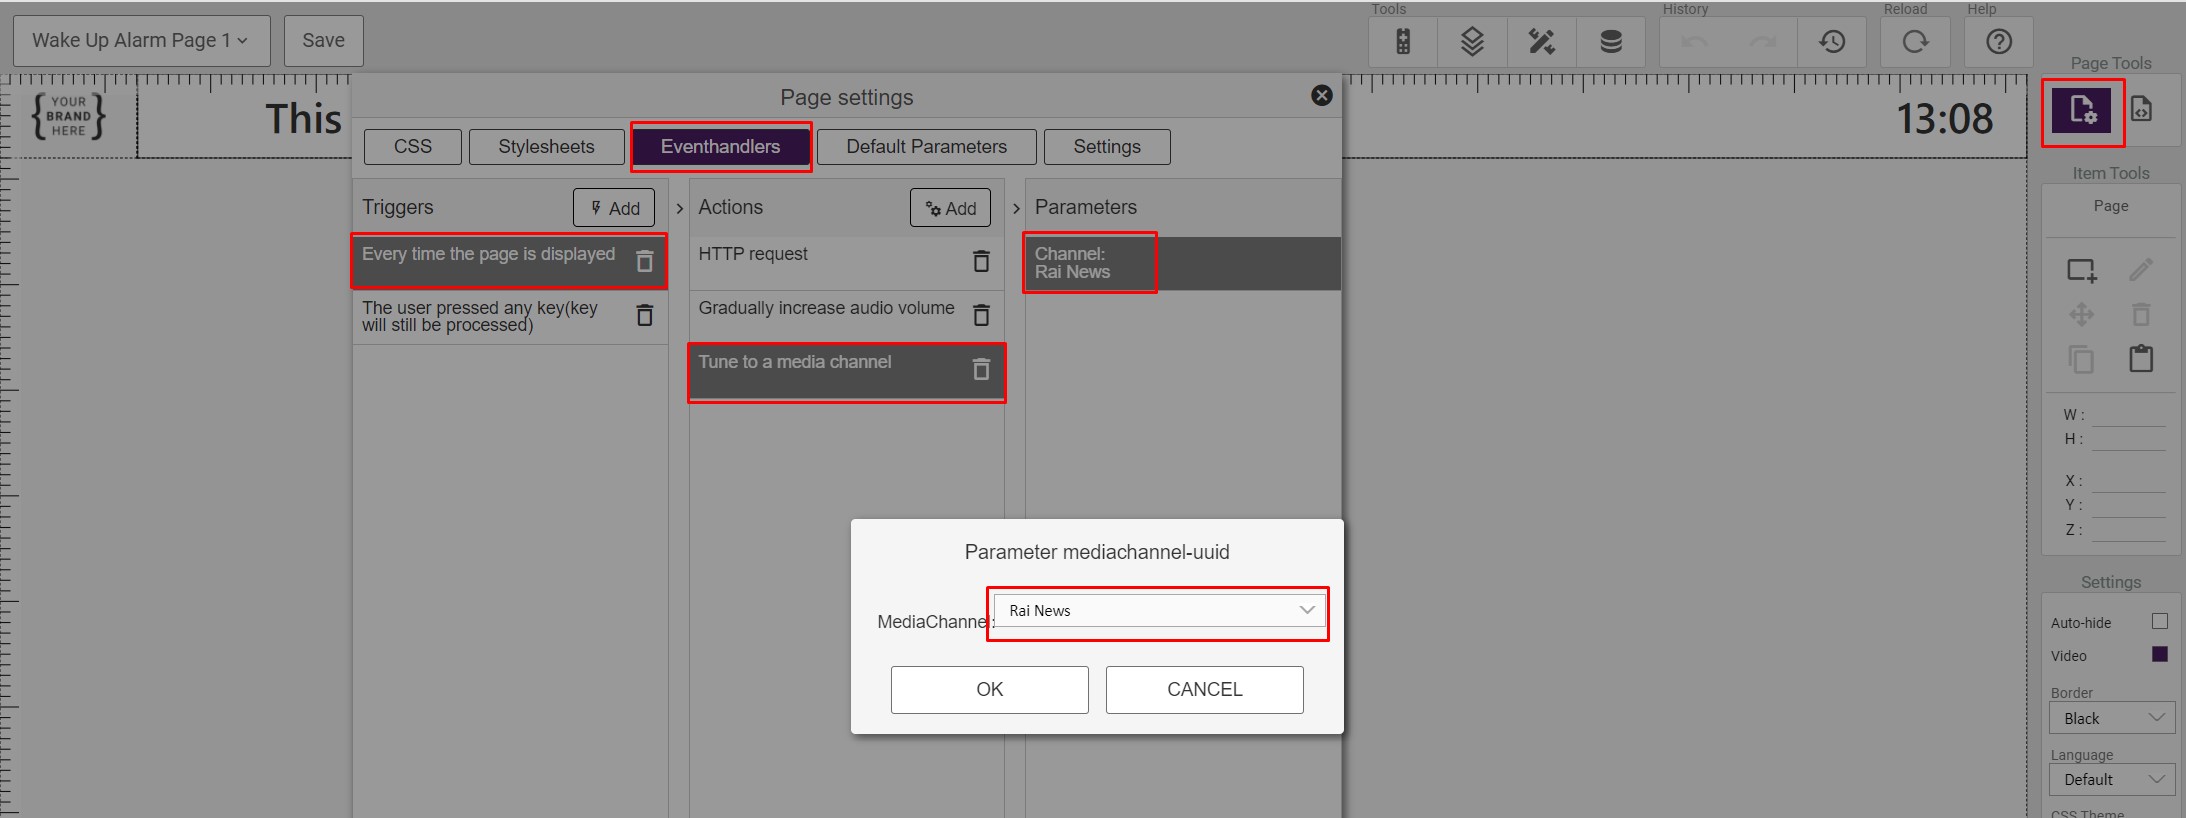
On Wake Up Alarm Page 1 you open the Page Settings, enter the Eventhandlers pane and change the media channel as shown below:
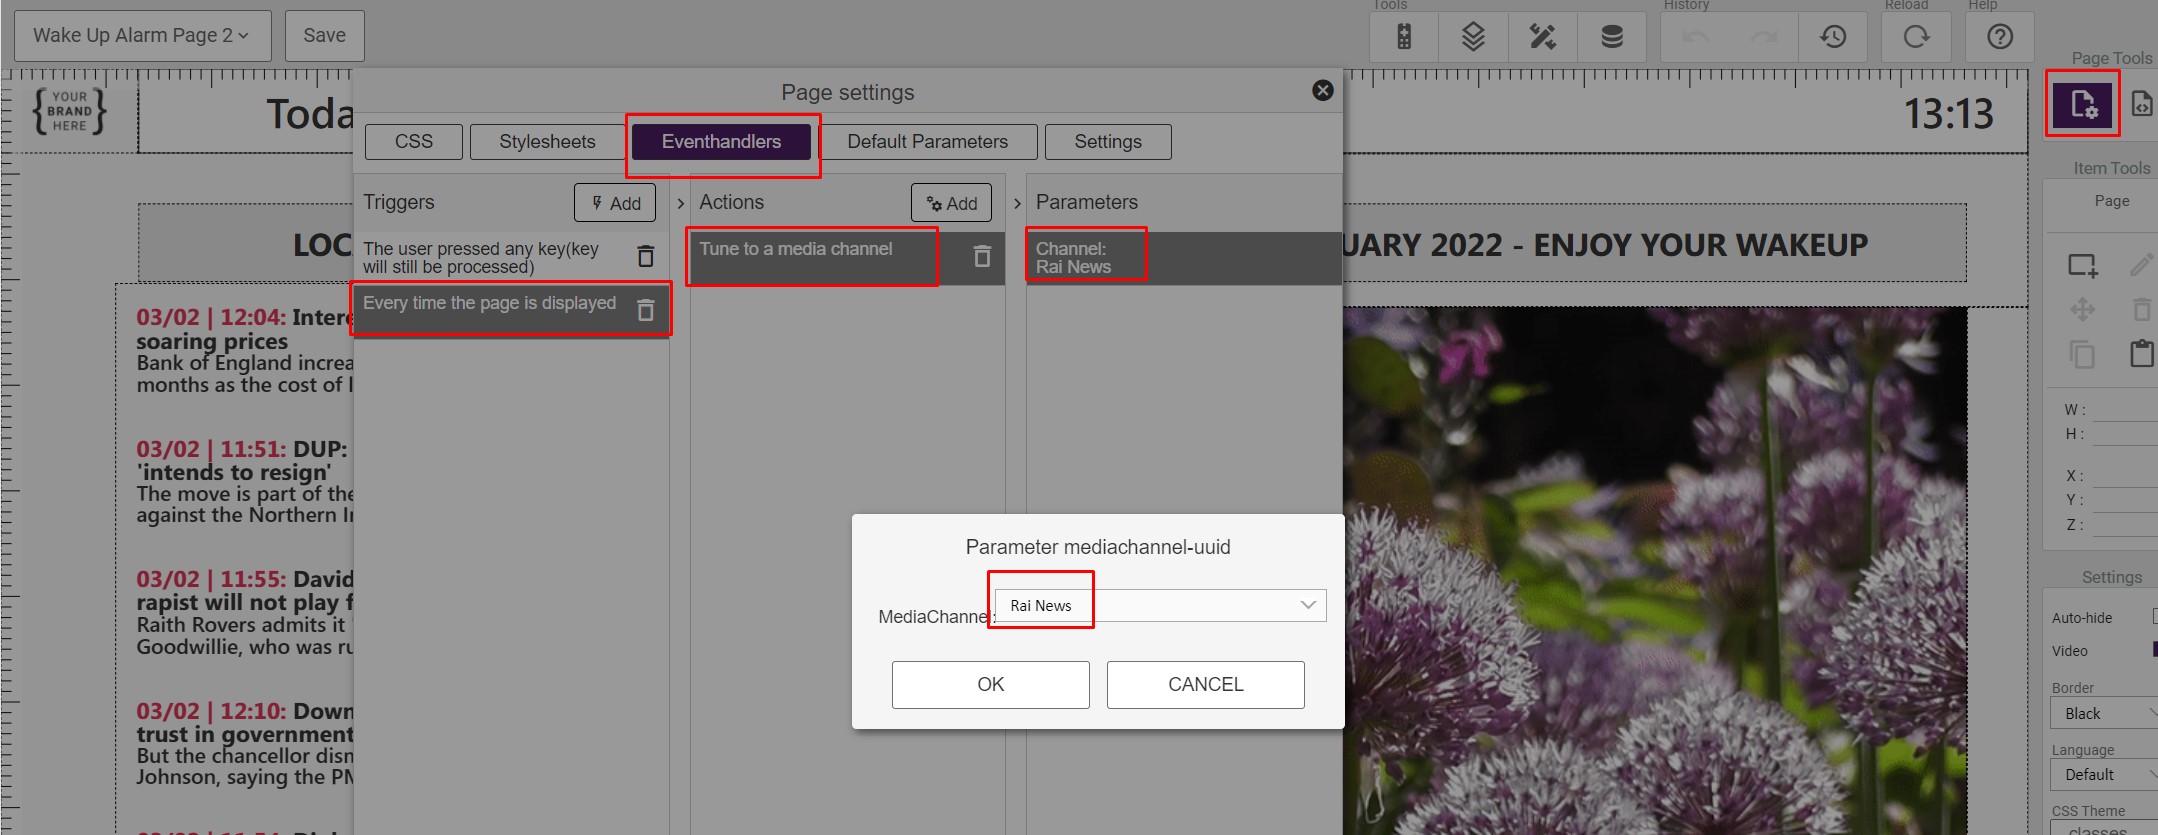
On Wake Up Alarm Page 2 you to the same procedure:
¶ Set up the correct RSS feed
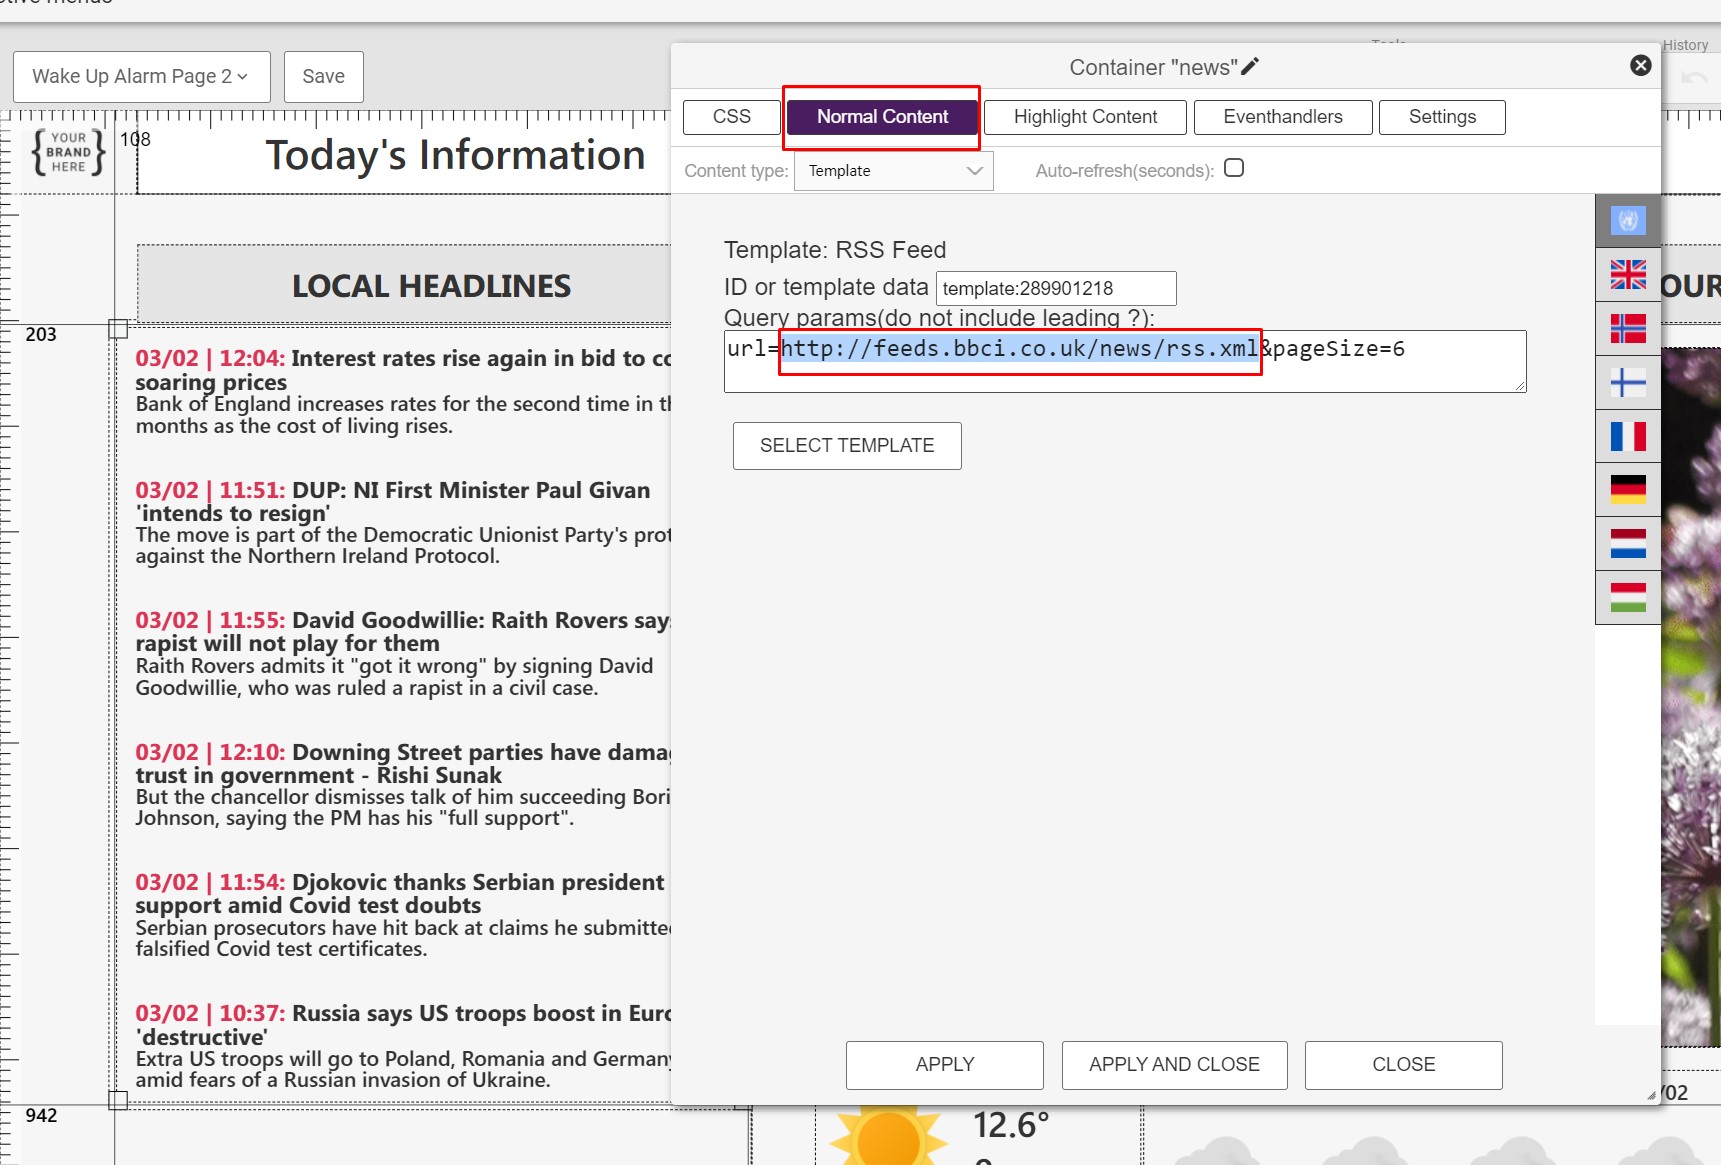
On Wake Up Alarm Page 2, click the RSS element, select the Eventhandlers pane and change the url as shown below:
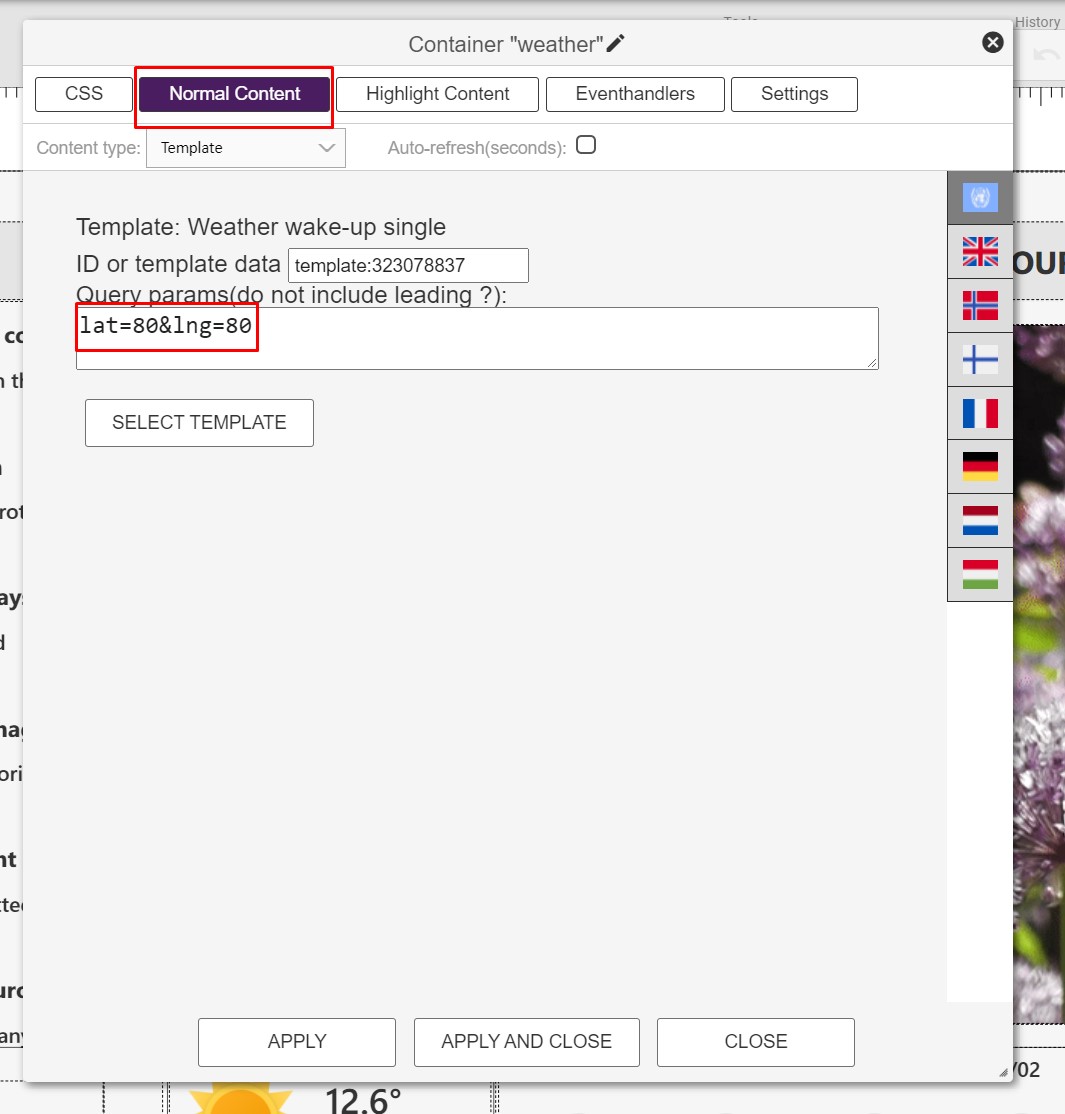
¶ Set up the correct weather location
There are 2 weather elements on Wake Up Alarm Page 2. One for the weather today and one for the coming days.
To set the correct location, click each of the elements, and change the latitude and longitude in the Normal Content pane on both elements:
¶ Remove animation on main menu
The main menu page has an animation effect when changing between the different tiles. This might not look good on all TV model.
To remove it, simply remove the following line from the mainMenuStyle style sheet:

You could also try to change the timing of the animation by adjusting the number of milliseconds.